
1:16
Completed: Morgan Three Wheeler
05 - January - 2014 - 14:55
In the last post, I mentioned converting this model from an air-cooled engine to a water-cooled one.
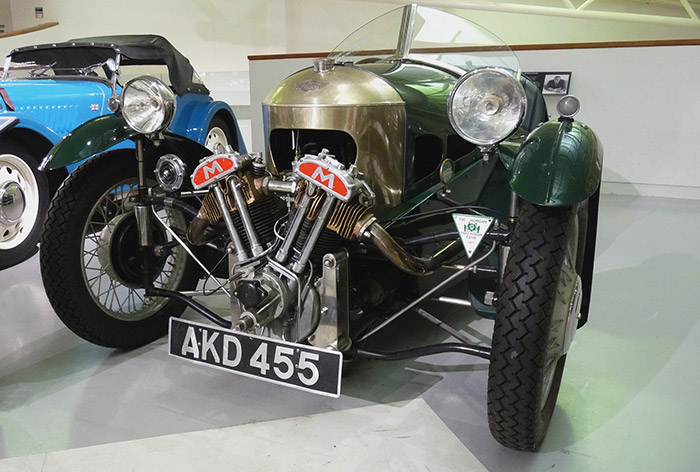
When I began the project, I did my usual reference hunting on the internet. I pulled together a couple dozen images, made myself a printout of a collection of those and got to work. After a little while, I started to find large discrepancies between the model kit and my reference images. What I discovered was that there are a few different engines that all seemed to be used around the same time (mid 1930's). Of those, two were made by Matchless, one of which was air cooled. The differentiating features of the air-cooled engine are the fins on the cylinders and the smaller opening on the cowl behind the engine.
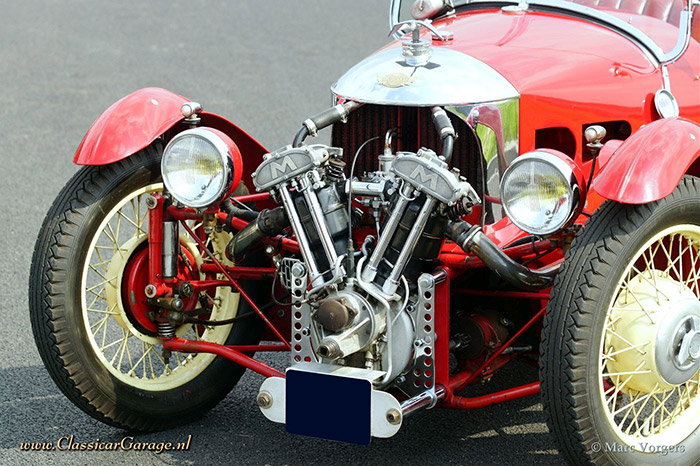
The other Matchless engine was water cooled, which can be spotted by the smooth cylinders, larger cowl opening and pipes going from the tops of the cylinders to the radiator inside the cowl.
The kit had an air-cooled engine, but, like many other parts on this kit, it wasn't a very good rendition. The detail was largely obscured by extra flash and poor mold alignment, even after all of the chrome was stripped off. Aside from that, I really just liked the way that the water cooled engine looked better. So, I decided to make a replacement engine.
I'd been toying with the idea of making model parts in the computer and then having them 3d printed, and this was the perfect opportunity to try it out. This presented a good test case for a number of reasons. First off, this engine is not very big, so many of the details on the engine are on the tiny side of what 3d printers can handle. This meant that I could see how well the details are reproduced when it gets down to the limits of the printers. Also, this let me get the same part printed in two different materials, to see if the higher-detail material was worth the extra cost (spoiler: it was).
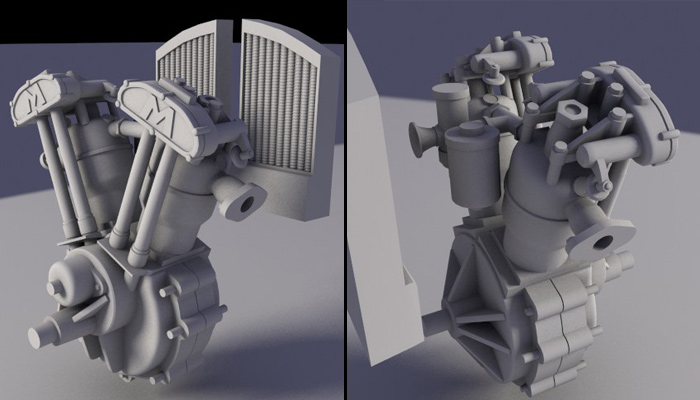
So that said, I fired up trusty ol 3dsmax, and modeled up an engine that was sized to fit in place of the kit engine. This took a bit of quality time with the assembled kit engine, some calipers, and lots of careful measuring. What you see below is what I came up with and sent to Shapeways for printing. I sent them two files, one for the engine and one for the radiator.
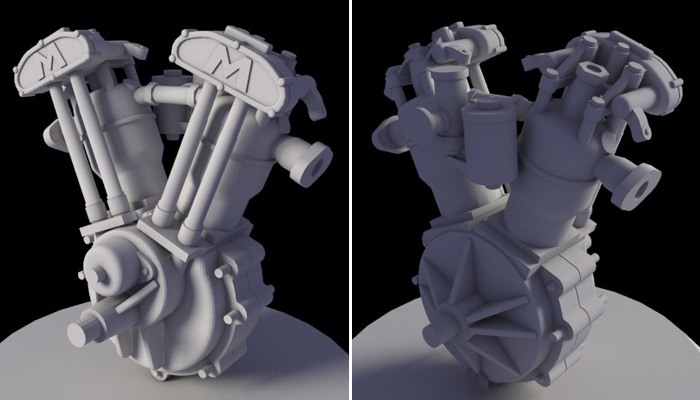
The radiator worked just fine and moved from prep to printing pretty quickly. The engine, on the other hand, got kicked back to me for various reasons. Mostly, it was because of various areas being too thin. Instead of them just trying to print whatever you send them (which is what I thought they would do), they check the file first and let you know if there are any areas that could cause trouble. After a few go-arounds with that process I ended up with the engine model you see below. It has many of the thin bits thickened up, and the valve spring cap things removed entirely.
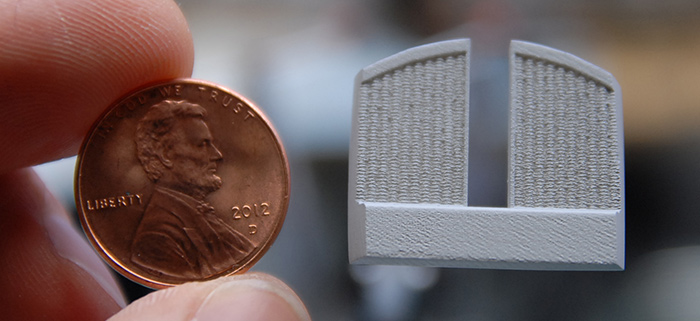
So, while the engine was being printed, the new radiator arrived! What you see below is my first 3d printed model part, cleaned and primed, next to a penny for scale.
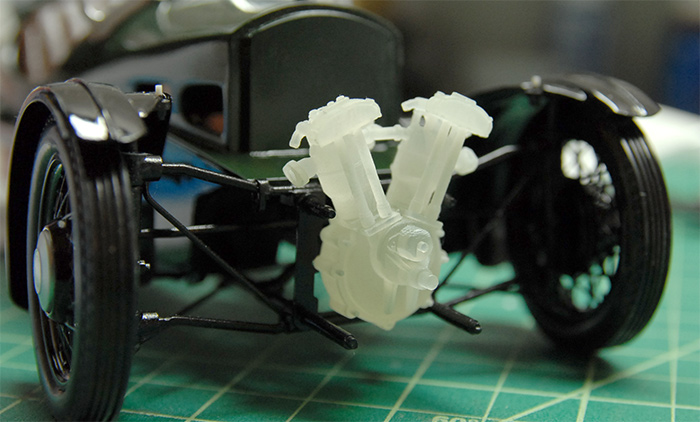
A few weeks later, the 3d printed engine arrived and below you can see my first test fitting, as well as what the raw printed material looks like.
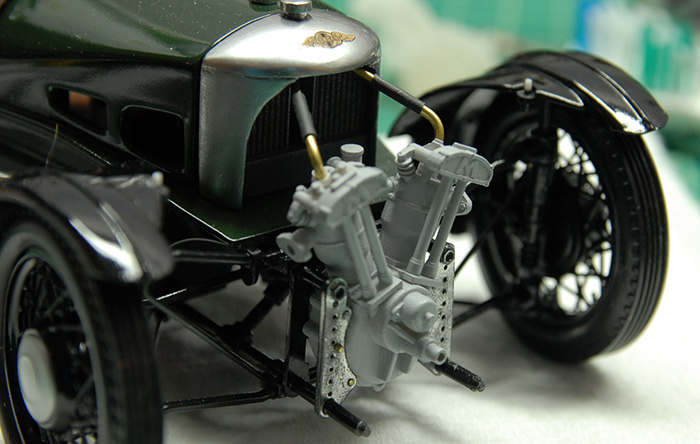
While the initial test fitting went pretty well, later fittings caused a little bit more trouble, as there were quite a few things to get aligned all at once. In the end, I ended up replacing some of the pins that were printed with the engine (the ones that go through the chrome plates) with small brass rod, for durability and so that I could reposition them slightly. Below you can see the final fitting, with radiator piping, made of brass rod and heat-shrink tubing, in place.
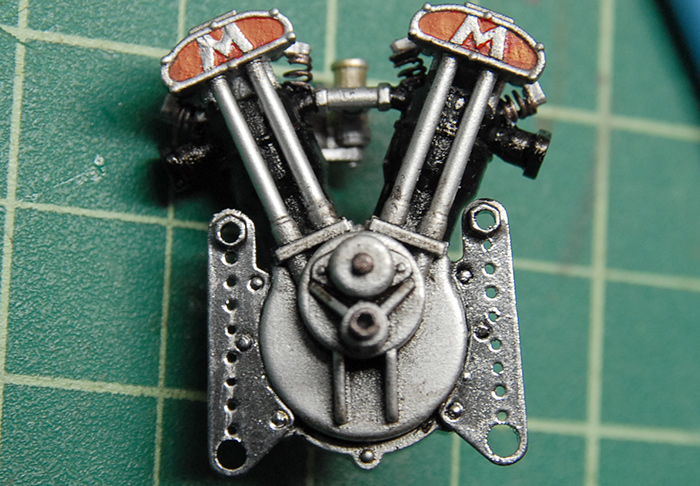
Once I was sure everything would fit, it was time for paint. Below you can see the painted engine, with some valve springs made from wound wire and the front frame plates attached.
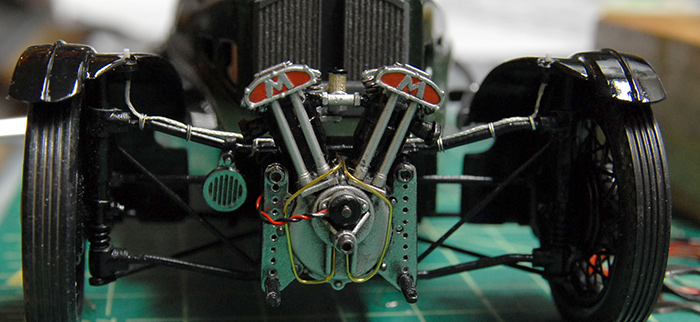
And finally, the finished engine, in place, along with some plumbing (although the radiator pipes are not glued on in this photo), ignition wiring and some wiring to where the headlights will go.
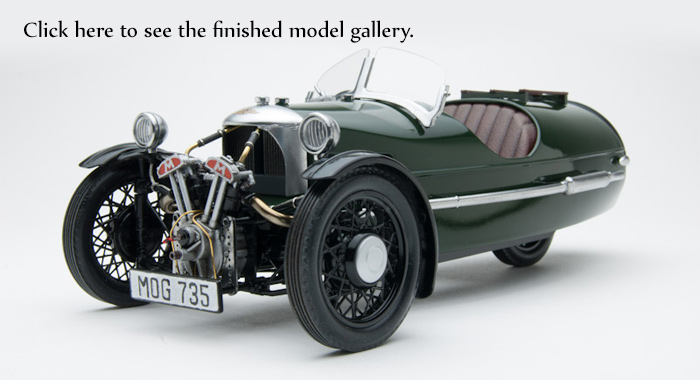
Overall, this was an informative project, and a good test for the 3d printing. Click on the image below to go to the galley of photos of the finished model:
Next up for me is some practice with car paint finishes.
I've also got something bigger in the works, which I'll reveal here once it's a bit closer to being ready ;)
Thanks for reading!
When I began the project, I did my usual reference hunting on the internet. I pulled together a couple dozen images, made myself a printout of a collection of those and got to work. After a little while, I started to find large discrepancies between the model kit and my reference images. What I discovered was that there are a few different engines that all seemed to be used around the same time (mid 1930's). Of those, two were made by Matchless, one of which was air cooled. The differentiating features of the air-cooled engine are the fins on the cylinders and the smaller opening on the cowl behind the engine.
The other Matchless engine was water cooled, which can be spotted by the smooth cylinders, larger cowl opening and pipes going from the tops of the cylinders to the radiator inside the cowl.
The kit had an air-cooled engine, but, like many other parts on this kit, it wasn't a very good rendition. The detail was largely obscured by extra flash and poor mold alignment, even after all of the chrome was stripped off. Aside from that, I really just liked the way that the water cooled engine looked better. So, I decided to make a replacement engine.
I'd been toying with the idea of making model parts in the computer and then having them 3d printed, and this was the perfect opportunity to try it out. This presented a good test case for a number of reasons. First off, this engine is not very big, so many of the details on the engine are on the tiny side of what 3d printers can handle. This meant that I could see how well the details are reproduced when it gets down to the limits of the printers. Also, this let me get the same part printed in two different materials, to see if the higher-detail material was worth the extra cost (spoiler: it was).
So that said, I fired up trusty ol 3dsmax, and modeled up an engine that was sized to fit in place of the kit engine. This took a bit of quality time with the assembled kit engine, some calipers, and lots of careful measuring. What you see below is what I came up with and sent to Shapeways for printing. I sent them two files, one for the engine and one for the radiator.
The radiator worked just fine and moved from prep to printing pretty quickly. The engine, on the other hand, got kicked back to me for various reasons. Mostly, it was because of various areas being too thin. Instead of them just trying to print whatever you send them (which is what I thought they would do), they check the file first and let you know if there are any areas that could cause trouble. After a few go-arounds with that process I ended up with the engine model you see below. It has many of the thin bits thickened up, and the valve spring cap things removed entirely.
So, while the engine was being printed, the new radiator arrived! What you see below is my first 3d printed model part, cleaned and primed, next to a penny for scale.
A few weeks later, the 3d printed engine arrived and below you can see my first test fitting, as well as what the raw printed material looks like.
While the initial test fitting went pretty well, later fittings caused a little bit more trouble, as there were quite a few things to get aligned all at once. In the end, I ended up replacing some of the pins that were printed with the engine (the ones that go through the chrome plates) with small brass rod, for durability and so that I could reposition them slightly. Below you can see the final fitting, with radiator piping, made of brass rod and heat-shrink tubing, in place.
Once I was sure everything would fit, it was time for paint. Below you can see the painted engine, with some valve springs made from wound wire and the front frame plates attached.
And finally, the finished engine, in place, along with some plumbing (although the radiator pipes are not glued on in this photo), ignition wiring and some wiring to where the headlights will go.
Overall, this was an informative project, and a good test for the 3d printing. Click on the image below to go to the galley of photos of the finished model:
Next up for me is some practice with car paint finishes.
I've also got something bigger in the works, which I'll reveal here once it's a bit closer to being ready ;)
Thanks for reading!
Beginning the Build: Morgan Three Wheeler
01 - December - 2013 - 14:19
On my continuing quest for a better car paint finish, I've chosen a Morgan Three Wheeler model, from Minicraft, as my next build.
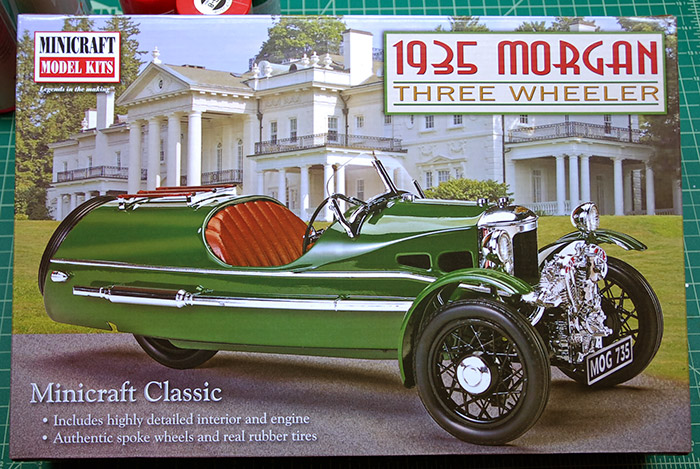
Often, when I pick out kits to build, I do so because of the difficulty and complexity of the kit. I look for well-engineered kits, with lots of extras like photo-etch, metal parts, great decals, etc. This kit, on the other hand, I picked out because I really like the Morgan Three Wheeler. I've seen a few in person and always though that they were just really cool vehicles.
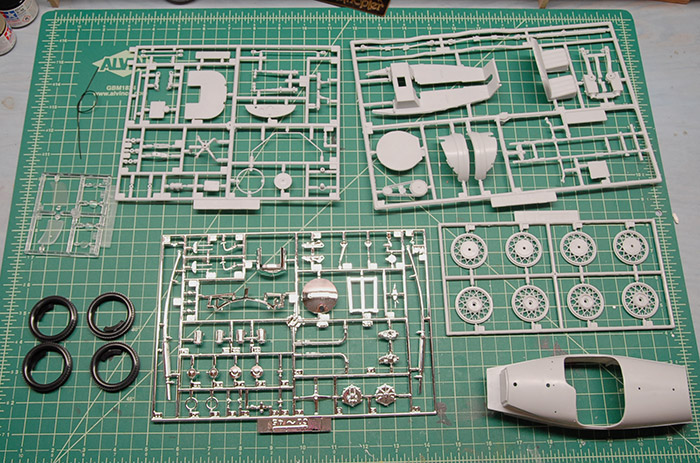
As a result of that method of kit selection, this one ended up taking quite a bit of extra work to make it acceptable. Below you can see the parts as they came out of the box: A few trees of a fairly soft grey plastic, some hard-ish rubber tires, some clear parts, a length of tubing for the engine and one tree of thickly-coated chrome parts.
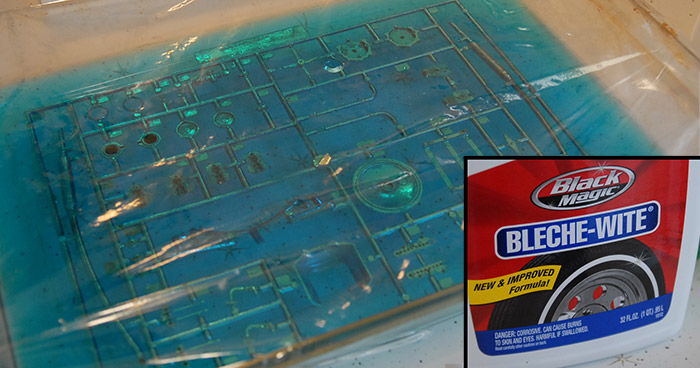
First and foremost, I knew that the chrome parts were just not going to cut it. The varnish/primer that they use under the chrome was on there pretty thick, and in combination with the chrome paint, was filling in many of the details on the parts. That's not evening mentioning the fundamental problem with parts that are painted on the trees: The spots that are left unpainted on the parts once they are cut off the sprue. I decided to give a technique a try that I had read about online and in magazines: de-chroming the parts with Bleche-wite. Bleche-wite is a cleaner that is meant to whiten the whitewalls of tires. It's a pretty aggressive cleaner, so should be handled with care, in a well-ventilated area. I used a baking dish, with the bottle of cleaner emptied into it. I dropped the chrome sprue in there and covered it with plastic wrap. I found that it took a couple multi-hour sessions to get all the chrome off, but because this solvent isn't as aggressive as something like lacquer thinner, I didn't have to worry about the plastic itself dissolving. If you are going to try this yourself, I recommend giving it a few hours in the cleaner and then giving it a light scrubbing with a toothbrush (don't use the brush afterward, despite the tooth-whitening potential), and repeat that process until all the chrome and underlying varnish is all gone.
With that out of the way, I should probably mention something about this kit: It is a mess. Compared to many of the other kits that I have built, from the likes of Tamiya, Hobbyboss and Dragon, this one is of markedly lower quality. There is heaps of flash, the registration between the mold halves is not very good, there are ejector pin marks and sinks all over the place and it just requires a great deal of work to get into shape.
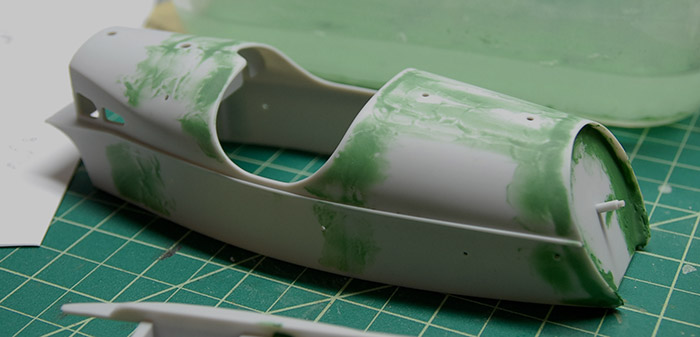
That said, I began by getting the body into a state that is ready for primer and paint. There were sinks on the exterior of the body in every place where there were structural braces on the inside. I ended up thinning some green Squadron putty with some lacquer thinner and spreading that over these areas. After that, I worked my way through various grits of sandpaper, wet sanding until it was smooth enough to be primed. Below you can see the exterior has been sanded, but the rear tire area still needs to be cleaned up.
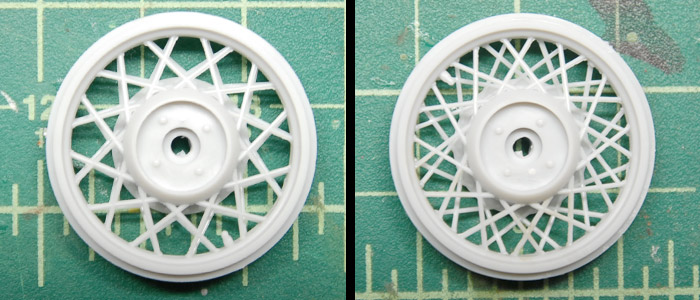
Also, while consulting some reference, I determined that the way the instructions wanted me to put the wheel halves together would have resulted in wheels that didn't really look like the real things. The 1:1 car's wire wheels look to have an offset pattern, making for a much more visually-dense criss-cross pattern. The way the parts aligned resulted in all the spokes lining up, making for a much simpler look. I wanted the more complex look, so I shaved off the locator pins and offset the halves a few degrees. Below you can see the stock and offset locations of the wheel halves.
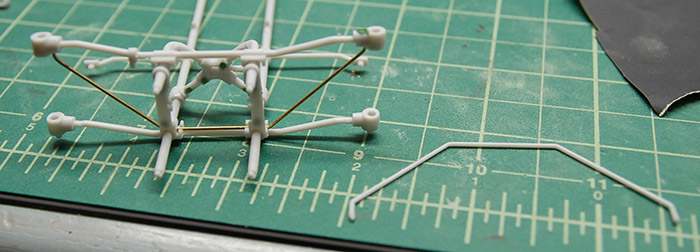
Some thing unusual about this kit is that it is constructed very much like the real car, with an underlying frame that the body sits on top of. While I'm not sure if this was the best idea, since the plastic that this kit is made of is pretty soft and not the best structural material, that is how it is made, so that is what I had to work with. While assembling the front end, I did notice that one of the bracing bars was cast out of scale, so I just replaced it with some extra brass rod that I had laying around, bent to match.
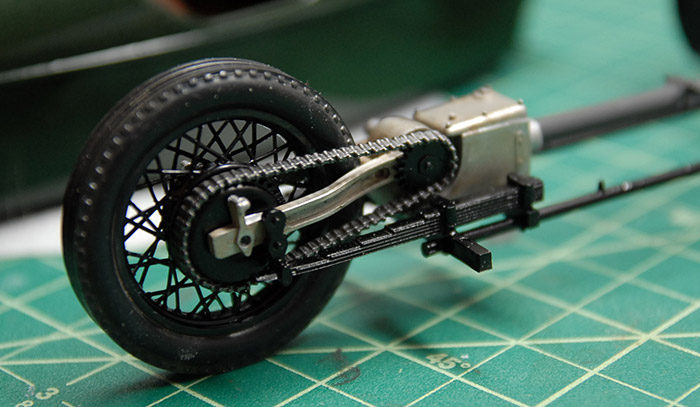
Below you can see a painted wheel, tire mounted, attached to the rear drive assembly. This whole assembly ends up being covered by the body, though, so there were some things here that I would usually fix, but decided not to bother with in this case. As a side note, to anyone else who may attempt this kit: The instructions mention dipping the tires in warm water in order to soften them before stretching them around the wheels. Use HOT water. It took me a few tries, with increasing warm/hot water to get the tires onto the wheels, and I managed to damage a few spokes. Using very hot water from the start would probably avoid any damage.
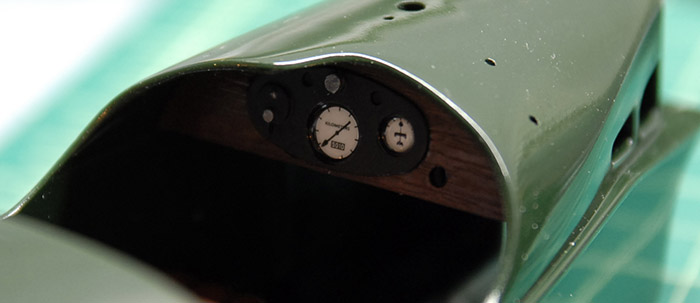
Below you can see the fairly simple dash board, with decals applied. The kit came with some very thick lenses for these gauges, but I decided to just use some clear parts cement to coat them instead, so that the graphics could still be seen.
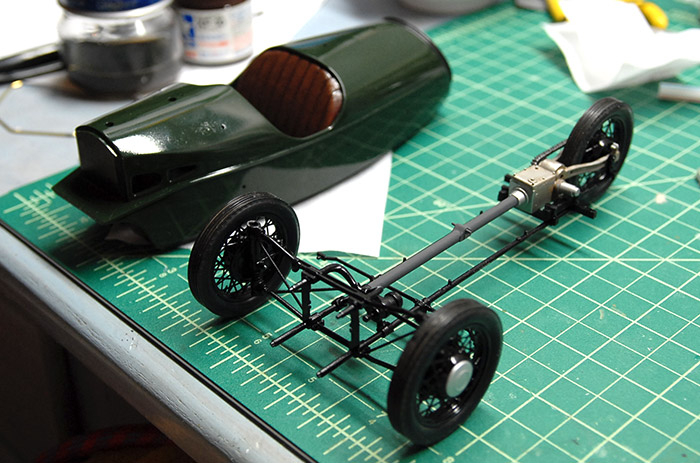
Below you can see the frame all together, and the body painted with the interior painted and attached.
Here I'll touch upon something that will be addressed more in the next blog post: conversion from an air-cooled engine to a water-cooled one. The first part of that involved reshaping the front cowl a bit. The model part also had a very large raised band where there should have been a barely sunken weld bead. I reshaped the front opening a bit to give some curve to the sides and then cut off the raised ridge and used a heated sewing pin to carve a bit of a weld bead. Below you can see the reshaped cowl along with a few other parts after getting a coat of primer, black gloss and Alclad chrome paint.
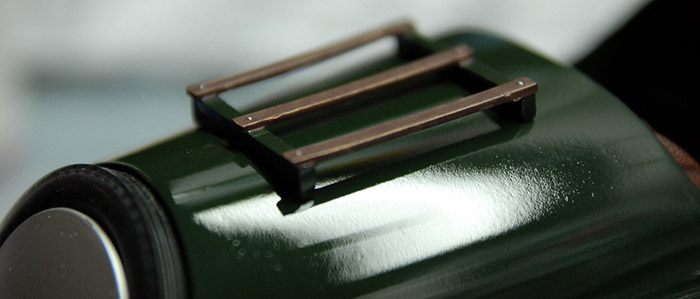
Finally, below you can see the rear rack mounted and a general indication of the quality of the paint job on this one. It's generally better than the SLS model, but still not quite what I was hoping for. This one is Tamiya british green and clear paints right from the can. I've decided that after this model is done, I'm just going to get a bunch of cheap car kits and just spend some time practicing my painting techniques on the bodies of those models.
Thanks for reading, and tune in for the next post, which will have some interesting new developments in model building!
Often, when I pick out kits to build, I do so because of the difficulty and complexity of the kit. I look for well-engineered kits, with lots of extras like photo-etch, metal parts, great decals, etc. This kit, on the other hand, I picked out because I really like the Morgan Three Wheeler. I've seen a few in person and always though that they were just really cool vehicles.
As a result of that method of kit selection, this one ended up taking quite a bit of extra work to make it acceptable. Below you can see the parts as they came out of the box: A few trees of a fairly soft grey plastic, some hard-ish rubber tires, some clear parts, a length of tubing for the engine and one tree of thickly-coated chrome parts.
First and foremost, I knew that the chrome parts were just not going to cut it. The varnish/primer that they use under the chrome was on there pretty thick, and in combination with the chrome paint, was filling in many of the details on the parts. That's not evening mentioning the fundamental problem with parts that are painted on the trees: The spots that are left unpainted on the parts once they are cut off the sprue. I decided to give a technique a try that I had read about online and in magazines: de-chroming the parts with Bleche-wite. Bleche-wite is a cleaner that is meant to whiten the whitewalls of tires. It's a pretty aggressive cleaner, so should be handled with care, in a well-ventilated area. I used a baking dish, with the bottle of cleaner emptied into it. I dropped the chrome sprue in there and covered it with plastic wrap. I found that it took a couple multi-hour sessions to get all the chrome off, but because this solvent isn't as aggressive as something like lacquer thinner, I didn't have to worry about the plastic itself dissolving. If you are going to try this yourself, I recommend giving it a few hours in the cleaner and then giving it a light scrubbing with a toothbrush (don't use the brush afterward, despite the tooth-whitening potential), and repeat that process until all the chrome and underlying varnish is all gone.
With that out of the way, I should probably mention something about this kit: It is a mess. Compared to many of the other kits that I have built, from the likes of Tamiya, Hobbyboss and Dragon, this one is of markedly lower quality. There is heaps of flash, the registration between the mold halves is not very good, there are ejector pin marks and sinks all over the place and it just requires a great deal of work to get into shape.
That said, I began by getting the body into a state that is ready for primer and paint. There were sinks on the exterior of the body in every place where there were structural braces on the inside. I ended up thinning some green Squadron putty with some lacquer thinner and spreading that over these areas. After that, I worked my way through various grits of sandpaper, wet sanding until it was smooth enough to be primed. Below you can see the exterior has been sanded, but the rear tire area still needs to be cleaned up.
Also, while consulting some reference, I determined that the way the instructions wanted me to put the wheel halves together would have resulted in wheels that didn't really look like the real things. The 1:1 car's wire wheels look to have an offset pattern, making for a much more visually-dense criss-cross pattern. The way the parts aligned resulted in all the spokes lining up, making for a much simpler look. I wanted the more complex look, so I shaved off the locator pins and offset the halves a few degrees. Below you can see the stock and offset locations of the wheel halves.
Some thing unusual about this kit is that it is constructed very much like the real car, with an underlying frame that the body sits on top of. While I'm not sure if this was the best idea, since the plastic that this kit is made of is pretty soft and not the best structural material, that is how it is made, so that is what I had to work with. While assembling the front end, I did notice that one of the bracing bars was cast out of scale, so I just replaced it with some extra brass rod that I had laying around, bent to match.
Below you can see a painted wheel, tire mounted, attached to the rear drive assembly. This whole assembly ends up being covered by the body, though, so there were some things here that I would usually fix, but decided not to bother with in this case. As a side note, to anyone else who may attempt this kit: The instructions mention dipping the tires in warm water in order to soften them before stretching them around the wheels. Use HOT water. It took me a few tries, with increasing warm/hot water to get the tires onto the wheels, and I managed to damage a few spokes. Using very hot water from the start would probably avoid any damage.
Below you can see the fairly simple dash board, with decals applied. The kit came with some very thick lenses for these gauges, but I decided to just use some clear parts cement to coat them instead, so that the graphics could still be seen.
Below you can see the frame all together, and the body painted with the interior painted and attached.
Here I'll touch upon something that will be addressed more in the next blog post: conversion from an air-cooled engine to a water-cooled one. The first part of that involved reshaping the front cowl a bit. The model part also had a very large raised band where there should have been a barely sunken weld bead. I reshaped the front opening a bit to give some curve to the sides and then cut off the raised ridge and used a heated sewing pin to carve a bit of a weld bead. Below you can see the reshaped cowl along with a few other parts after getting a coat of primer, black gloss and Alclad chrome paint.
Finally, below you can see the rear rack mounted and a general indication of the quality of the paint job on this one. It's generally better than the SLS model, but still not quite what I was hoping for. This one is Tamiya british green and clear paints right from the can. I've decided that after this model is done, I'm just going to get a bunch of cheap car kits and just spend some time practicing my painting techniques on the bodies of those models.
Thanks for reading, and tune in for the next post, which will have some interesting new developments in model building!