
Maschinen Krieger
Kröte - Finished and Photographed
04 - July - 2012 - 20:42
Another one wrapped up. Below you can see the finished product. Once I went to put everything together, I found that the concave bottom of the robot feet made it quite difficult to glue down to the base. I ended up having to build some additional structure on to the feet bottoms so that there was something of substance under there that could be glued down.
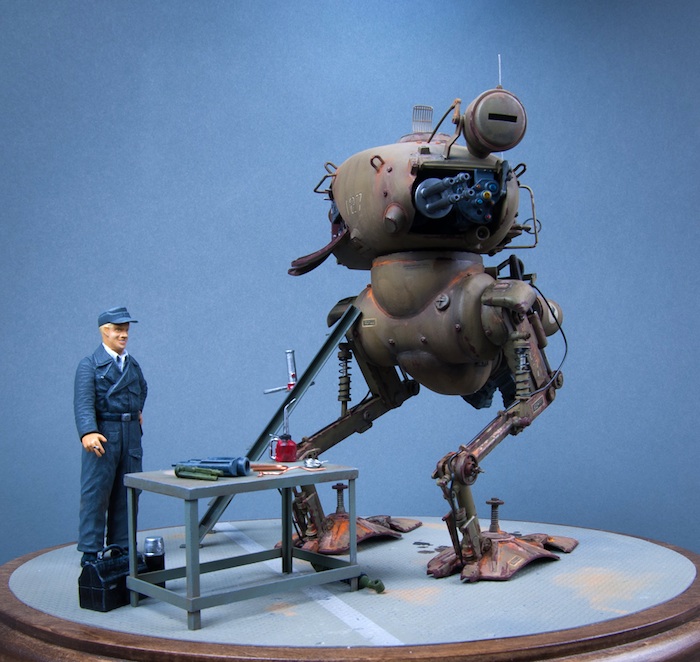
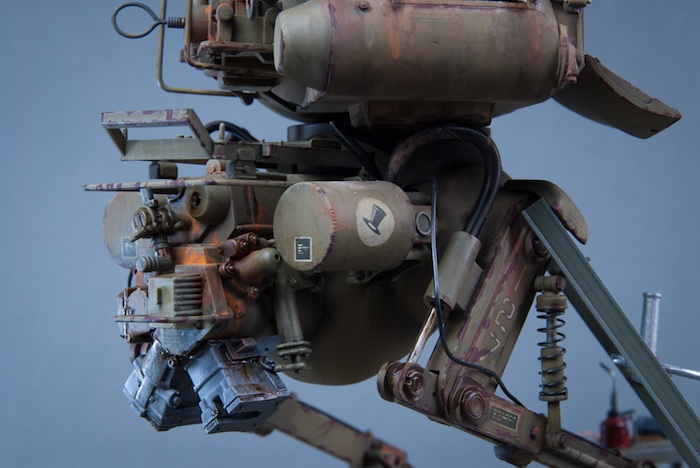
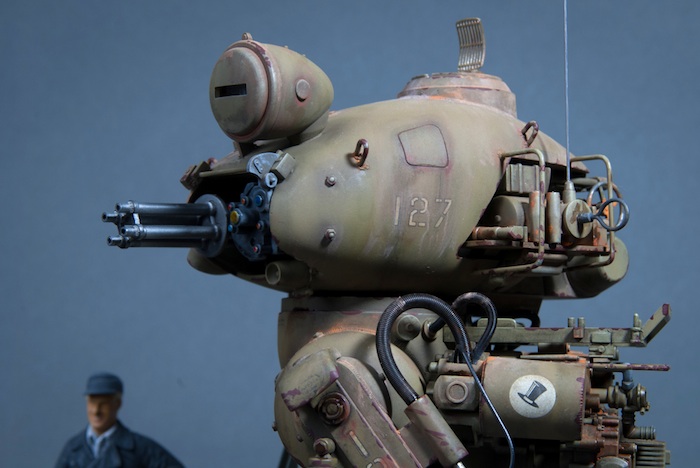
Weathering was done with MIG pigments and Abteilung oils. I also went back and added a good deal of red primer-colored paint along many of the edges to represent chipped and scraped paint. It's another new technique for me (since I don't do much armor modeling) and I feel that it was somewhat successful. Next time, though, I think I'll approach it a little differently, using some of the same salt-mask techniques on the flooring and maybe looking into a similar technique that uses hairspray as a masking agent.
Next, various washes of dark oils and pigments, spread around with mineral spirits were used to accent the details. Some selective areas of dirt and rust, also spread with mineral spirits, picked out areas that I thought would likely rust a bit. Finally, a few touches of MIG Oil and Grime mixture (basically a black/brown sludge that dries glossy to look wet) were used to add some leaky areas and a few spots on the floor.
Click on any of the images, or the link on the side bar to the left, to go to the full gallery.
Thanks for reading!
Kröte - Diorama and Weathering
04 - July - 2012 - 11:34
Part way through the build of this kit, I decided that I wanted a little bit of environmental context for the completed model. For me, that meant building an appropriate base for it to stand on, as well as a few props to give context to why the model had its side panel opened up. Since the kit also came with the figure, I thought a good solution was to make the floor something like an aircraft hanger floor, to add a table and ladder, a few dollhouse tools and accessories and a few painted parts from the spares drawer.
Starting with the floor, as I mentioned in the last post, I painted it all a metal color and gave it a few thick coats of clear to protect the metal paint. Next, I decided to try out a new technique: using salt and water to roughly mask coats of paint. This involved dampening the surface and sprinkling table salt over it. The water made the salt stick and I pushed it around a bit with my finger to get it to clump together a bit. Once allowed to dry, the salt hardens up and is ready for painting. Below, you can see my freshly salted floor.
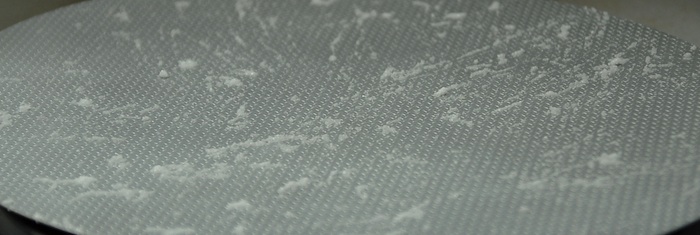
After the salting, I applied a few coats of various shades of grey paint. Then I rubbed some of the salt off, exposing the bright metal underneath. Being that this was the first time I tried this technique, I found that I had probably used a bit much salt, making my chips very large and very numerous. So, I left some of the salt on there and then airbrushed a few light coats of more grey paint over the newly-exposed metal areas. This dulled them down a bit, and added some depth. Next I masked and sprayed a white line across the floor, just for visual interest. Finally, I rubbed off the last little bits of salt, leaving a few fresh paint chips. As an added touch, I took a fine grain sanding stick and gave the surface a very light sanding. As I had hoped, this took the grey paint off of the raised areas, but didn't get down to the metal paint, because of the thick coats of clear in between. This gave me the look of having the grey paint rubbed off of all of the raised parts of the diamond plate.
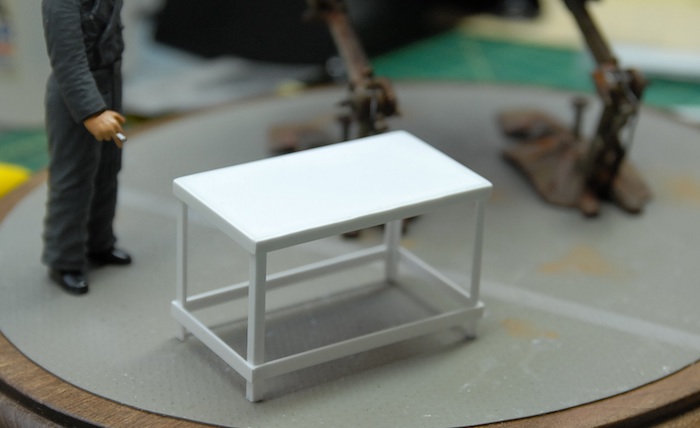
Next up was to build a few extra bits of furniture in order to help fill out the scene. I figured that a little work table would make sense, so I put one together using some strip and sheet styrene that I had around. Below you can see the completed, but unpainted, table in place as I tried to figure out where things should be situated on the base.
After the table, I noticed that the figure would be far too short to reach the open access panel of the machine without some sort of stool or ladder. So, using the same sort of strip and sheet styrene, I built a little ladder to lean against the side of the model (although I forgot to take a photo of it). This just left a bit of painting on the new parts and weathering of all parts. Below you can see part of my collection of pigments and oil paints that were used for the weathering and detailing. You can also see the couple of doll house props that I bought to go along with this (oil can, lunch box)
That's it for this entry. Up next: photos of the finished model and diorama. Thanks for reading!
Starting with the floor, as I mentioned in the last post, I painted it all a metal color and gave it a few thick coats of clear to protect the metal paint. Next, I decided to try out a new technique: using salt and water to roughly mask coats of paint. This involved dampening the surface and sprinkling table salt over it. The water made the salt stick and I pushed it around a bit with my finger to get it to clump together a bit. Once allowed to dry, the salt hardens up and is ready for painting. Below, you can see my freshly salted floor.
After the salting, I applied a few coats of various shades of grey paint. Then I rubbed some of the salt off, exposing the bright metal underneath. Being that this was the first time I tried this technique, I found that I had probably used a bit much salt, making my chips very large and very numerous. So, I left some of the salt on there and then airbrushed a few light coats of more grey paint over the newly-exposed metal areas. This dulled them down a bit, and added some depth. Next I masked and sprayed a white line across the floor, just for visual interest. Finally, I rubbed off the last little bits of salt, leaving a few fresh paint chips. As an added touch, I took a fine grain sanding stick and gave the surface a very light sanding. As I had hoped, this took the grey paint off of the raised areas, but didn't get down to the metal paint, because of the thick coats of clear in between. This gave me the look of having the grey paint rubbed off of all of the raised parts of the diamond plate.
Next up was to build a few extra bits of furniture in order to help fill out the scene. I figured that a little work table would make sense, so I put one together using some strip and sheet styrene that I had around. Below you can see the completed, but unpainted, table in place as I tried to figure out where things should be situated on the base.
After the table, I noticed that the figure would be far too short to reach the open access panel of the machine without some sort of stool or ladder. So, using the same sort of strip and sheet styrene, I built a little ladder to lean against the side of the model (although I forgot to take a photo of it). This just left a bit of painting on the new parts and weathering of all parts. Below you can see part of my collection of pigments and oil paints that were used for the weathering and detailing. You can also see the couple of doll house props that I bought to go along with this (oil can, lunch box)
That's it for this entry. Up next: photos of the finished model and diorama. Thanks for reading!
Maschinen Krieger - Kröte
28 - May - 2012 - 21:58
After a year spent with the Curtiss Jenny and all of its wood, metal and string, I was definitely ready for a change of pace. I have had this model sitting in my collection for a bunch of years. I bought it a while back, had started working on it, but for whatever reason, ended up boxing it back up.
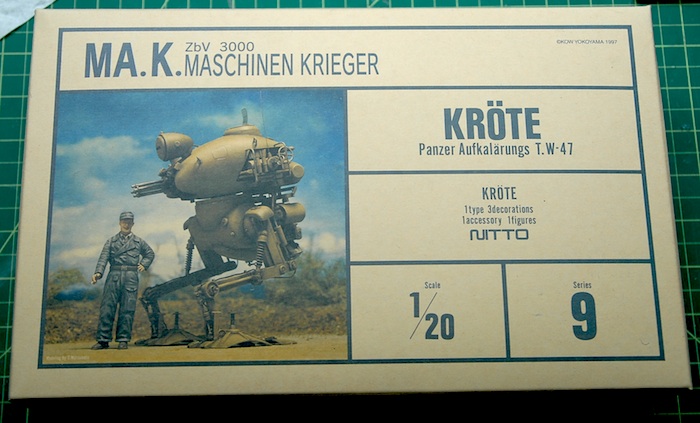
Part of the Maschinen Krieger series, the model is a mixture of WWII armor and sci-fi designs. This particular model is a bipedal walking tank design, and comes with a figure as well.
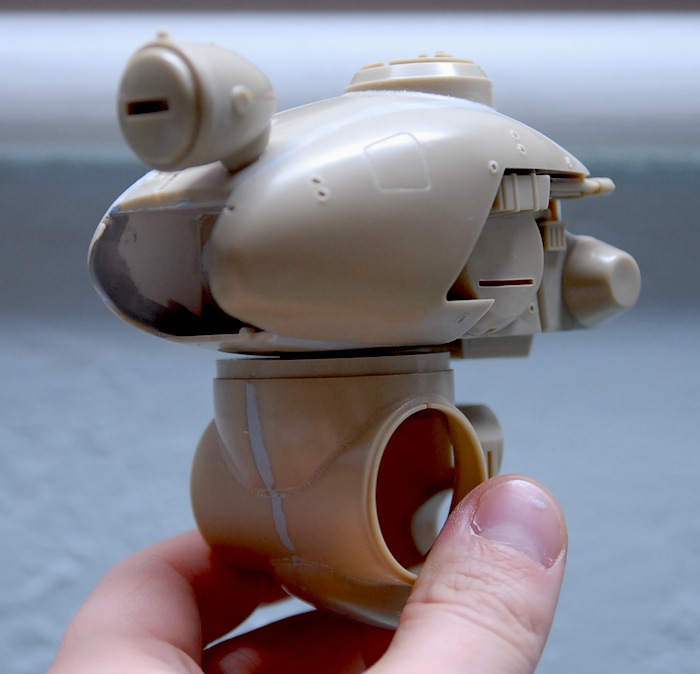
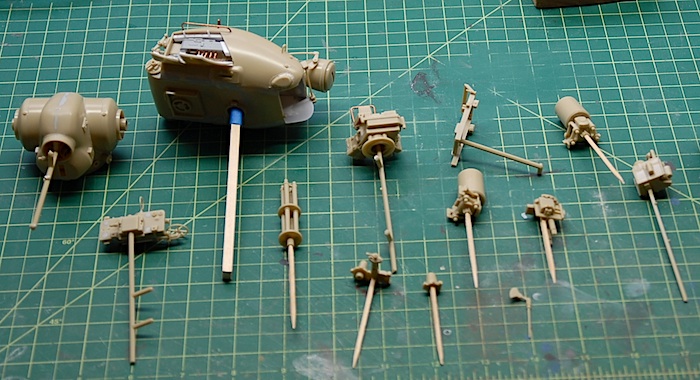
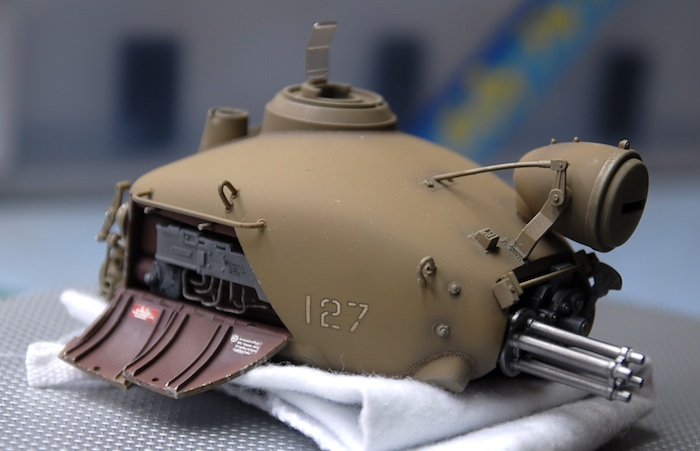
Beginning construction, the upper hull consists of four main parts. The fit wasn't as precise as I would prefer, so there were a few rounds of fitting, gluing, filling, sanding, etc, in order to make it look like one solid part. In the picture below, you can see the main parts assembled. In the front gun area, I added some sheet styrene (where the dark filler is, in the photo), as the kit just let the insides of that area open, which I thought looked a bit odd. The lower hull is just two main left and right halves, which you can see below. The upper and lower sections just twist together and are left unglued.
One of the few upgrades/changes I decided to make on this project, was to add a bit of detail to the side panels of the upper hull. As you can see in the image below, the uppoer hull had a recessed area with some cursory detail molded in.
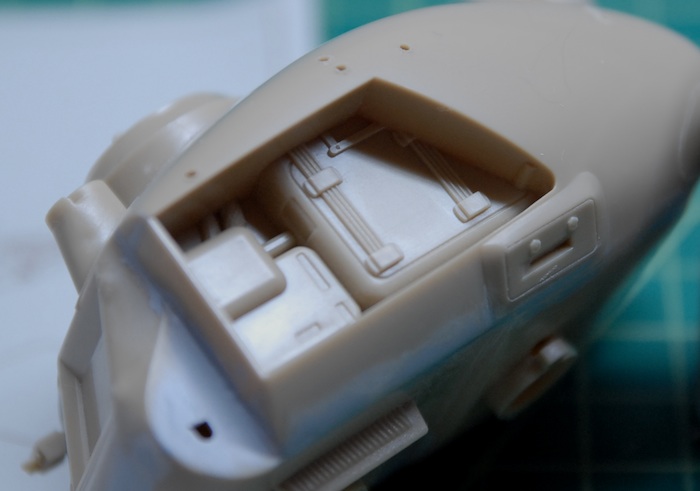
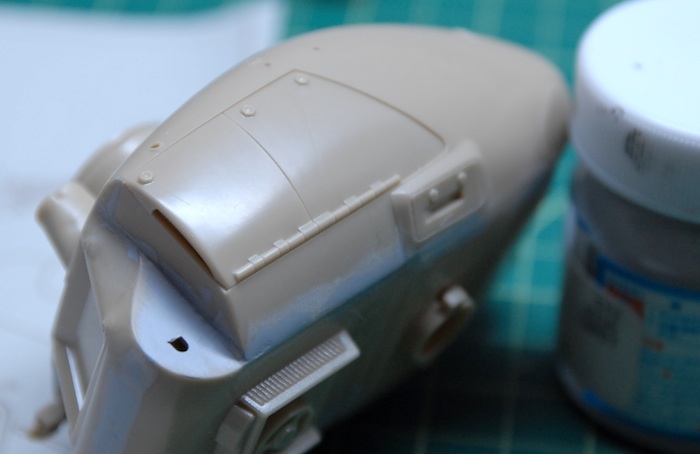
The kit instructions just called for covering that recess with a panel (molded to look like two panels) and going on about your merry way.
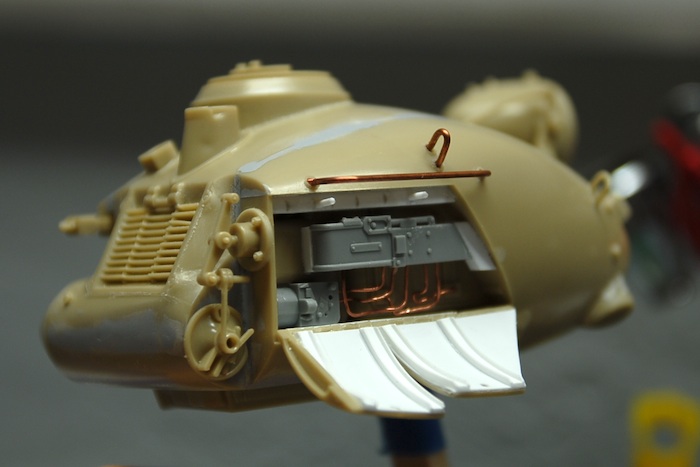
At this point, I thought it might be fun to set this up as a little diorama, making it look like the figure was taking a little break from some repair work on the machine. The first step in this plan was to make these side hatches be opened instead of closed and then add a bit of detail in there. First, I cut the hatch in half, so I could have the two parts be opened a slightly different amount. Next, using some sheet styrene and some shallow U-shaped styrene strip, I added some reinforcement to the back side of the doors.
Along with a few left over parts from previous models, some more strip styrene and some soft copper wire, more detail was added. Finally, the hinges on the hatches were carved a bit (added detail to the side that we now see), and then the panels were glued in place.
Below you can see all of the various hull subassemblies ready for priming.
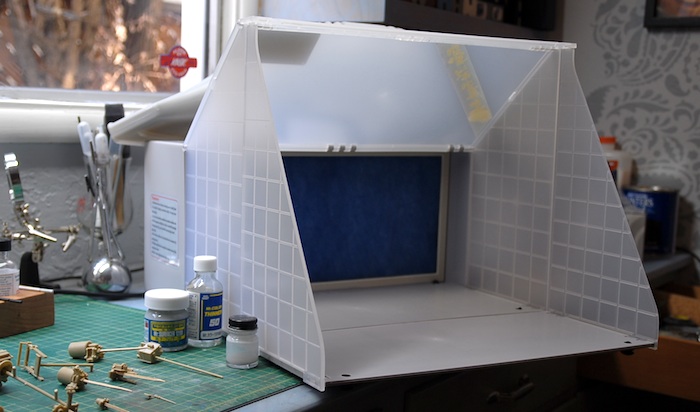
One of my new acquisitions, is this indoor spray booth. It has a vent hose that can be fished out of a window, so that the outside world can enjoy my paint fumes (after running through that blue filter), and it also collapses down into a small-suitcase size, so it can be tucked into the closet as needed.
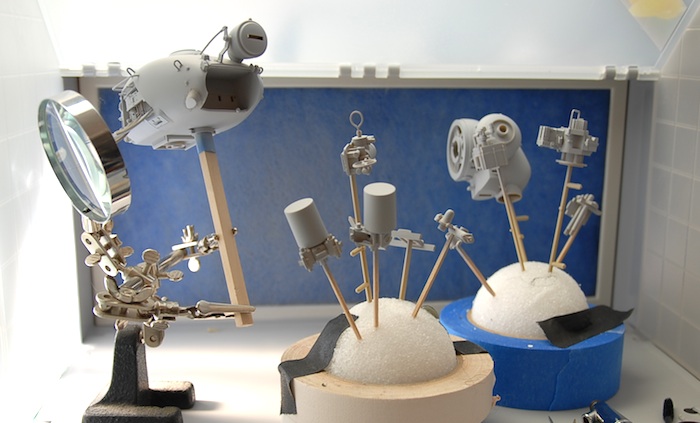
Below you can see the main parts all primed up and ready for another pass at sanding and smoothing seams.
While this was going on, I also assembled the figure and had a shot at painting him. I haven't done any figure painting since I was a kid, so this was somewhat new for me. I stocked up on Vallejo paints before starting, since I had read various mentions of them being great for hand-brushing. I had long been disappointed with the Tamiya paints performance when hand brushing, and found the Vallejo paints to be a welcome change.
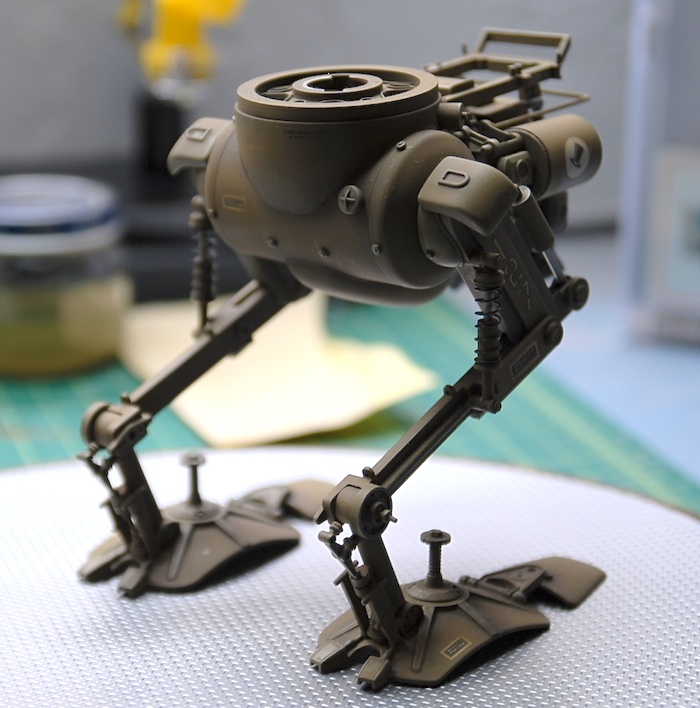
After a pass at painting the main parts, I assembled everything for the upper hull. Next was a pass at rough shading with a darker shade of green and some dry-brushing to highlight the details. A few decals went on and then one more pass with the green paint in order to blend them in a little bit. Below you can see the current state of the top and bottom halves. I have still yet to do a weathering pass, to get things feeling a little more natural. I'm also looking to come up with another decal or two for the inside of the hatches, which would involve some Photoshop work and printing out the images on to decal paper.
Upper hull:
Lower hull and legs:
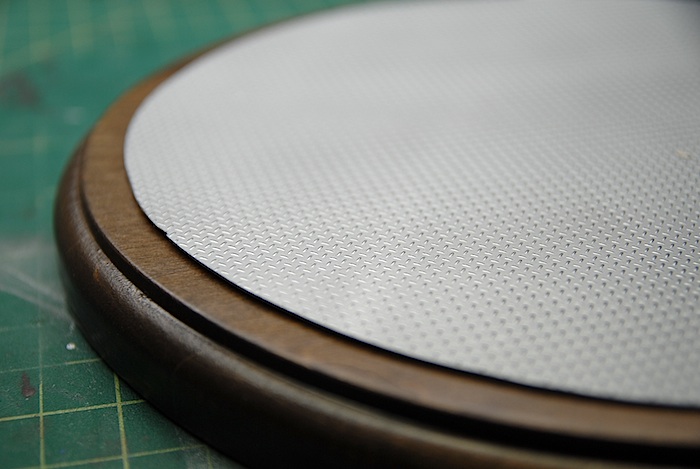
The beginnings of the base for the little diorama can be seen below. I got a wooden oval from a craft store, and stained it. This was followed by a few coats of polyurethane. I ran across some diamond plate styrene sheet at the hobby store and though that might make a good hanger floor. So far it has just gotten a few coats of Testor's metalizer paint, soon to be followed by some yellow markings and some grey to dull it all down.
That's all for now. More updates to follow as this project wraps up!
Part of the Maschinen Krieger series, the model is a mixture of WWII armor and sci-fi designs. This particular model is a bipedal walking tank design, and comes with a figure as well.
Beginning construction, the upper hull consists of four main parts. The fit wasn't as precise as I would prefer, so there were a few rounds of fitting, gluing, filling, sanding, etc, in order to make it look like one solid part. In the picture below, you can see the main parts assembled. In the front gun area, I added some sheet styrene (where the dark filler is, in the photo), as the kit just let the insides of that area open, which I thought looked a bit odd. The lower hull is just two main left and right halves, which you can see below. The upper and lower sections just twist together and are left unglued.
One of the few upgrades/changes I decided to make on this project, was to add a bit of detail to the side panels of the upper hull. As you can see in the image below, the uppoer hull had a recessed area with some cursory detail molded in.
The kit instructions just called for covering that recess with a panel (molded to look like two panels) and going on about your merry way.
At this point, I thought it might be fun to set this up as a little diorama, making it look like the figure was taking a little break from some repair work on the machine. The first step in this plan was to make these side hatches be opened instead of closed and then add a bit of detail in there. First, I cut the hatch in half, so I could have the two parts be opened a slightly different amount. Next, using some sheet styrene and some shallow U-shaped styrene strip, I added some reinforcement to the back side of the doors.
Along with a few left over parts from previous models, some more strip styrene and some soft copper wire, more detail was added. Finally, the hinges on the hatches were carved a bit (added detail to the side that we now see), and then the panels were glued in place.
Below you can see all of the various hull subassemblies ready for priming.
One of my new acquisitions, is this indoor spray booth. It has a vent hose that can be fished out of a window, so that the outside world can enjoy my paint fumes (after running through that blue filter), and it also collapses down into a small-suitcase size, so it can be tucked into the closet as needed.
Below you can see the main parts all primed up and ready for another pass at sanding and smoothing seams.
While this was going on, I also assembled the figure and had a shot at painting him. I haven't done any figure painting since I was a kid, so this was somewhat new for me. I stocked up on Vallejo paints before starting, since I had read various mentions of them being great for hand-brushing. I had long been disappointed with the Tamiya paints performance when hand brushing, and found the Vallejo paints to be a welcome change.
After a pass at painting the main parts, I assembled everything for the upper hull. Next was a pass at rough shading with a darker shade of green and some dry-brushing to highlight the details. A few decals went on and then one more pass with the green paint in order to blend them in a little bit. Below you can see the current state of the top and bottom halves. I have still yet to do a weathering pass, to get things feeling a little more natural. I'm also looking to come up with another decal or two for the inside of the hatches, which would involve some Photoshop work and printing out the images on to decal paper.
Upper hull:
Lower hull and legs:
The beginnings of the base for the little diorama can be seen below. I got a wooden oval from a craft store, and stained it. This was followed by a few coats of polyurethane. I ran across some diamond plate styrene sheet at the hobby store and though that might make a good hanger floor. So far it has just gotten a few coats of Testor's metalizer paint, soon to be followed by some yellow markings and some grey to dull it all down.
That's all for now. More updates to follow as this project wraps up!