
Raised Beds
Building Raised Garden Beds
14 - September - 2019 - 19:39
The soil in our back yard is fairly awful. It’s very clay-heavy and previous attempts at trying to grow things like carrots did not turn out well. Instead we ended up with horror movie prop carrots, like so (eyes added for extra horror):

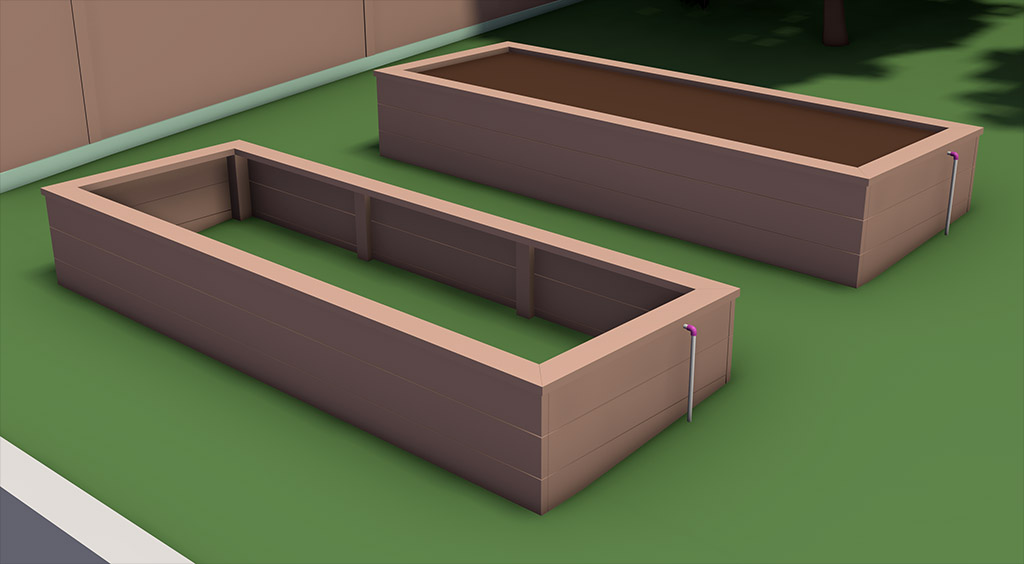
As a result, we decided to put some time and money into building raised beds, so we could have better soil and easier access to the garden (and less lawn to mow). I wanted to keep it fairly simple, but still have them look nice, provide plenty of planting space and I had a hunch that I could tap into the existing back yard sprinkler system in order to automate irrigation. With those things in mind, I mocked up my back yard and proposed garden beds in a 3d modeling package, and got something like this:
That also allowed me to figure out how much wood I would need and in what dimensions, so I could order it from the lumber yard. The sides of the beds were to be made from 12’ long 2x8’s and the caps are 2x6’s, with 4x4 posts for the corners and 2x4 braces. I choose to go with all redwood on this projects, since all of the wood was to be in constant contact with soil and weather. Since I planned on growing food in these beds, I didn’t want to go with pressure-treated lumber, due to concerns about the chemicals leeching into the soil over time.
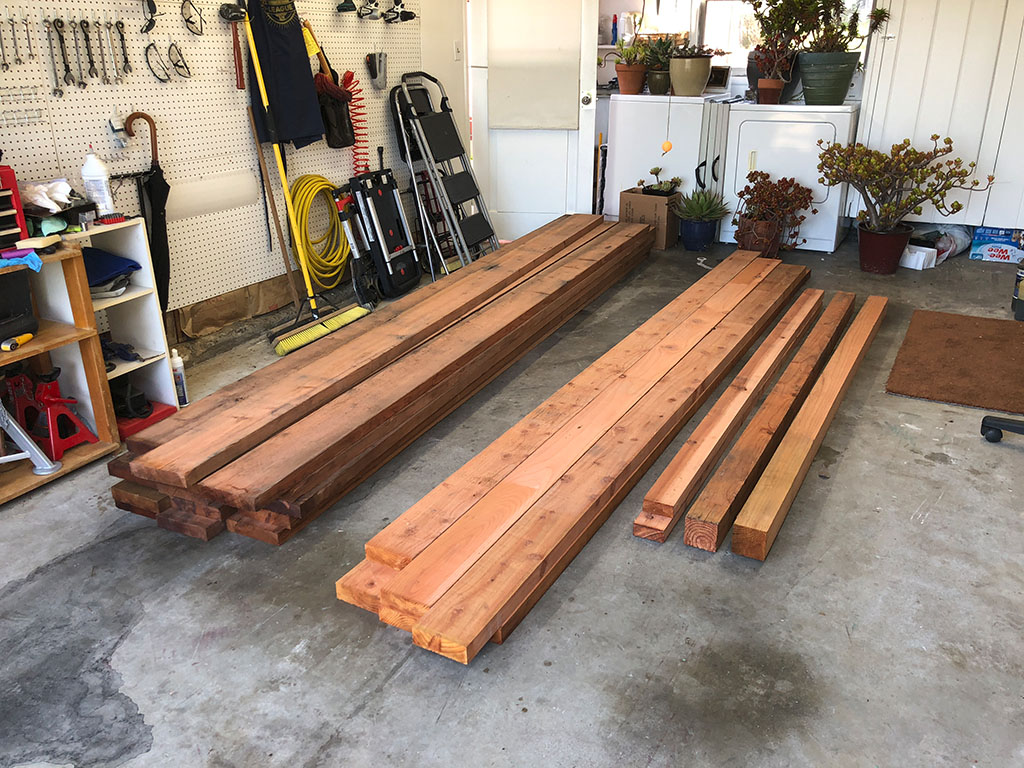
Here’s my starting lumber pile in the garage:
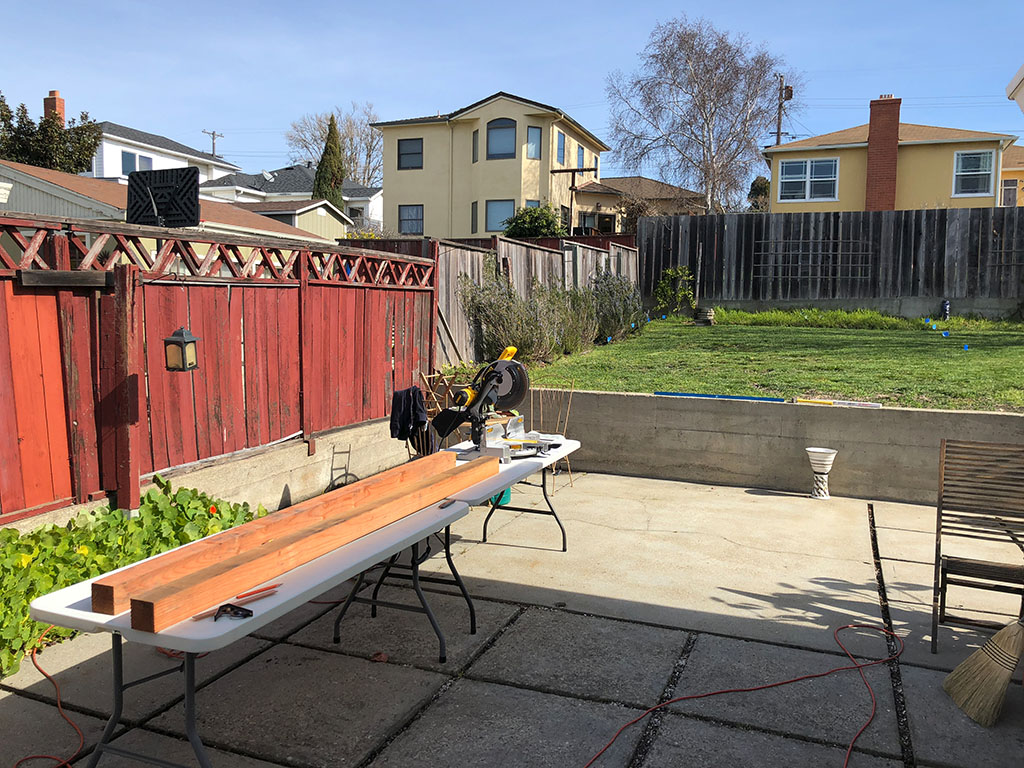
I set myself up a miter station in the back yard and also measured out where exactly the beds were to be located (those little blue flags in the background are my makeshift corner markers.
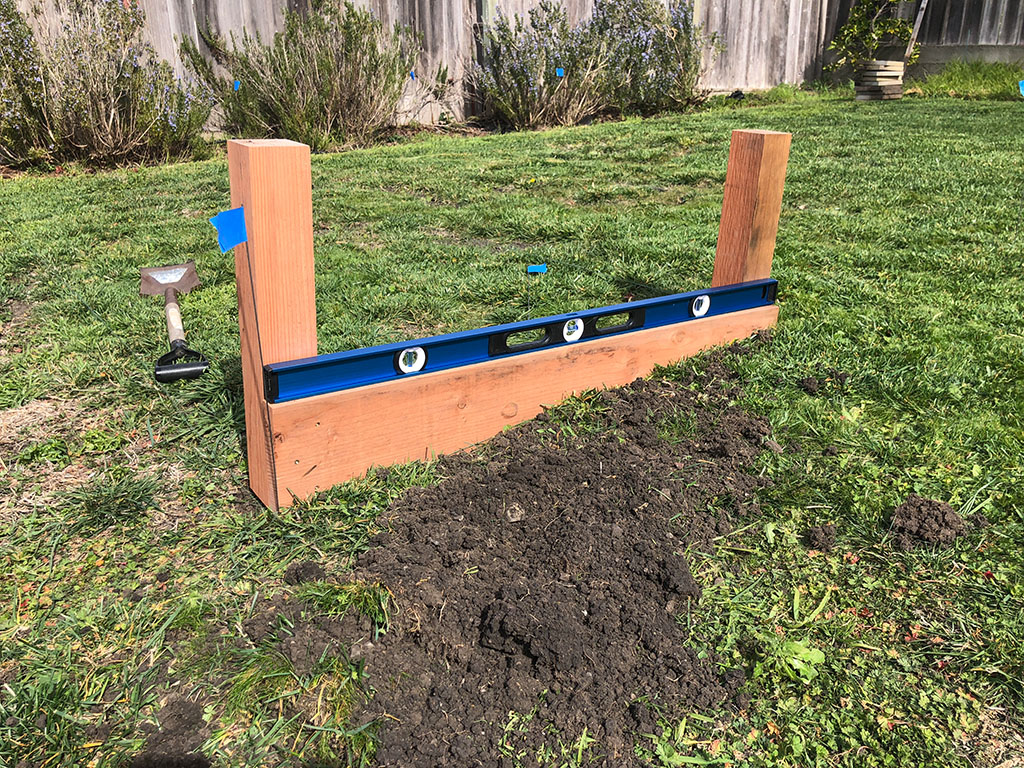
I also knew that I wanted the beds to be level, but the entire back yard has a slope to it. This meant digging into the yard so that the front edge of each bed would meet the ground and the back edge would go down into the soil. Here you can see my process. I put two of the posts and one cross bar together, so that I could dig into the ground and get it level.
I did the same thing for the far end, and after a great deal of digging, got the long boards in place and leveled as well.
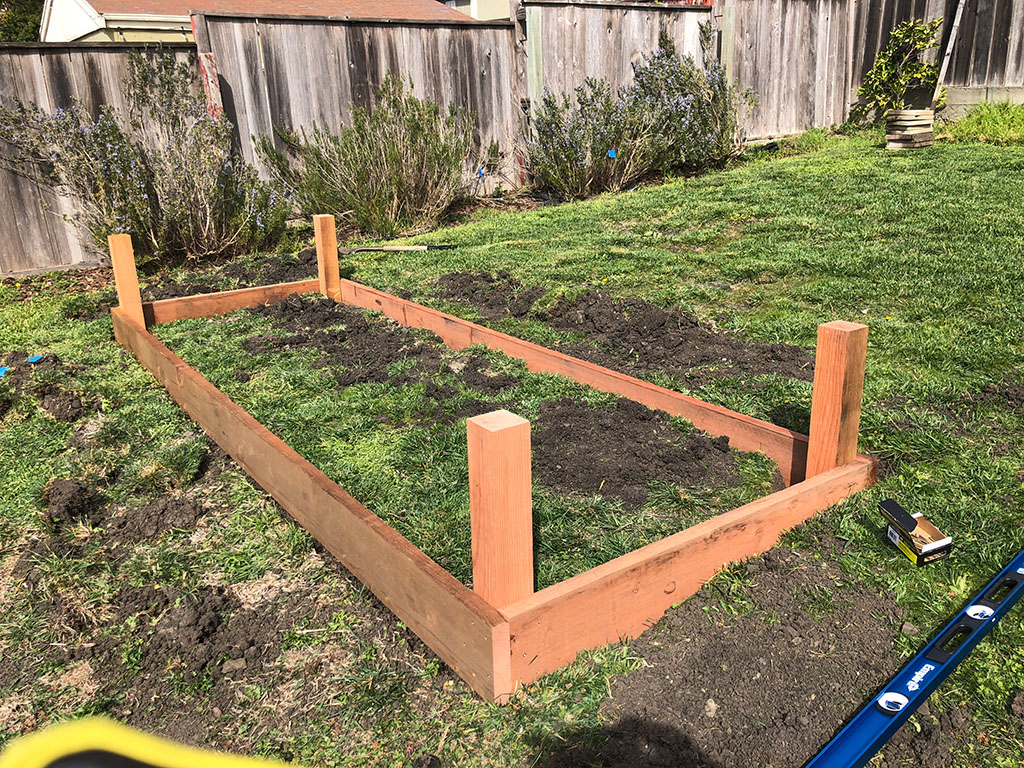
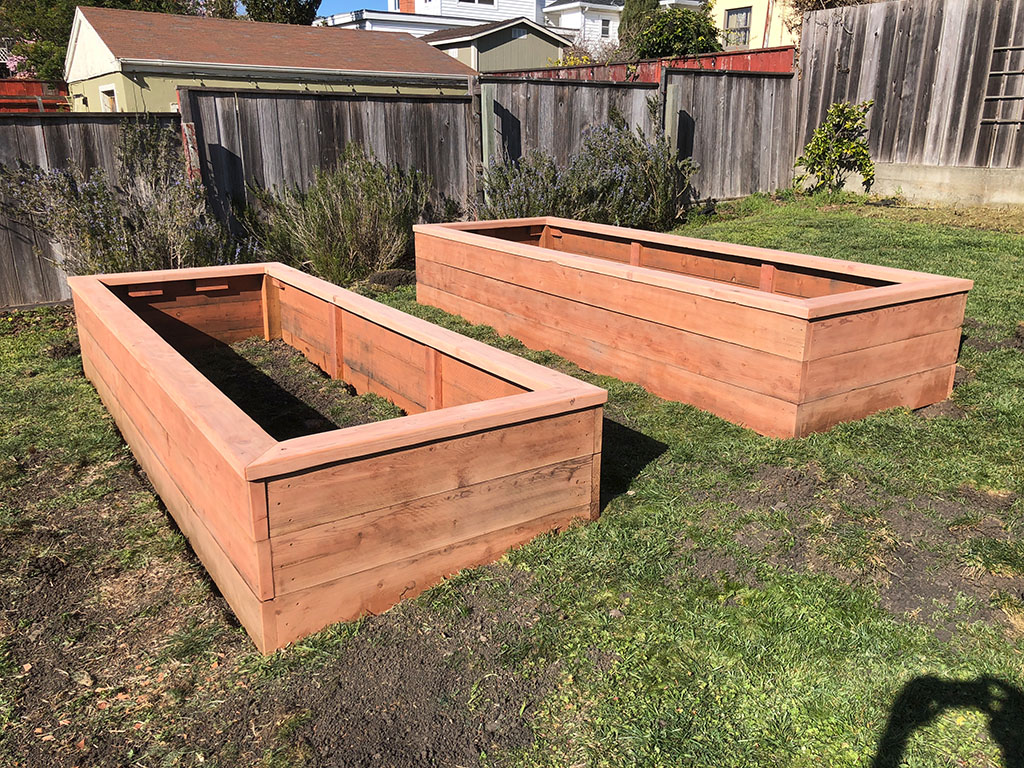
At the end of the first day, I had the two beds in place and mostly put together. Each of these measures about 12’ long by 4’ wide.
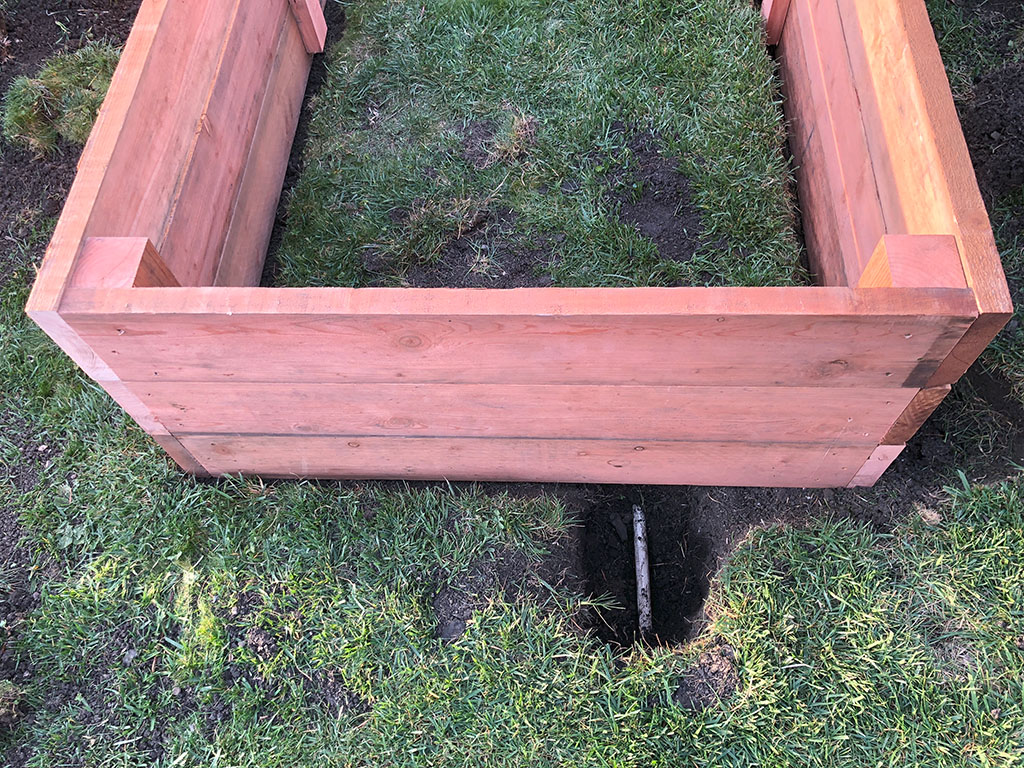
During that digging, I also figured out where the underground sprinkler pipe should be and dug down to it for later access. Here you can see how it runs underneath one of the beds.
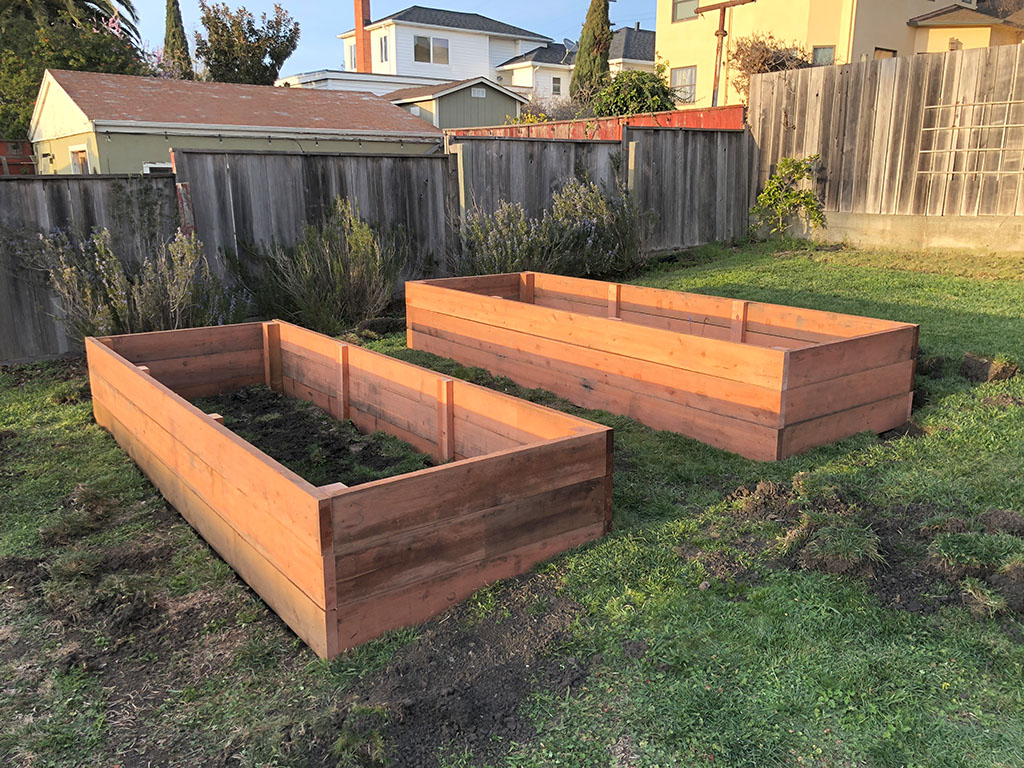
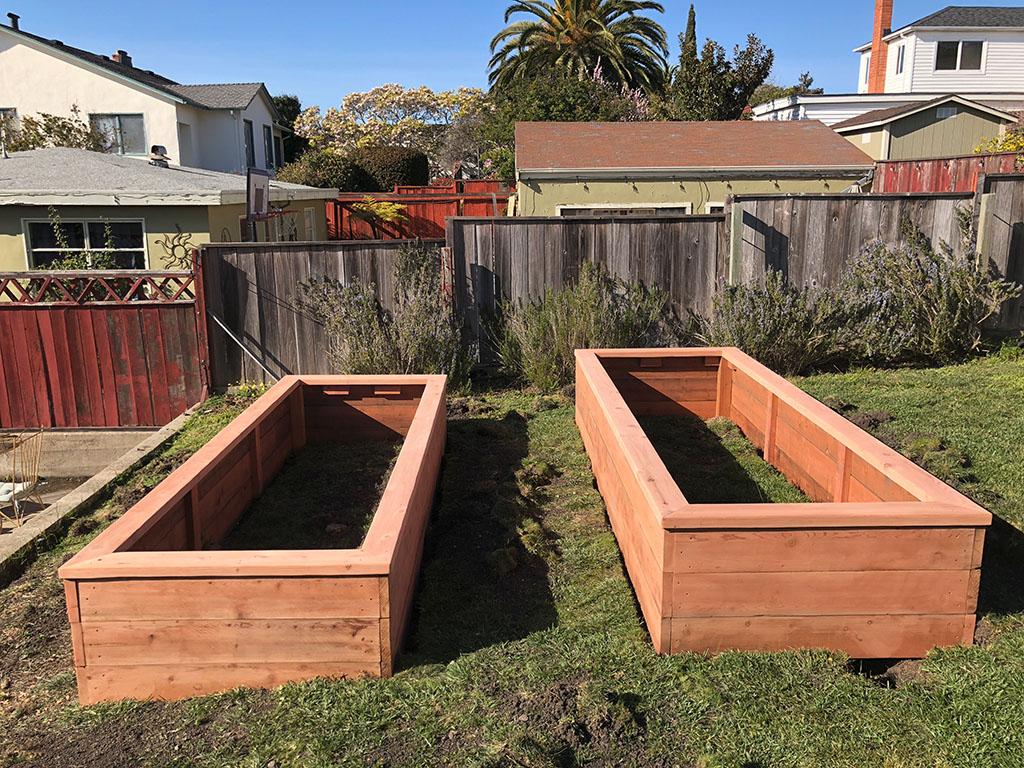
The next day I added the caps, mostly to make the beds a little more comfortable to use. My wife and I also spent a few hours sanding the exteriors of the beds in order to smooth them out a bit and make the redwood a bit nicer to look at. Here you can see the sanded beds.
And an end view to show the change in elevation vs the ground.
A week or so later this truck showed up and dumped a couple cubic yards of garden soil onto a tarp in our driveway. It turns out that it takes a LOT of soil to fill two 12x4’ beds.
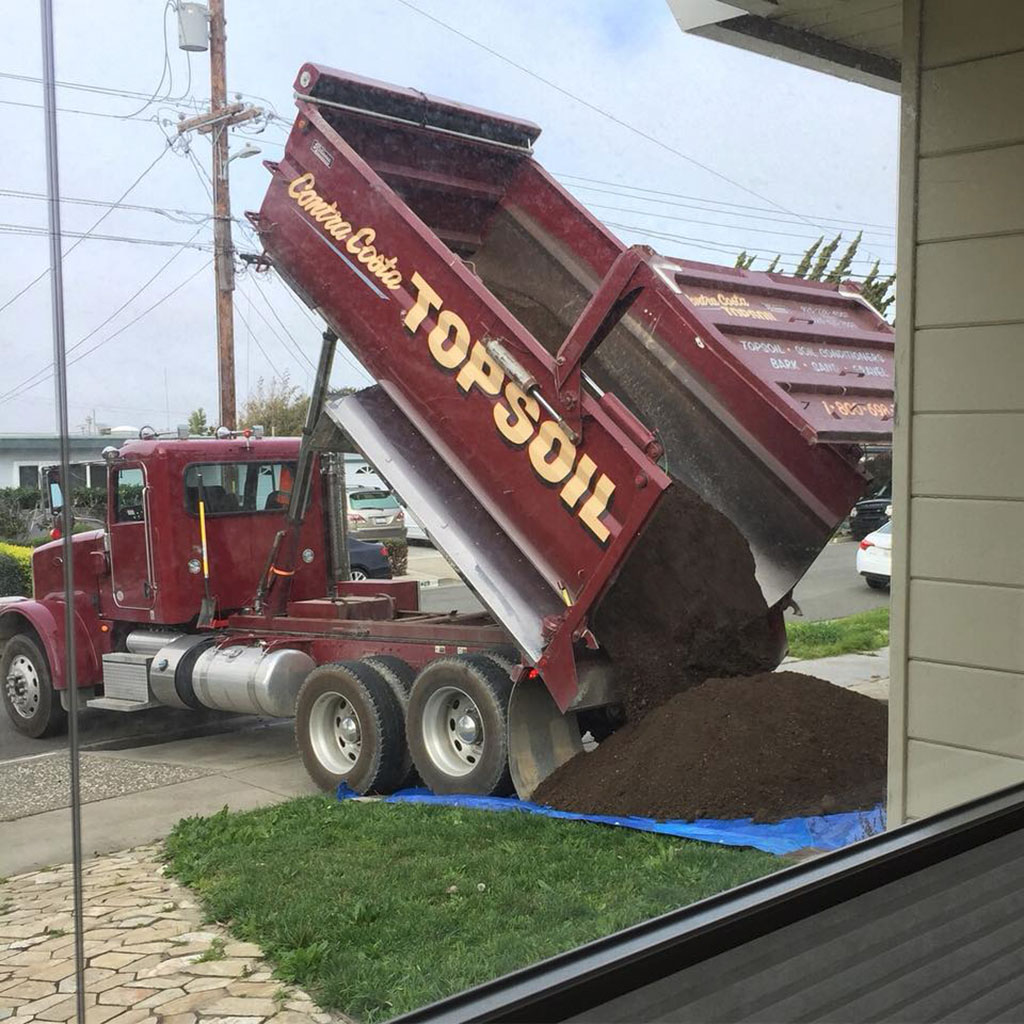
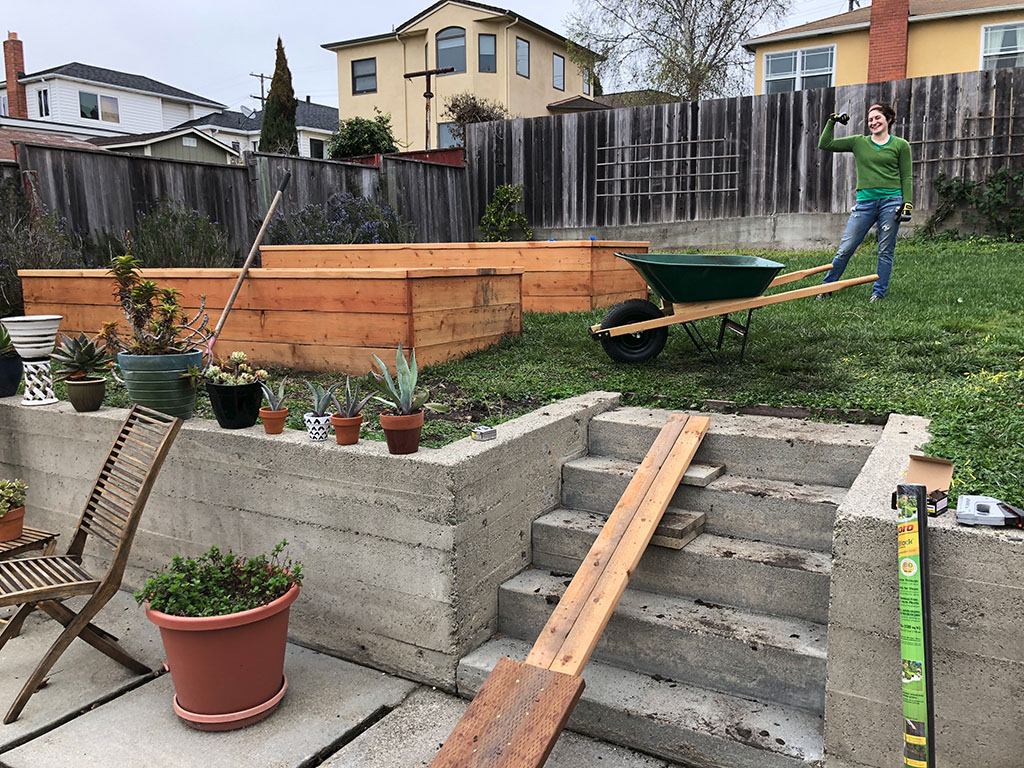
Thus began what I think might have been the most backbreaking day of labor in my entire life. Since the driveway is in front of our house and there is no way to get that truck any closer to the beds, all of the soil needed to be loaded into a wheelbarrow and pushed around the house, up this little makeshift ramp and then emptied over the edge of the beds. All that soil was HEAVY. It also took a good six hours of heavy lifting to get it all moved. I could barely move at the end of the day.
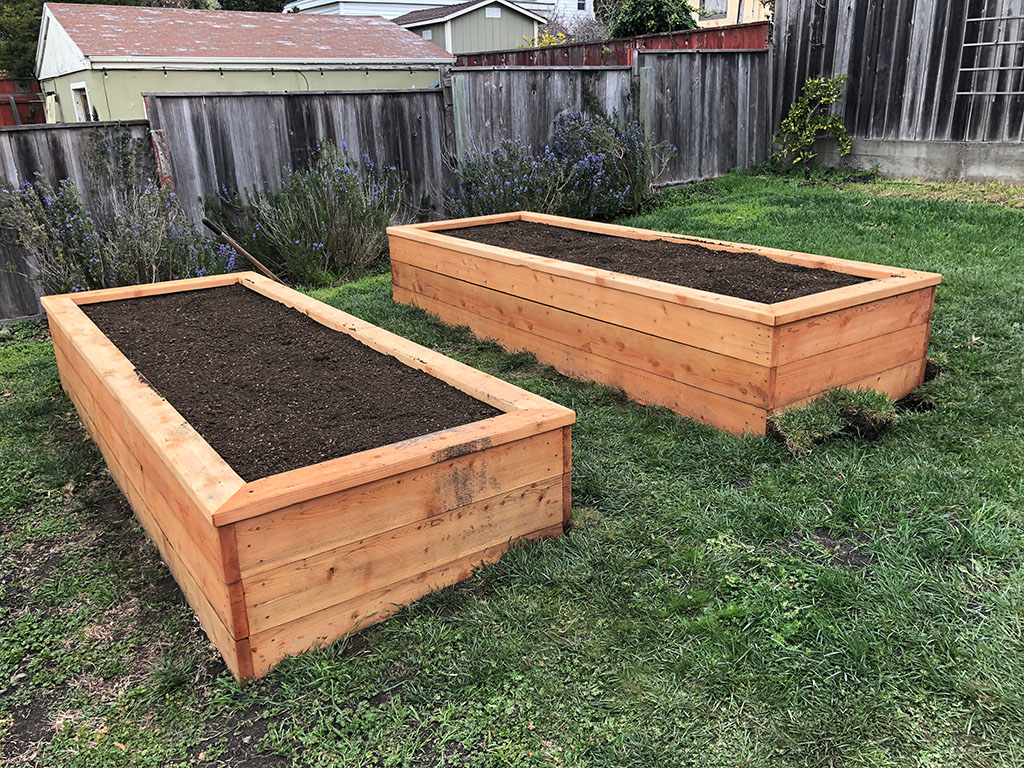
But look how nice the beds are when filled with fresh soil! No eldritch horror carrots from THESE beds!
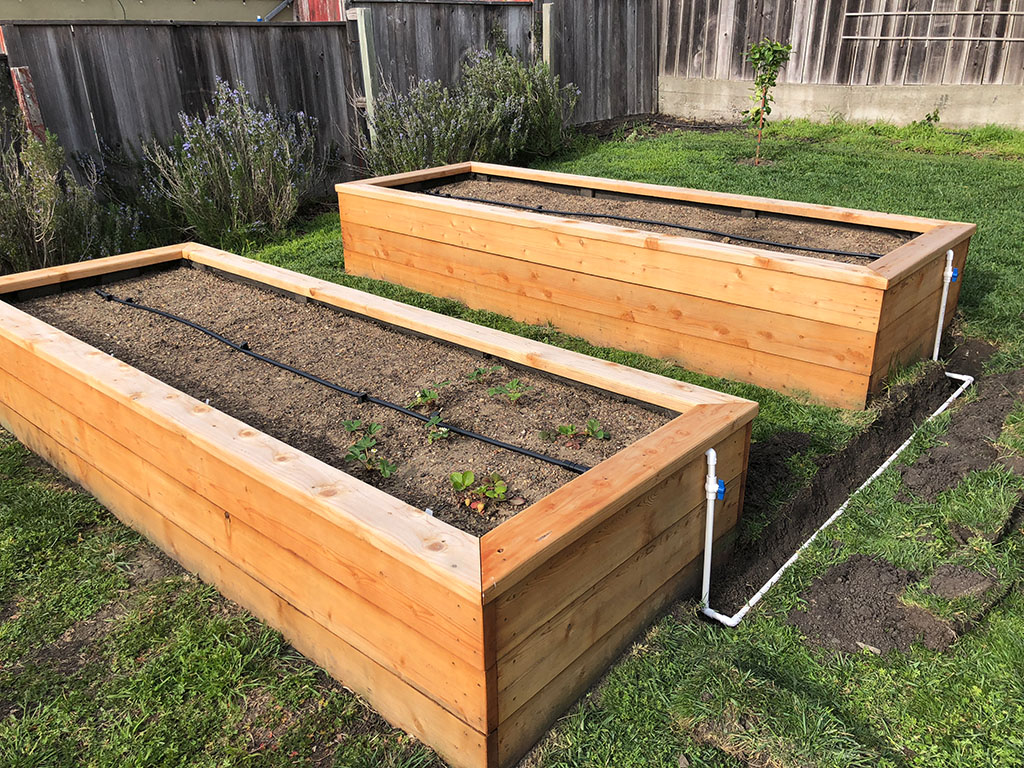
Next step was to dig a little trench for irrigation and tap into the sprinkler line. This was all pretty simple PVC pipe work, but I did discover that there wasn’t enough water pressure to run BOTH the lawn sprinklers and the bed irrigation. Sorry middle-of-the-lawn, but no more water for you! Fortunately, the pipe in question only fed four sprinklers, one of which was now under a couple feet of soil and another of which would just be spraying the side of the new bed. Overall this leaves a little gap right in the middle of the lawn that doesn’t get water in the summer, but that’s not too big a deal.
As you can see below, I just diverted the underground pipe up to the upper bed and then added a T joint in order to get a line down to the lower bed. I also added cutoff valves in case I didn’t want to water one bed for some reason. It doesn’t really ever get below freezing here in Northern California, so no real need to worry about pipes freezing in the winter or anything like that.
The final result! Here you can see some strawberries planted, pea trellises in place and a coat of deck sealer on the outside of all the wood.
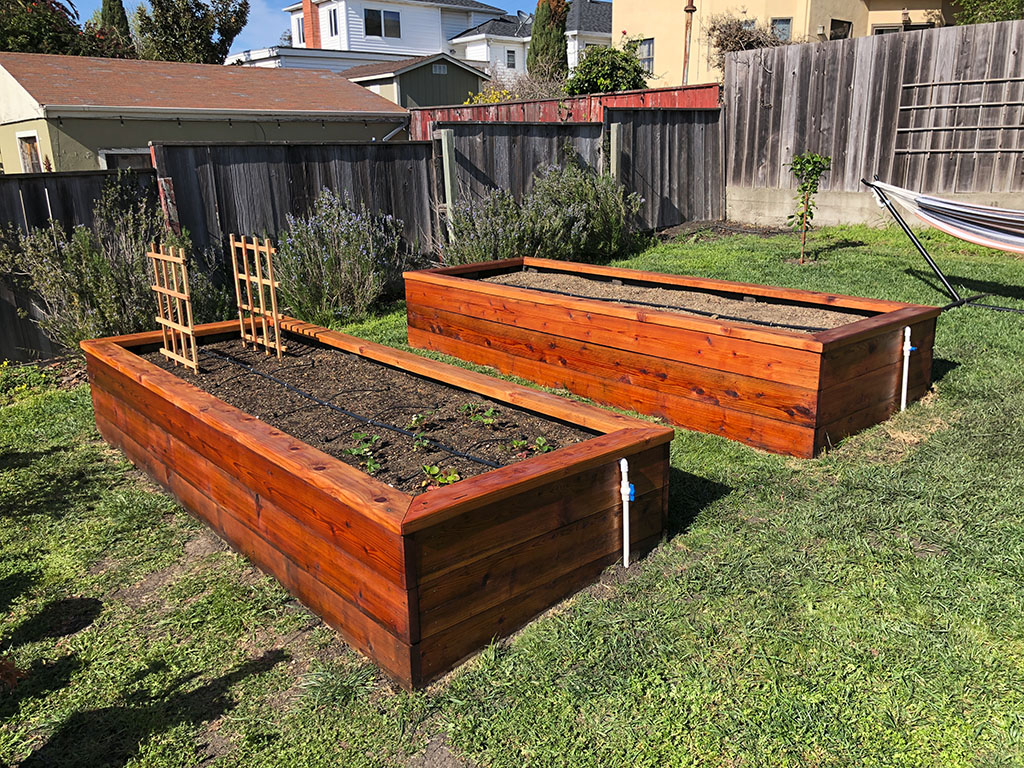
These have been in place for a bit over a year now and aside from having to add more soil this year, after it all settled a bit, everything has been working great!
Thanks for reading!
As a result, we decided to put some time and money into building raised beds, so we could have better soil and easier access to the garden (and less lawn to mow). I wanted to keep it fairly simple, but still have them look nice, provide plenty of planting space and I had a hunch that I could tap into the existing back yard sprinkler system in order to automate irrigation. With those things in mind, I mocked up my back yard and proposed garden beds in a 3d modeling package, and got something like this:
That also allowed me to figure out how much wood I would need and in what dimensions, so I could order it from the lumber yard. The sides of the beds were to be made from 12’ long 2x8’s and the caps are 2x6’s, with 4x4 posts for the corners and 2x4 braces. I choose to go with all redwood on this projects, since all of the wood was to be in constant contact with soil and weather. Since I planned on growing food in these beds, I didn’t want to go with pressure-treated lumber, due to concerns about the chemicals leeching into the soil over time.
Here’s my starting lumber pile in the garage:
I set myself up a miter station in the back yard and also measured out where exactly the beds were to be located (those little blue flags in the background are my makeshift corner markers.
I also knew that I wanted the beds to be level, but the entire back yard has a slope to it. This meant digging into the yard so that the front edge of each bed would meet the ground and the back edge would go down into the soil. Here you can see my process. I put two of the posts and one cross bar together, so that I could dig into the ground and get it level.
I did the same thing for the far end, and after a great deal of digging, got the long boards in place and leveled as well.
At the end of the first day, I had the two beds in place and mostly put together. Each of these measures about 12’ long by 4’ wide.
During that digging, I also figured out where the underground sprinkler pipe should be and dug down to it for later access. Here you can see how it runs underneath one of the beds.
The next day I added the caps, mostly to make the beds a little more comfortable to use. My wife and I also spent a few hours sanding the exteriors of the beds in order to smooth them out a bit and make the redwood a bit nicer to look at. Here you can see the sanded beds.
And an end view to show the change in elevation vs the ground.
A week or so later this truck showed up and dumped a couple cubic yards of garden soil onto a tarp in our driveway. It turns out that it takes a LOT of soil to fill two 12x4’ beds.
Thus began what I think might have been the most backbreaking day of labor in my entire life. Since the driveway is in front of our house and there is no way to get that truck any closer to the beds, all of the soil needed to be loaded into a wheelbarrow and pushed around the house, up this little makeshift ramp and then emptied over the edge of the beds. All that soil was HEAVY. It also took a good six hours of heavy lifting to get it all moved. I could barely move at the end of the day.
But look how nice the beds are when filled with fresh soil! No eldritch horror carrots from THESE beds!
Next step was to dig a little trench for irrigation and tap into the sprinkler line. This was all pretty simple PVC pipe work, but I did discover that there wasn’t enough water pressure to run BOTH the lawn sprinklers and the bed irrigation. Sorry middle-of-the-lawn, but no more water for you! Fortunately, the pipe in question only fed four sprinklers, one of which was now under a couple feet of soil and another of which would just be spraying the side of the new bed. Overall this leaves a little gap right in the middle of the lawn that doesn’t get water in the summer, but that’s not too big a deal.
As you can see below, I just diverted the underground pipe up to the upper bed and then added a T joint in order to get a line down to the lower bed. I also added cutoff valves in case I didn’t want to water one bed for some reason. It doesn’t really ever get below freezing here in Northern California, so no real need to worry about pipes freezing in the winter or anything like that.
The final result! Here you can see some strawberries planted, pea trellises in place and a coat of deck sealer on the outside of all the wood.
These have been in place for a bit over a year now and aside from having to add more soil this year, after it all settled a bit, everything has been working great!
Thanks for reading!