
March 2011
Wing Skids and Tail Parts
27 - March - 2011 - 20:07
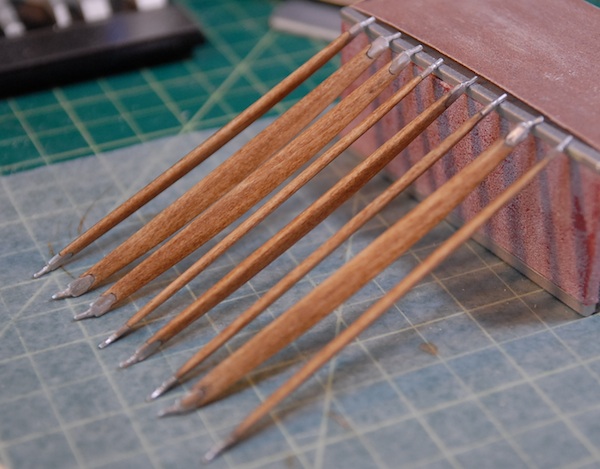
As the building continues, I've finally completed all the little details on the wings. There were lots of little metal fittings, bits of rigging, and wooden supports that go along with the wings that all needed to be built before I moved on. For example, you can see below, the supports that go between the upper and lower wings. These were made from laser cut basswood with cast metal fittings on each end. Unfortunately, the notches that the cast metal fit into were not laser cut into the parts, so these took quite a bit of carving, sanding and filing in order to shape the wooden parts correctly. Once the metal parts were fitted, then the wooden middle needed to be sanded round and the metal ends polished to a shine.
In this image, the parts are drying after having been stained to match the rest of the model.
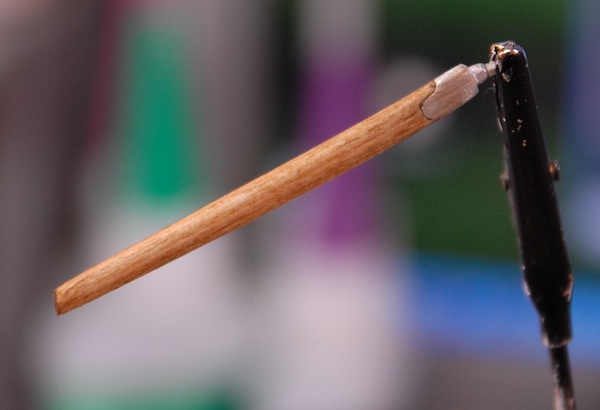
Similarly, the below part is the support that goes between the upper center wing section and the top of the fuselage. A similar carving/sanding/filing technique was required on these in order to get the metal end fittings integrated.
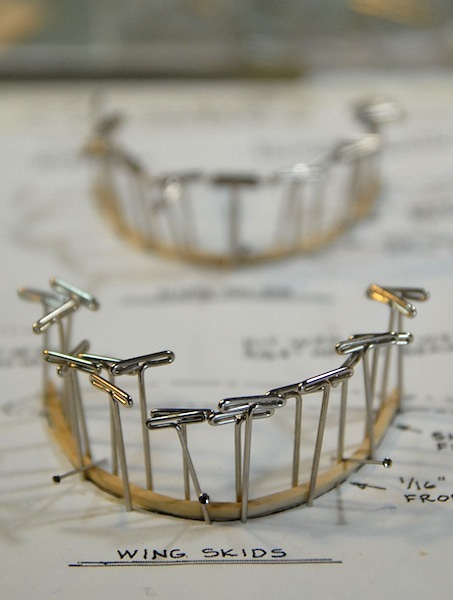
Also on the list of odds and ends were the skids that go on the bottom of the lower wings. On the real plane these were installed to help prevent catching a wing tip on a messy landing. On the model, they are made from a bent piece of wood. Since this bend was somewhat extreme, given that it was a 1/16" x 1/16" piece of wood, I decided to try a few new techniques for prepping the wood for bending. I tried wrapping it in a wet paper towel and then microwaving that, but didn't really have any luck there. Finally I just settled on good old fashioned soaking of the wood for an hour or so each. Below you can see the wood parts pinned down to the plans as they dry.
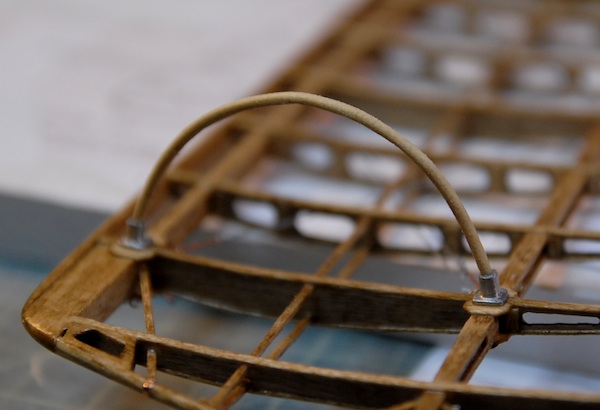
And here are the skids installed on the bottom of the wing, prior to stain and polyurethane.
That pretty much wrapped up the miscellaneous wing parts (there were a few others, like the king posts on the upper wings, but I don't have photos of those), so I finally got to move along to some non-wing parts.
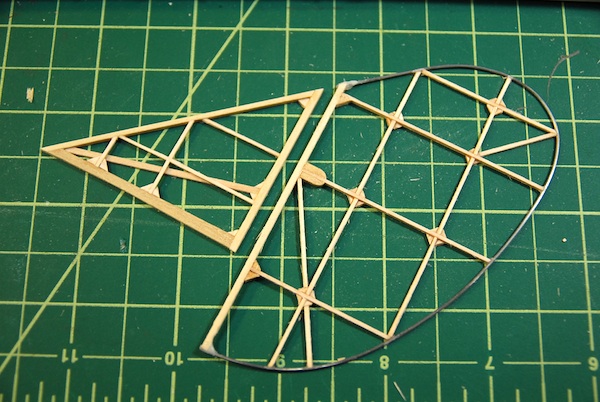
First on the list are the tail surfaces. I started with the vertical stabilizer and rudder. The vertical stabilizer was a quick build, since it was just strip wood, pinned over the plan and glued in place. The rudder was a little more complicated, but still fairly simple. Like the wings, the rudder has a trailing edge made of bent wire. I used the same technique as I had previously to make the wire easier to work with. This involved annealing the wire, using a cooking torch (like for making creme brulee) to get the wire red hot and then let it cool back down again. This makes it a bit softer after it cools and easier to work with.
Below you can see the bent wire pinned in place and shimmed off the plans just a bit (so that it is centered to the leading edge) with the first of the ribs glued in place.

I've just finished the rudder, which was also pretty much just simple strip wood, cut, sanded and glued in place. Below you can see the completed parts. They still need to be stained, polyurethaned and then fitted with a few metal parts, but that'll come later, once the elevator is done. I've got to wait until the elevator is done because the bottom of the vertical stabilizer needs to be sanded to fit the top of the elevator so they both need to be complete before I can do the final fitting and then stain, etc.
The finished parts:
In this image, the parts are drying after having been stained to match the rest of the model.
Similarly, the below part is the support that goes between the upper center wing section and the top of the fuselage. A similar carving/sanding/filing technique was required on these in order to get the metal end fittings integrated.
Also on the list of odds and ends were the skids that go on the bottom of the lower wings. On the real plane these were installed to help prevent catching a wing tip on a messy landing. On the model, they are made from a bent piece of wood. Since this bend was somewhat extreme, given that it was a 1/16" x 1/16" piece of wood, I decided to try a few new techniques for prepping the wood for bending. I tried wrapping it in a wet paper towel and then microwaving that, but didn't really have any luck there. Finally I just settled on good old fashioned soaking of the wood for an hour or so each. Below you can see the wood parts pinned down to the plans as they dry.
And here are the skids installed on the bottom of the wing, prior to stain and polyurethane.
That pretty much wrapped up the miscellaneous wing parts (there were a few others, like the king posts on the upper wings, but I don't have photos of those), so I finally got to move along to some non-wing parts.
First on the list are the tail surfaces. I started with the vertical stabilizer and rudder. The vertical stabilizer was a quick build, since it was just strip wood, pinned over the plan and glued in place. The rudder was a little more complicated, but still fairly simple. Like the wings, the rudder has a trailing edge made of bent wire. I used the same technique as I had previously to make the wire easier to work with. This involved annealing the wire, using a cooking torch (like for making creme brulee) to get the wire red hot and then let it cool back down again. This makes it a bit softer after it cools and easier to work with.
Below you can see the bent wire pinned in place and shimmed off the plans just a bit (so that it is centered to the leading edge) with the first of the ribs glued in place.
I've just finished the rudder, which was also pretty much just simple strip wood, cut, sanded and glued in place. Below you can see the completed parts. They still need to be stained, polyurethaned and then fitted with a few metal parts, but that'll come later, once the elevator is done. I've got to wait until the elevator is done because the bottom of the vertical stabilizer needs to be sanded to fit the top of the elevator so they both need to be complete before I can do the final fitting and then stain, etc.
The finished parts:
And One Month Later....
13 - March - 2011 - 19:52
The wings are all rigged and nearly complete!
After a few weeks of tying tiny little copper fitting to short lengths of string, I managed to tie at least a few on to the model itself. I managed to come up with a fairly successful system where I tied all of the string to the little copper turnbuckles first and then tied them to the wing itself. I originally was doing one string at a time, tying the turnbuckle to the string and then the string to the model, but found this to be pretty slow going.
Here you can see a bunch of the pre-tied turnbuckles ready to go onto the lower wing panels. I have found that some of my ship-modeling skills have been helpful when it comes to knots and such.
Once I had all of the rigging in the wings complete, then it was time to add various other copper and white metal fittings. This gave me the opportunity to use a new toy I purchased at the beginning of this project. It is a 'Hold and Fold' photo-etch workstation from the nice folks at The Small Shop. As you can see in the photo, it is a billet aluminum clamp-like device that let's me clamp a bit of photo-etched metal down (very precisely) and then fold it using that great big razor blade. I got to use it a bit today to crease some of the rigging plate things that go on to the wings and will eventually be clamped between the wing and the posts that connect the two wings.
Once I had all of the rigging in the wings complete, then it was time to add various other copper and white metal fittings. This gave me the opportunity to use a new toy I purchased at the beginning of this project. It is a 'Hold and Fold' photo-etch workstation from the nice folks at The Small Shop. As you can see in the photo, it is a billet aluminum clamp-like device that let's me clamp a bit of photo-etched metal down (very precisely) and then fold it using that great big razor blade. I got to use it a bit today to crease some of the rigging plate things that go on to the wings and will eventually be clamped between the wing and the posts that connect the two wings.
I also spent a bit of time filing, sanding and polishing a few cast white metal parts which were put together to become the little pulleys that control the ailerons. I've still got two more to add, but here are the tops ones in place:
That's all for now! With the wings nearly complete, I'll soon be moving on to the tail parts. Until next time.