
August 2011
Engine Is In the Plane!
22 - August - 2011 - 21:24
At long last, tonight I mounted the engine to the fuselage!
Here are a few images showing how I got there.
First, I made a few more 'springs' for the rockers and such.

That gave me the parts to finish up the cylinder assemblies.
Next up was the polishing and mounting of the exhaust headers.
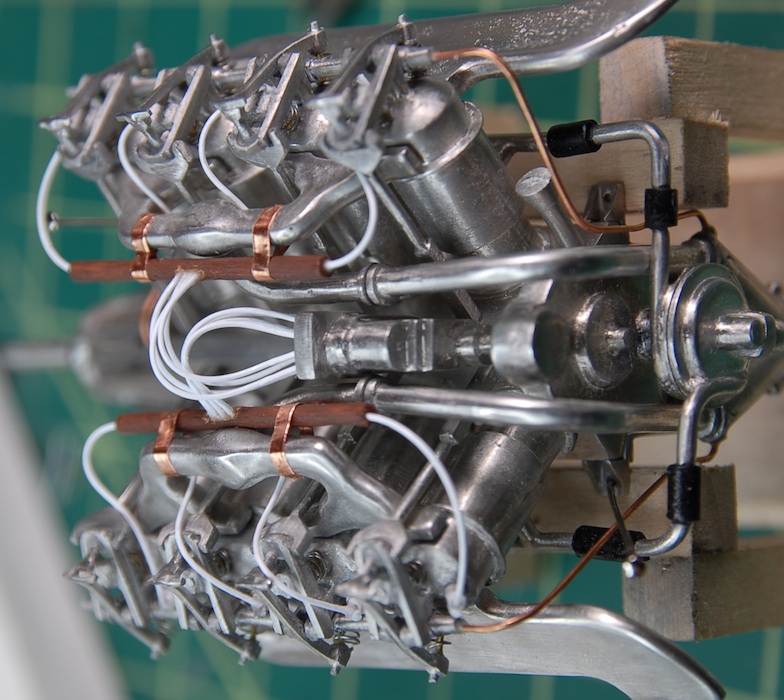
After that was a bit of wiring. This was tricky, as the instructions just mentioned gluing the wires to the spark plugs. Except that, in reality, the wire is very stiff and wouldn't stay glued to the plug tips. Anticipating this issue, I drilled tiny holes in the side of each plug and glued the wire tips into these holes. This was a bit of a pain, but seemed to work out decently. Next up were some little dowels, painted brown, to simulate the fiber tubes that collected and routed the plug wires on their way to the magneto. Finally, there were another eight wires that came out of the dowels and into the magneto.
With that step complete, the next step was to mount the engine to the fuselage. While the engine isn't quite complete, all of the remaining steps require that the engine be in the plane, as they mostly involve various tubing and wiring.
Ta Da!
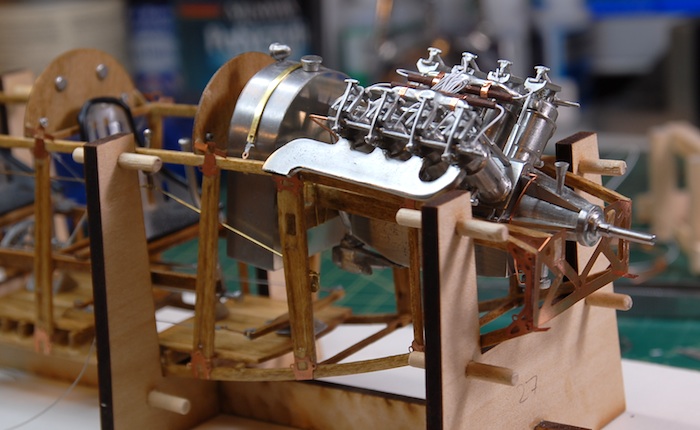
Next up: Wiring, tubes, the radiator and propeller.
Here are a few images showing how I got there.
First, I made a few more 'springs' for the rockers and such.
That gave me the parts to finish up the cylinder assemblies.
Next up was the polishing and mounting of the exhaust headers.
After that was a bit of wiring. This was tricky, as the instructions just mentioned gluing the wires to the spark plugs. Except that, in reality, the wire is very stiff and wouldn't stay glued to the plug tips. Anticipating this issue, I drilled tiny holes in the side of each plug and glued the wire tips into these holes. This was a bit of a pain, but seemed to work out decently. Next up were some little dowels, painted brown, to simulate the fiber tubes that collected and routed the plug wires on their way to the magneto. Finally, there were another eight wires that came out of the dowels and into the magneto.
With that step complete, the next step was to mount the engine to the fuselage. While the engine isn't quite complete, all of the remaining steps require that the engine be in the plane, as they mostly involve various tubing and wiring.
Ta Da!
Next up: Wiring, tubes, the radiator and propeller.
Engine Updates
07 - August - 2011 - 20:19
As some may have noticed, it has been quite a while since my last update. Those same some might be thinking, "Oh, it just another blog, where the updates get further and further apart." I would like to rebut that with, "Balderdash! The updates have been sparse recently because I am in the midst of wedding planning and have had very little time for modeling, let alone model blogging!"
With that said, I got a bit of time this weekend to do a little bit of modeling, and got the model desk reassembled (the web cam part had been taken apart for wedding related reasons). Once things were back in order, cleaned up and ready to roll, I managed to test out an idea I had been toying around with for some upgrades to the engine, and I think they turned out pretty well. But first, let's get up to date with the state of the model.
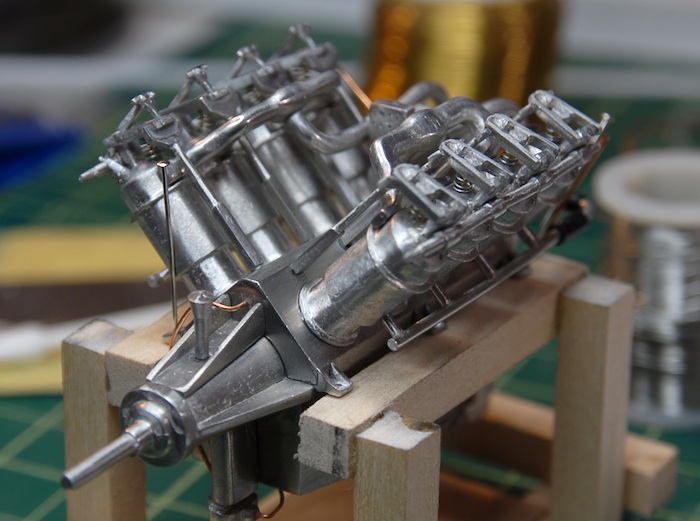
When last I wrote about it, the engine was just beginning assembly, with the large pieces coming together. The next step in the process was to add the cylinders. Here are a few of them, sanded and polished and ready to be epoxied to the engine block.
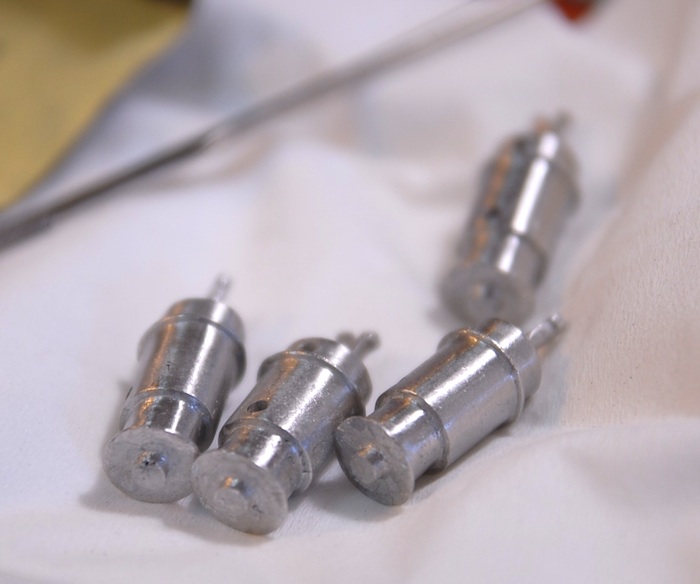
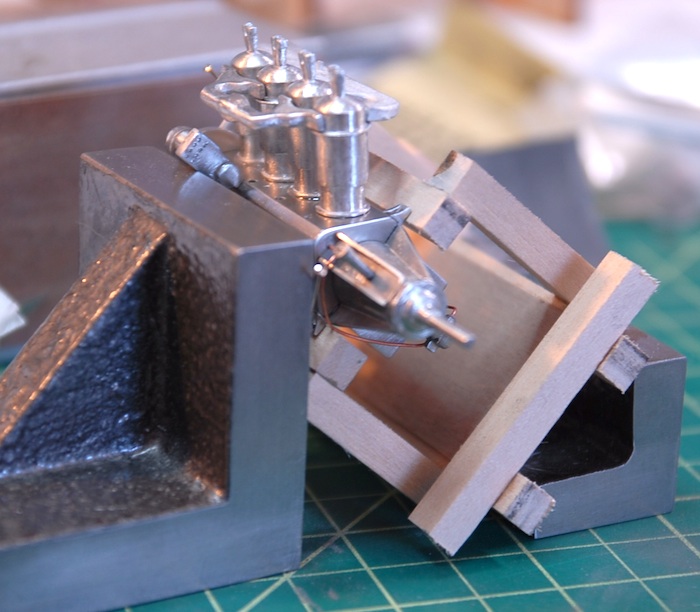
In order to get them all properly aligned (there is a bit of slop in the attachment points on the engine block), the directions recommended using the intake runner and exhaust headers to insure that everything will align later on. In order to make this easier, I set the whole engine assembly up so that the cylinders balanced on the top while the epoxy set.
And then the other side:

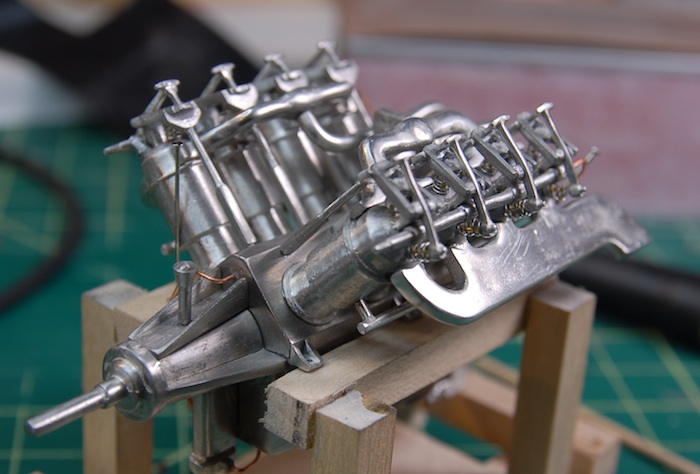
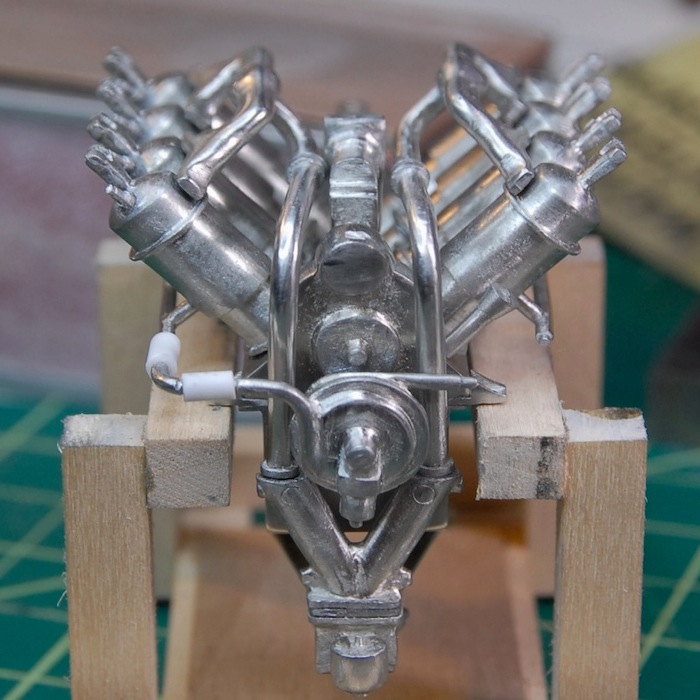
After the cylinders were all in place, I added on the water inlet piping and the air intakes.

Along with those, there were other miscellaneous pipes that got added. Below you can see the test-fit of the intermediate piping. The kit came with some clear rubber tubing for these parts, but since rubber tubing is a pain to paint, AND I already had various sizes of styrene tubing, I decided to go with the hard styrene tubes, cut to length.
That tubing was then painted black and glued in place on both sides.
This brings me to the previously-mentioned upgrade. The kit has various pushrods, rockers and such for the top of each cylinder. Cast into two of those parts are 'springs' that I felt were not satisfactory. The castings were shallow and hardly looked like springs at all. So, I decided that I could replace the springs with a center rod and some wound wire that looks like a spring. I wound some very thin wire that I had left from a previous kit around a mandrel tool, and cut some lengths of thicker brass wire for the centers. I cut off the cast springs, filed everything clean and drilled some tiny holes to keep the center rods in place.
Here are the results on my first test cylinder:
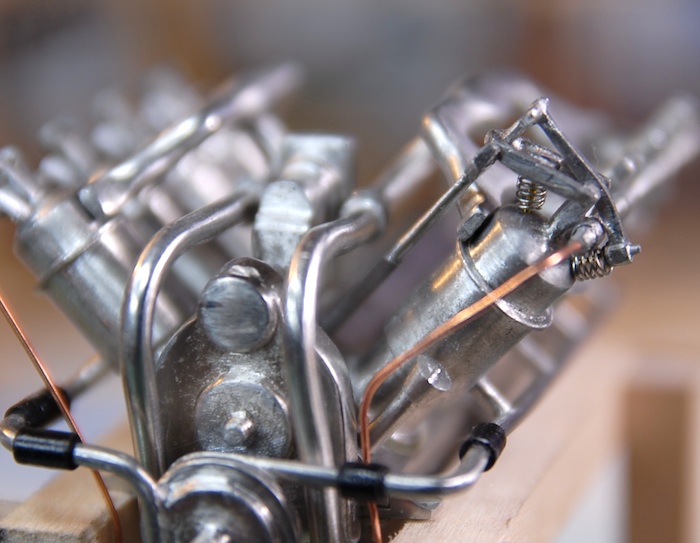
I think these look much more like the real engine. I've got a pile of photo reference of the engine that I have collected and have found it very useful to refer to while building.
And that brings us up to the present. I've got two of the eight cylinders done with the springs, as of tonight, and hopefully I can continue with this during the week and next weekend.The next update should see the engine mounted on the fuselage! Stay tuned!
With that said, I got a bit of time this weekend to do a little bit of modeling, and got the model desk reassembled (the web cam part had been taken apart for wedding related reasons). Once things were back in order, cleaned up and ready to roll, I managed to test out an idea I had been toying around with for some upgrades to the engine, and I think they turned out pretty well. But first, let's get up to date with the state of the model.
When last I wrote about it, the engine was just beginning assembly, with the large pieces coming together. The next step in the process was to add the cylinders. Here are a few of them, sanded and polished and ready to be epoxied to the engine block.
In order to get them all properly aligned (there is a bit of slop in the attachment points on the engine block), the directions recommended using the intake runner and exhaust headers to insure that everything will align later on. In order to make this easier, I set the whole engine assembly up so that the cylinders balanced on the top while the epoxy set.
And then the other side:
After the cylinders were all in place, I added on the water inlet piping and the air intakes.
Along with those, there were other miscellaneous pipes that got added. Below you can see the test-fit of the intermediate piping. The kit came with some clear rubber tubing for these parts, but since rubber tubing is a pain to paint, AND I already had various sizes of styrene tubing, I decided to go with the hard styrene tubes, cut to length.
That tubing was then painted black and glued in place on both sides.
This brings me to the previously-mentioned upgrade. The kit has various pushrods, rockers and such for the top of each cylinder. Cast into two of those parts are 'springs' that I felt were not satisfactory. The castings were shallow and hardly looked like springs at all. So, I decided that I could replace the springs with a center rod and some wound wire that looks like a spring. I wound some very thin wire that I had left from a previous kit around a mandrel tool, and cut some lengths of thicker brass wire for the centers. I cut off the cast springs, filed everything clean and drilled some tiny holes to keep the center rods in place.
Here are the results on my first test cylinder:
I think these look much more like the real engine. I've got a pile of photo reference of the engine that I have collected and have found it very useful to refer to while building.
And that brings us up to the present. I've got two of the eight cylinders done with the springs, as of tonight, and hopefully I can continue with this during the week and next weekend.The next update should see the engine mounted on the fuselage! Stay tuned!