
Fuselage Continues
09 - May - 2011 - 20:27
In the last post, I mentioned that I was not happy with the construction method used in the kit instructions to make the mortised fuselage ribs. The instructions wanted the ribs to be cut from a solid piece and the mortises carved out from those. I made one test piece and found that: a) this is really hard b) the wood that the kit came with for these parts was not the best quality, and tended to flake apart during the carving and c) the final product, because of a and b, was simply not as refined and clean as I would like.
So, what I ended up doing was to get three strips of wood, cut the mortise shape out of two of them, and then sandwich them all together to create a much better looking part. Below you can see what I ended up with, as it is being glued to one half of the fuselage.
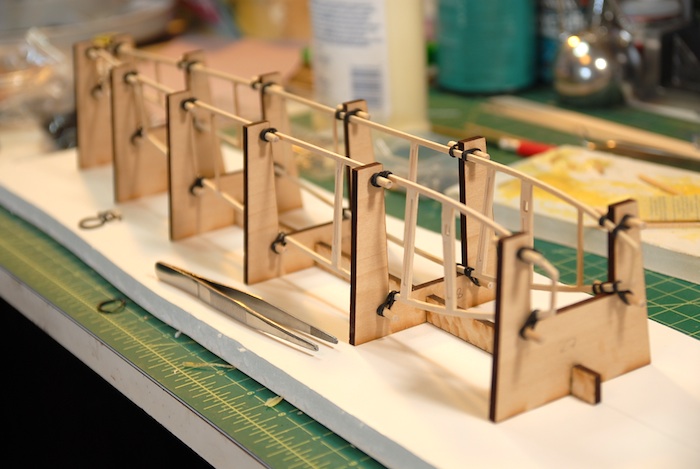
Once I got those parts all made, putting together the two sides of the fuselage went pretty quickly. Below you can see the two sides attached to the fuselage building jig, which holds everything straight and square while the cross pieces are glued in.
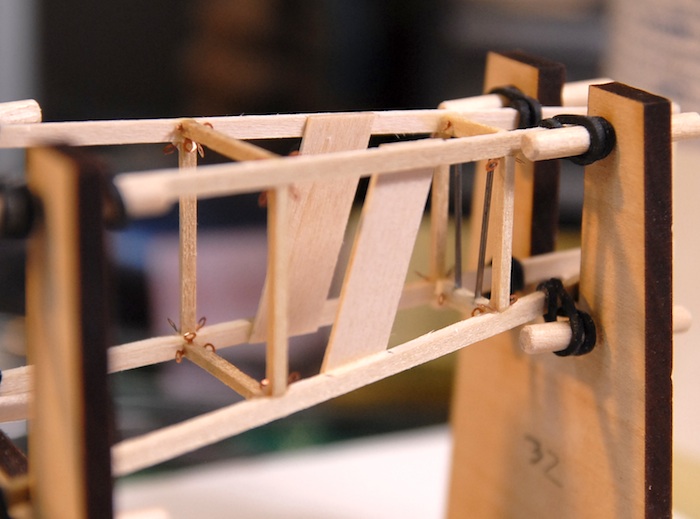
On the real plane, the top longerons (supposedly a real word) are spliced together behind the cockpit. I'm assuming this is because either a piece of wood that long was tricky to find, or perhaps the front of the plane needed wood of a different type that the tail did. Either way, my whole plane is made of basswood, and it's actually pretty easy to find a 16" long strip of wood, so I don't have to put in a real splice. Instead, the instructions had me wrap a section in thin nylon cord, to give the look of a spliced section.

At the tail of the fuselage, there are a number of additions that are meant to strengthen the structure around the tail skid. For my purposes, this just meant a couple thick strips on the sides and a few steel wires in between the top and bottom.
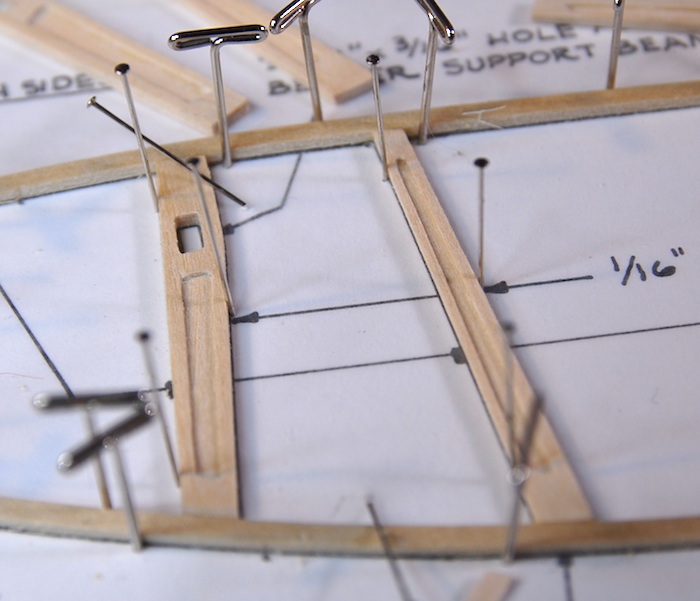
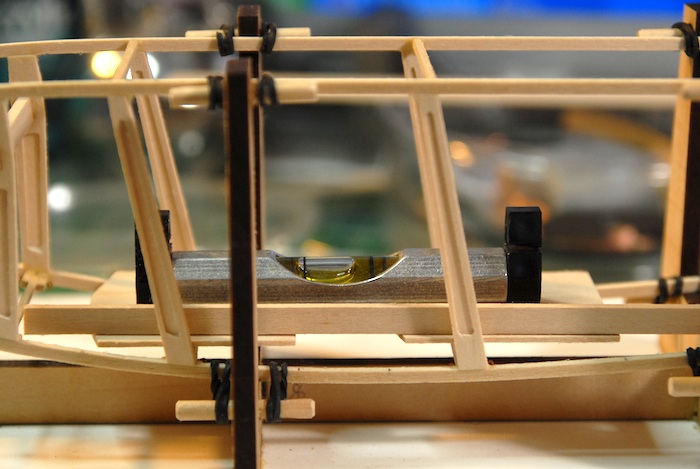
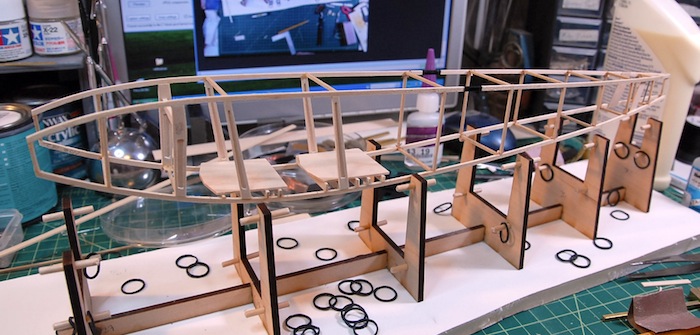
It was at this point that I found that I am going to need to start skipping sections of the instructions in order to facilitate the stain and polyurethane that I am putting on the model. I need to get as much of the wooden parts together, skip the addition of various metal parts, and still try to leave it all open enough that adding the metal parts later is easy. So, at this point I've skipped adding some of the engine mounting hardware because of the large photo-etch parts that that would require and have, instead, moved on to installing the cockpit flooring. Below you can see my efforts to get the two floors relatively level before fitting all the support beams underneath them.
Finally, here is the fuselage out of the building jig, and with the floor support beams in place. There is still lots of work to be done on the fuselage, but actually only a few more steps before I stain the whole thing and apply the polyurethane.
That's all I've got for now. Stay tuned for more action-packed model-building chronicles!!
So, what I ended up doing was to get three strips of wood, cut the mortise shape out of two of them, and then sandwich them all together to create a much better looking part. Below you can see what I ended up with, as it is being glued to one half of the fuselage.
Once I got those parts all made, putting together the two sides of the fuselage went pretty quickly. Below you can see the two sides attached to the fuselage building jig, which holds everything straight and square while the cross pieces are glued in.
On the real plane, the top longerons (supposedly a real word) are spliced together behind the cockpit. I'm assuming this is because either a piece of wood that long was tricky to find, or perhaps the front of the plane needed wood of a different type that the tail did. Either way, my whole plane is made of basswood, and it's actually pretty easy to find a 16" long strip of wood, so I don't have to put in a real splice. Instead, the instructions had me wrap a section in thin nylon cord, to give the look of a spliced section.
At the tail of the fuselage, there are a number of additions that are meant to strengthen the structure around the tail skid. For my purposes, this just meant a couple thick strips on the sides and a few steel wires in between the top and bottom.
It was at this point that I found that I am going to need to start skipping sections of the instructions in order to facilitate the stain and polyurethane that I am putting on the model. I need to get as much of the wooden parts together, skip the addition of various metal parts, and still try to leave it all open enough that adding the metal parts later is easy. So, at this point I've skipped adding some of the engine mounting hardware because of the large photo-etch parts that that would require and have, instead, moved on to installing the cockpit flooring. Below you can see my efforts to get the two floors relatively level before fitting all the support beams underneath them.
Finally, here is the fuselage out of the building jig, and with the floor support beams in place. There is still lots of work to be done on the fuselage, but actually only a few more steps before I stain the whole thing and apply the polyurethane.
That's all I've got for now. Stay tuned for more action-packed model-building chronicles!!
blog comments powered by Disqus