
Cockpit Fittings
19 - June - 2011 - 21:45
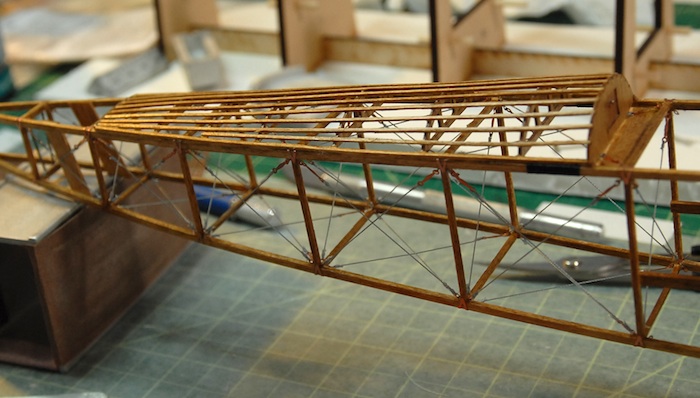
Picking up from the last post, the rigging for the fuselage is complete between the tail and the cockpit. I've left off around the cockpit so that it is easier to add various fittings, seats, etc.
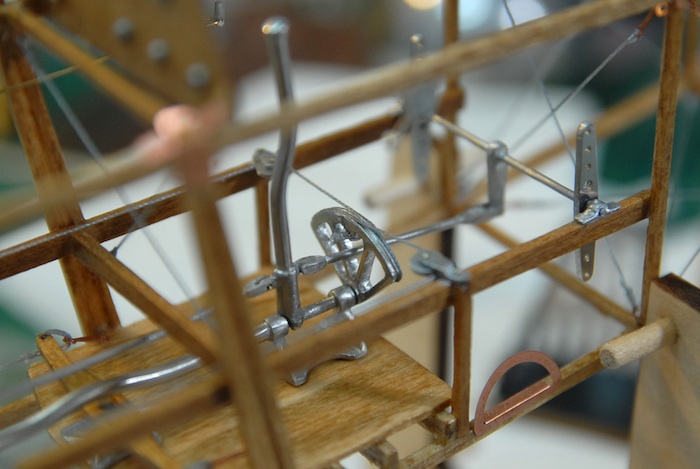
First up in the fittings were the rudder pedals and their connections and mounting points.
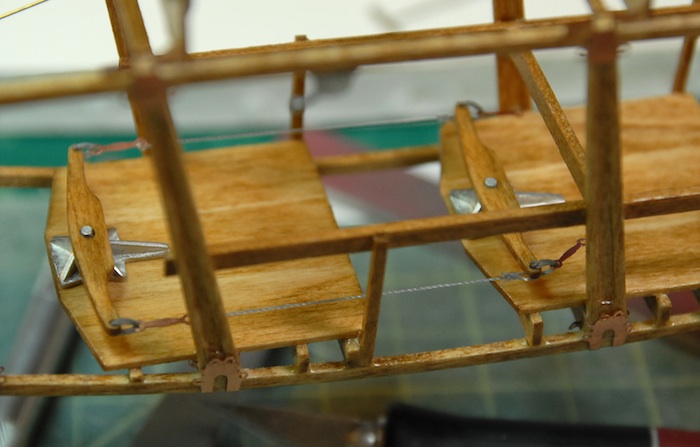
Those were followed by the control sticks and their various connections.
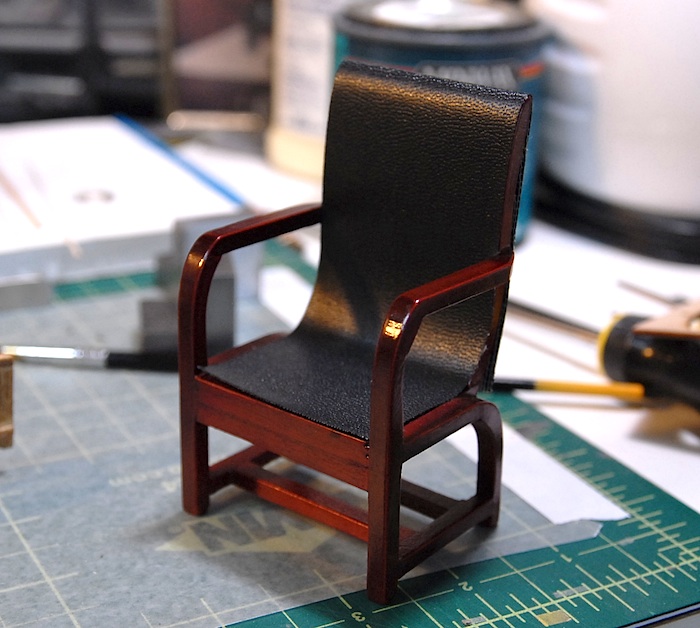
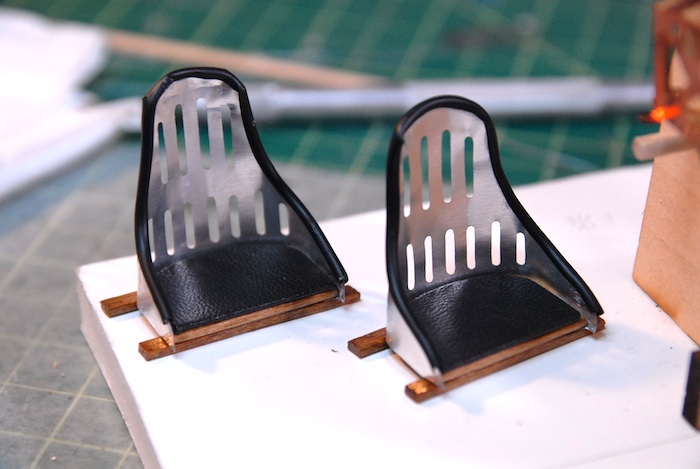
Next up were the seats. The kit came with photo-etch metal backs and wooden seats. The instructions mentioned that the real seats were covered with cloth on the backs and had pads on the seats. I decided that I should add a few of those extras to the seats on my plane. I had some tubing left over from a previous model that I used to line the edges of the seat backs. I feel that this had mixed results and I am not entirely happy with the results. For the cushions, I decided that I would find some leather-like fabric and wrap that around some wood.
I went to my local hobby shop in search of such a material, but they didn't have anything like that for purchase. But I DID notice a dollhouse chair there, for about $8, that had the type of material that I was looking for. So, I decided that instead of going store to store, looking for what I wanted, I would just buy the chair and strip the cloth off of it.
Behold, the sacrificial chair:
And the end result of my chair-enhancing efforts:
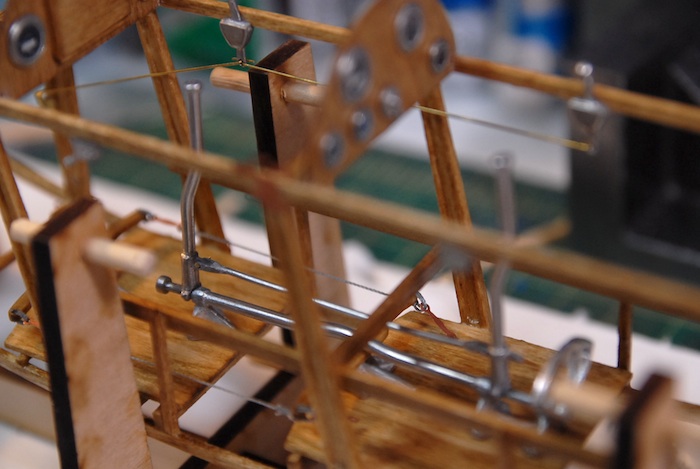
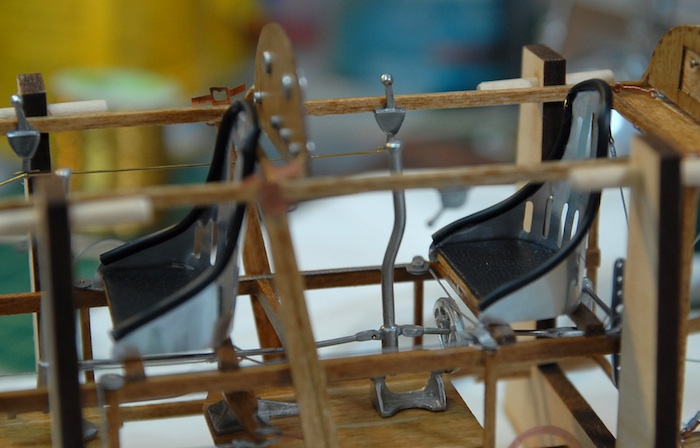
Before installing the chairs into the cockpits, I had to do just a bit of rigging. Here you can see the aileron control wires.
And finally, the seats installed.
With this done, I'm moving on to the engine and fuel tank. It's a fun-filled world of cast metal and sanding/polishing. Stay tuned for further adventures!
First up in the fittings were the rudder pedals and their connections and mounting points.
Those were followed by the control sticks and their various connections.
Next up were the seats. The kit came with photo-etch metal backs and wooden seats. The instructions mentioned that the real seats were covered with cloth on the backs and had pads on the seats. I decided that I should add a few of those extras to the seats on my plane. I had some tubing left over from a previous model that I used to line the edges of the seat backs. I feel that this had mixed results and I am not entirely happy with the results. For the cushions, I decided that I would find some leather-like fabric and wrap that around some wood.
I went to my local hobby shop in search of such a material, but they didn't have anything like that for purchase. But I DID notice a dollhouse chair there, for about $8, that had the type of material that I was looking for. So, I decided that instead of going store to store, looking for what I wanted, I would just buy the chair and strip the cloth off of it.
Behold, the sacrificial chair:
And the end result of my chair-enhancing efforts:
Before installing the chairs into the cockpits, I had to do just a bit of rigging. Here you can see the aileron control wires.
And finally, the seats installed.
With this done, I'm moving on to the engine and fuel tank. It's a fun-filled world of cast metal and sanding/polishing. Stay tuned for further adventures!
blog comments powered by Disqus