
1955 Chris-Craft Cobra
15 - May - 2016 - 21:47
Back at the end of 2015, I was in Orlando, Florida, visiting Disney World (taking advantage of a perk of working for the mouse: free park entry!). One of the restaurants in Disney Springs (formerly Downtown Disney) was just FILLED with great looking large scale boat and ship models. I was inspired to take up a wooden model project again, except this time I wanted it to end up shiny. After a bit of research, I narrowed it down to a handful of possible kit options. Mostly I was looking at kits from Dumas, as they have some great looking Chris-Craft speedboat kits. I spent a Saturday morning making the rounds at my local hobby shops (living in the SF Bay Area, there are a few to choose from) and managed to find this kit:
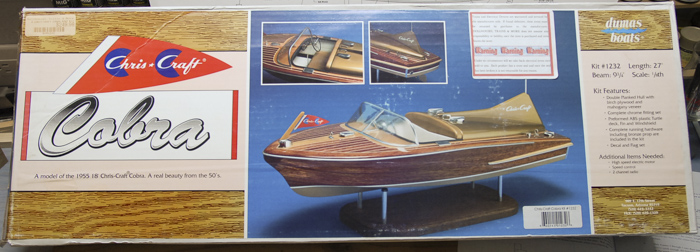
With a length of 27 inches, it’s a fairly large scale project (at least for me and my limited building space).
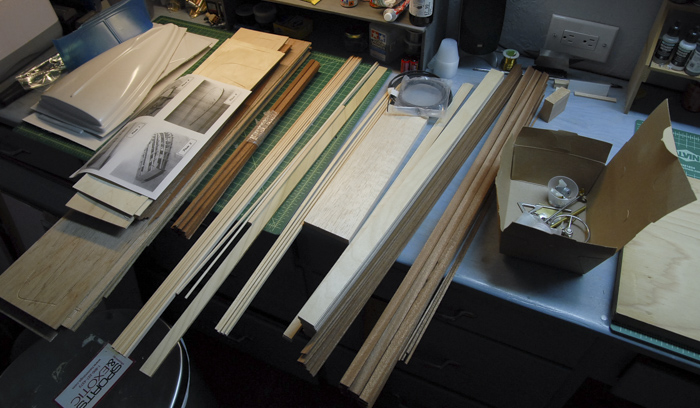
Like most kits of this type, it comes as a number of sheets of pre-cut parts, some strips of thin plywood, a bunch of strips of mahogany and bass wood, and some cast metal parts.
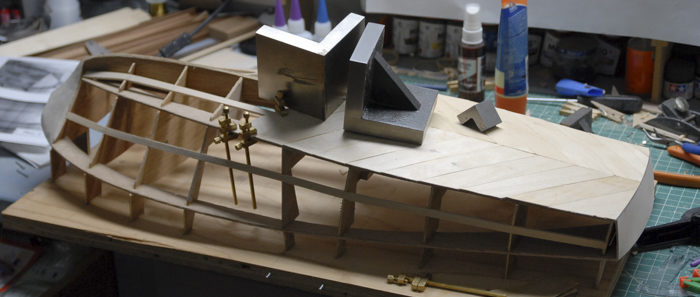
The instructions had me start by marking rib positions on a building board (spare plywood in this case) and then assembling and gluing the frame to the board.
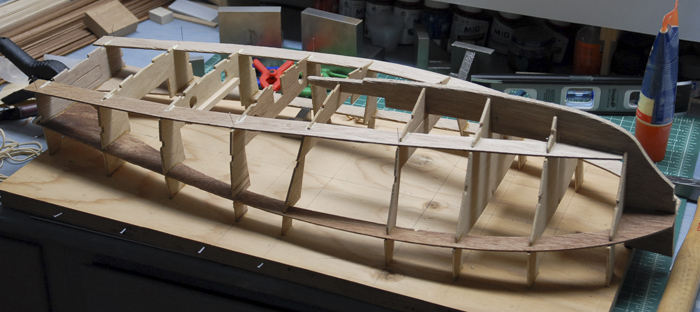
That was followed by adding a few stringers and the keel boards on the bottom of the boat.
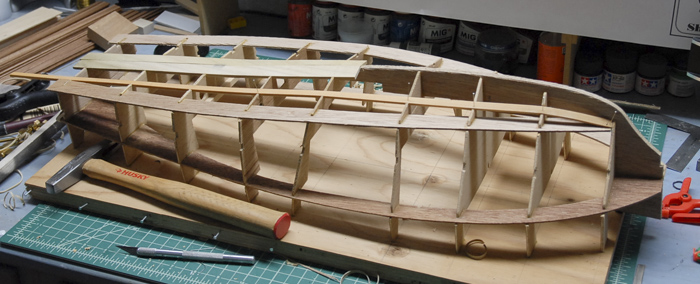
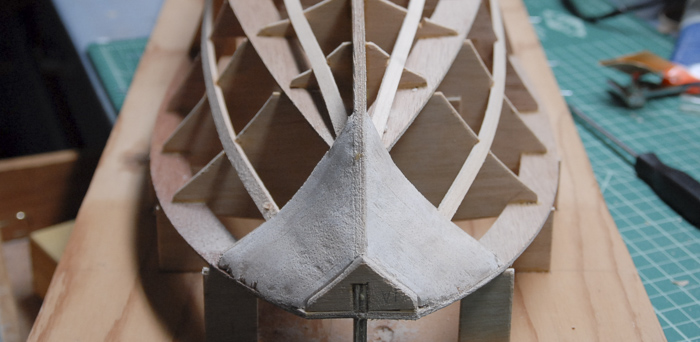
Because of the rapid change in shape between the first rib and the nose of the boat, the front is shaped from balsa. The kit came with a sheet of half-inch-thick balsa that was cut into triangles and glued in place. Below you can see the rough blocks glued in place. I had to use a little bit of spare balsa that I had laying around in order to fill the space all of the way (those thin sheets right at the front).
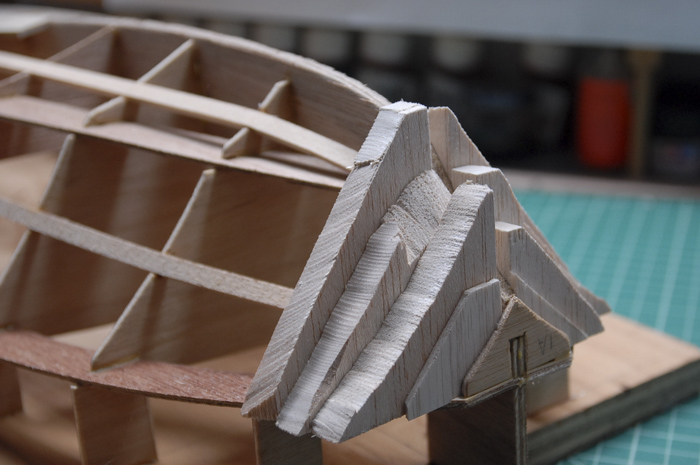
Below you can see the rough shaping. This was done using first a jewelers saw to cut off big chunks of the wood, then a sanding drum on a Dremel for fast shaping and then finally some 150 grit sandpaper for finer shaping.
Next up was the under-planking. This consisted of 1/16 inch thick plywood strips that are laid diagonally on the bottom and sides of the hull. The instructions said to use a thick cyanoacrylate (super glue), but I found that when the strips needed to be bent a bit, the glue tended to not have the strength to hold the strips in place. I believe that this was mostly because there were fairly small areas in which the strips contacted the frame. I had actually started the planking and then found that I had started laying the planks going the wrong direction (dark spots in photo below was the glue that held them in place). When I discovered this, I tried to take those planks off and discovered that they came off so easily that I lost all confidence in the CA method.
I decided instead to try good ol’ yellow carpenter’s glue. This required that the strips be clamped in place while the glue dried. Once dried, though, the glue was strong and the connection between the strips and frame was solid. I ended up going with this technique for all of the under-planking. Below you can see the transom in place as well as the first few planks.

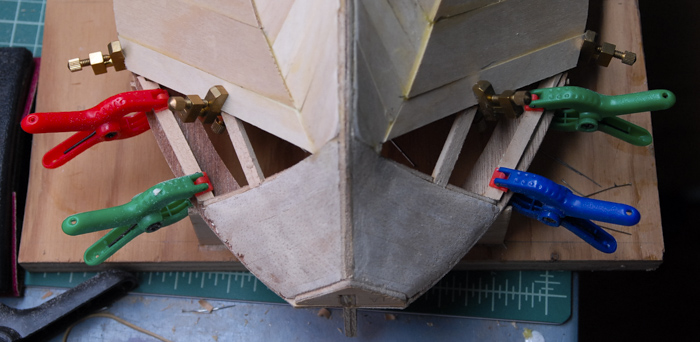
Below you can see some of the clamping and weighting I needed to do in order to hold planks in place while the glue dried. Those angle blocks weigh 3lbs each, and were providing a great deal of pressure on those planks.
A closer view of the same setup.
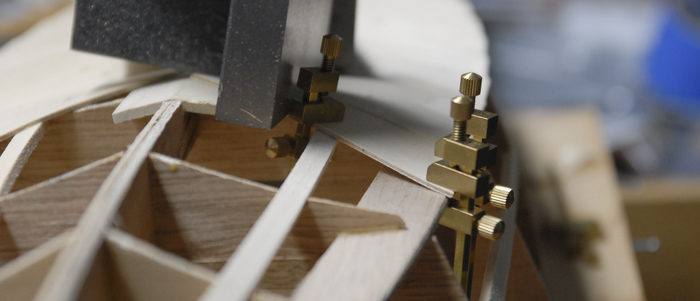
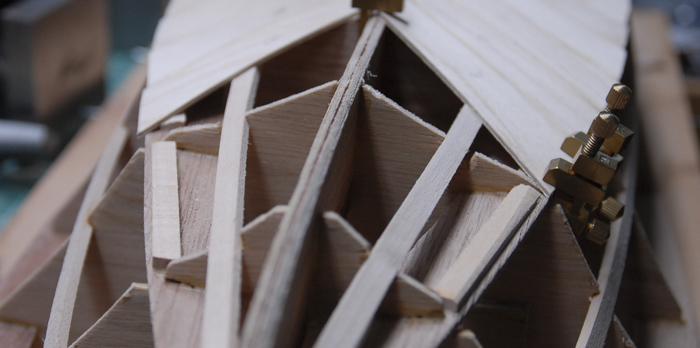
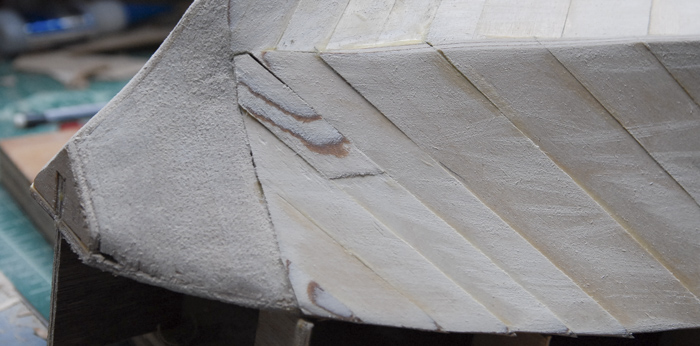
As I got closer and closer to the nose of the boat, the angle between the bottom planks and the chine (frame piece that is the line between the sides and bottom) became shallower and the area of contact between the two got smaller. What I decided to do was add a few strips of basswood, trimmed to the correct angle, in order to give more contact area. Below you can see those strips in place.
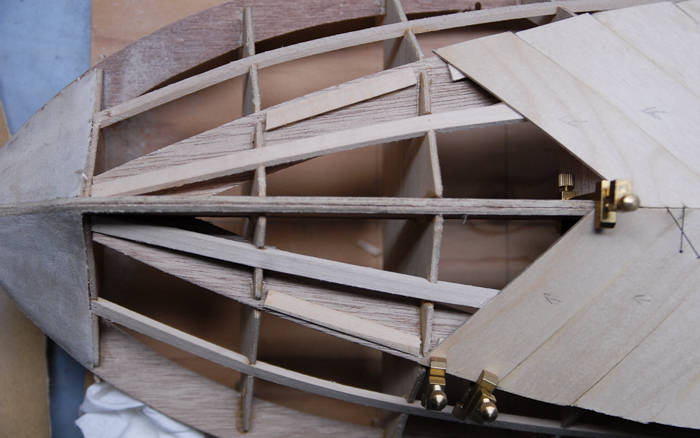
A different angle on the same strips. You can see that the left side is untrimmed, while the right side is trimmed to the angle of the strips of plywood.
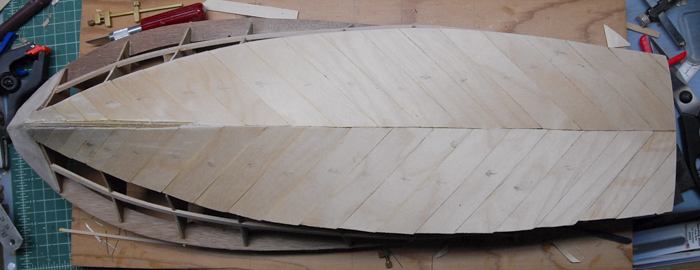
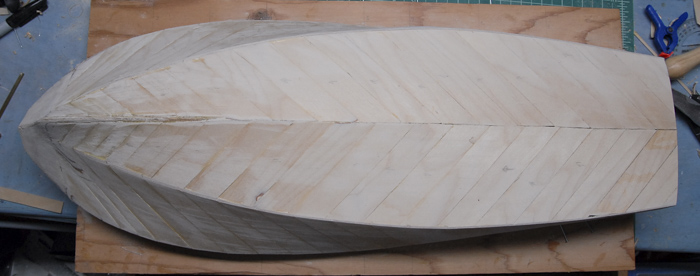
Below you can see the entire bottom of the boat with under-planking on it. The top edge in this photo has been sanded even with the angle of the side, while the bottom edge still looks ragged because it has not yet been sanded smooth.
The planking of the sides was very similar. I did attempt to use straight sewing pins as temporary nails. This worked some times and other times just resulted in lots of bent pins and plenty of cursing.
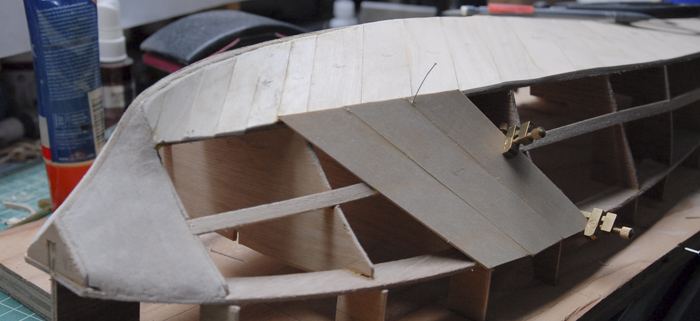
Using thinner strips of plywood near the front. The thinner strips are easier to bend and can therefore be formed to the sharper curves near the bow.
With the under-planking complete, the whole hull got a first pass of sanding.
In a few places, a plank or two ended up lower than I would like. In the case below, I added another bit of strip on top and then sanded it flush to the surrounding planks.
After that first pass of sanding, I put a thin layer of wood filler over most of the hull. This filled in gaps, leveled out the surface and gave me something to sand down in order to get things nice and smooth before the top plank layer.
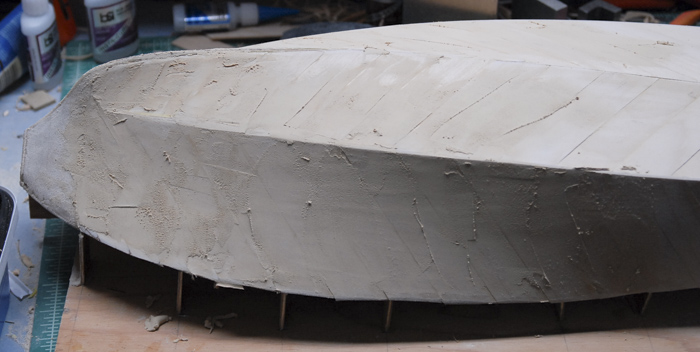
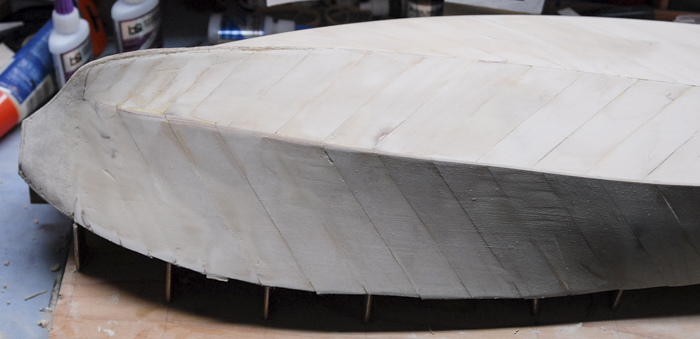
Below you can see the filled and sanded result, all ready for the mahogany plank layer.
That seems like a good place to stop for this post. The mahogany planking is nearly done, so look for that in a forthcoming blog post!
Thanks for reading!
With a length of 27 inches, it’s a fairly large scale project (at least for me and my limited building space).
Like most kits of this type, it comes as a number of sheets of pre-cut parts, some strips of thin plywood, a bunch of strips of mahogany and bass wood, and some cast metal parts.
The instructions had me start by marking rib positions on a building board (spare plywood in this case) and then assembling and gluing the frame to the board.
That was followed by adding a few stringers and the keel boards on the bottom of the boat.
Because of the rapid change in shape between the first rib and the nose of the boat, the front is shaped from balsa. The kit came with a sheet of half-inch-thick balsa that was cut into triangles and glued in place. Below you can see the rough blocks glued in place. I had to use a little bit of spare balsa that I had laying around in order to fill the space all of the way (those thin sheets right at the front).
Below you can see the rough shaping. This was done using first a jewelers saw to cut off big chunks of the wood, then a sanding drum on a Dremel for fast shaping and then finally some 150 grit sandpaper for finer shaping.
Next up was the under-planking. This consisted of 1/16 inch thick plywood strips that are laid diagonally on the bottom and sides of the hull. The instructions said to use a thick cyanoacrylate (super glue), but I found that when the strips needed to be bent a bit, the glue tended to not have the strength to hold the strips in place. I believe that this was mostly because there were fairly small areas in which the strips contacted the frame. I had actually started the planking and then found that I had started laying the planks going the wrong direction (dark spots in photo below was the glue that held them in place). When I discovered this, I tried to take those planks off and discovered that they came off so easily that I lost all confidence in the CA method.
I decided instead to try good ol’ yellow carpenter’s glue. This required that the strips be clamped in place while the glue dried. Once dried, though, the glue was strong and the connection between the strips and frame was solid. I ended up going with this technique for all of the under-planking. Below you can see the transom in place as well as the first few planks.
Below you can see some of the clamping and weighting I needed to do in order to hold planks in place while the glue dried. Those angle blocks weigh 3lbs each, and were providing a great deal of pressure on those planks.
A closer view of the same setup.
As I got closer and closer to the nose of the boat, the angle between the bottom planks and the chine (frame piece that is the line between the sides and bottom) became shallower and the area of contact between the two got smaller. What I decided to do was add a few strips of basswood, trimmed to the correct angle, in order to give more contact area. Below you can see those strips in place.
A different angle on the same strips. You can see that the left side is untrimmed, while the right side is trimmed to the angle of the strips of plywood.
Below you can see the entire bottom of the boat with under-planking on it. The top edge in this photo has been sanded even with the angle of the side, while the bottom edge still looks ragged because it has not yet been sanded smooth.
The planking of the sides was very similar. I did attempt to use straight sewing pins as temporary nails. This worked some times and other times just resulted in lots of bent pins and plenty of cursing.
Using thinner strips of plywood near the front. The thinner strips are easier to bend and can therefore be formed to the sharper curves near the bow.
With the under-planking complete, the whole hull got a first pass of sanding.
In a few places, a plank or two ended up lower than I would like. In the case below, I added another bit of strip on top and then sanded it flush to the surrounding planks.
After that first pass of sanding, I put a thin layer of wood filler over most of the hull. This filled in gaps, leveled out the surface and gave me something to sand down in order to get things nice and smooth before the top plank layer.
Below you can see the filled and sanded result, all ready for the mahogany plank layer.
That seems like a good place to stop for this post. The mahogany planking is nearly done, so look for that in a forthcoming blog post!
Thanks for reading!
blog comments powered by Disqus