
Armed Virginia Sloop - continued
28 - June - 2009 - 21:53
I've been steadily plugging away on this model, mostly on planking-related tasks. I decided to do a little bit of painting, somewhat for accent/contrast, and somewhat to cover areas that would look bad if not painted (inside the gunports).
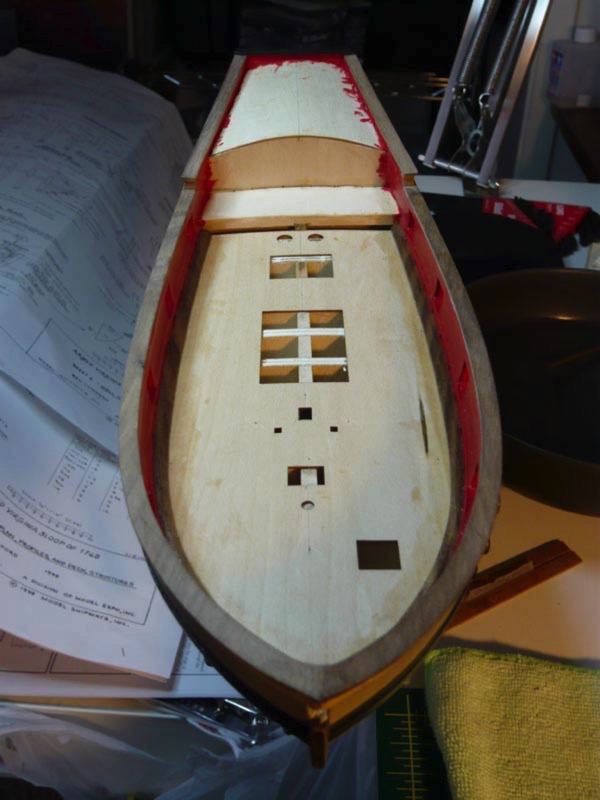
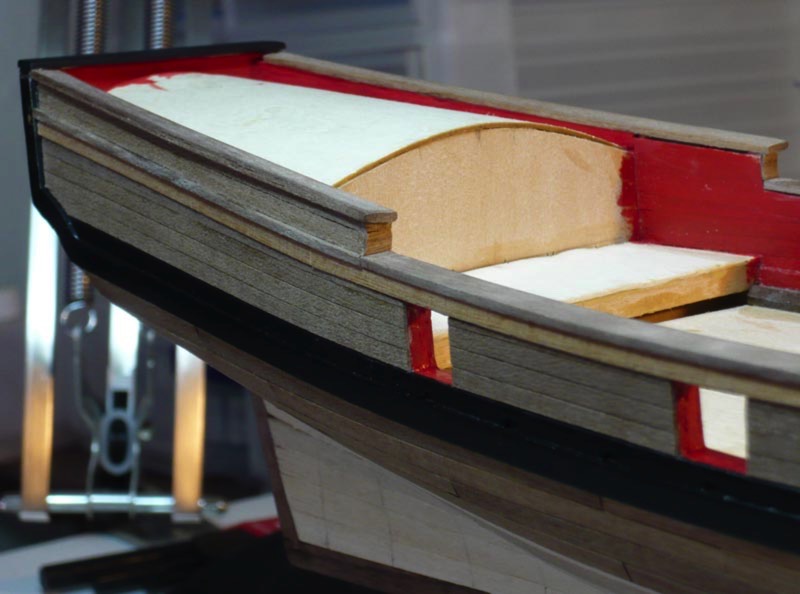
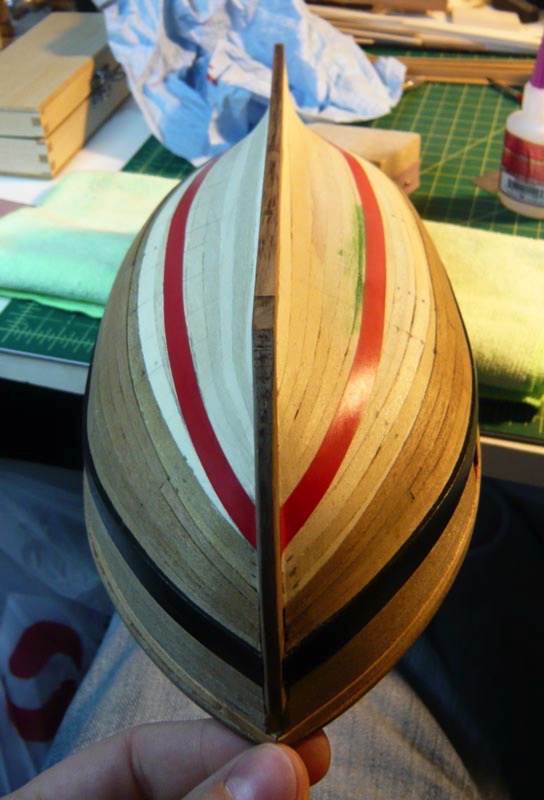
Here you can see the insides of the railing things painted the appropriate red color. I discovered, once I had the sides built up and the railings installed, that the back deck sides on my model were a bit taller than they are supposed to be. This meant that the sides up there, on my model, were only as thick as the outside basswood planking and looked pretty weird. So I spent a bit of time adding a few layers of wood to give those back walls thickness. It seems to have turned out okay, and I'm hoping it won't cause any issues later on in the build.
Once that was complete, I moved on to installing some of the main thicker planks on the upper outside of the hull and then adding the thin walnut finish planking to the upper areas.
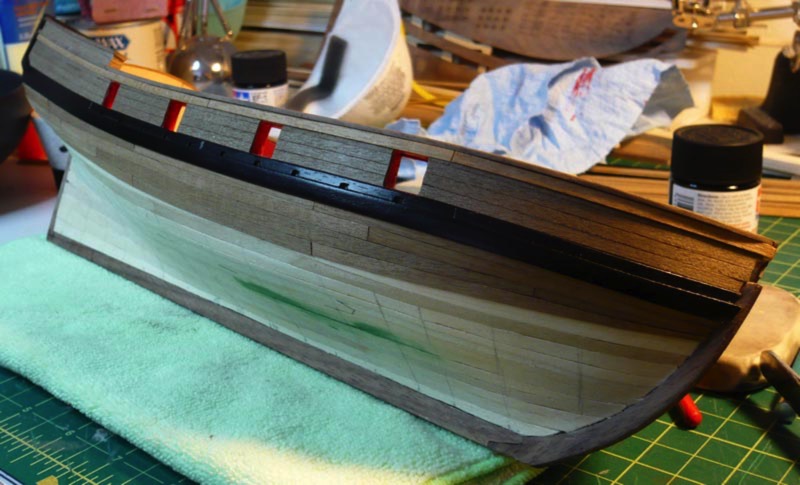
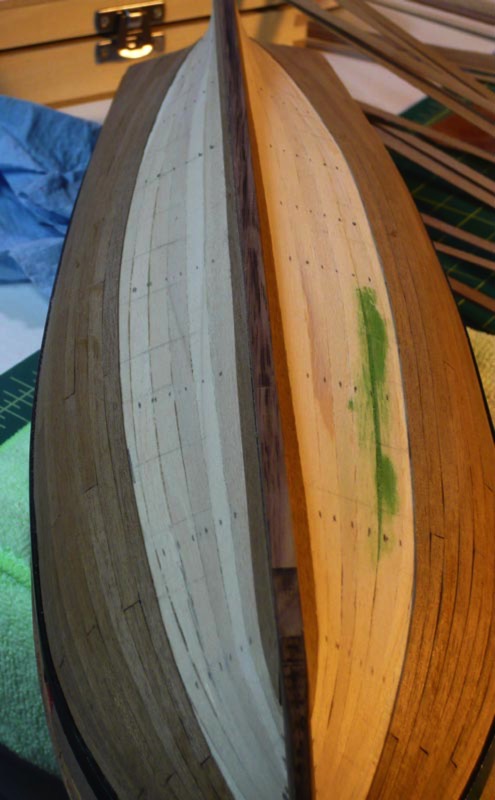
From that point it was just a matter of planking the rest of the lower hull. It took me a little while to get the hang of how things go, but this task isn't too tough. It does get a bit tedious though, since it is really just a great deal of measuring and trimming plank after plank. Below you can see some of the masking tape guidelines that I used in order to help me control the flow of the planks around the hull.
I found that once I masked off a new line (based off of plank width), I could then go back and eyeball rough divisions of the intermediate space. So, for example, if the space between the tape and the finished planks required five full-width planks to cover it at the widest spot, then I would then move along the length of the ship and make marks that divided the space into five sections. If I did this every two inches or so, I found that I could then simply lay down an uncut 4" plank, see where it needed to be width-wise and then trim as needed. Then it was just a simple matter of cutting, gluing and, in some cases, soaking and bending, all of the planks required to fill the space. To the right, you can see the hull, a bit further along, with the markings for the last section in place.
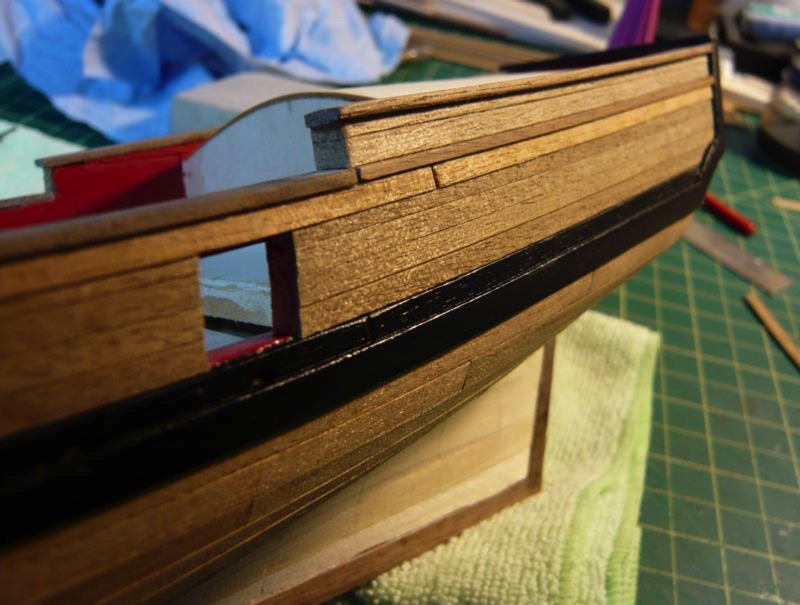
That said, I discovered today that I still managed to goof up the planking on one side of the hull. It's nothing too major, but my planking pattern is off on every third plank, so that instead of a nice even distribution of plank ends, they are a bit offset. Since I was already about two thirds of the way done on that side, I decided I could live with it :)
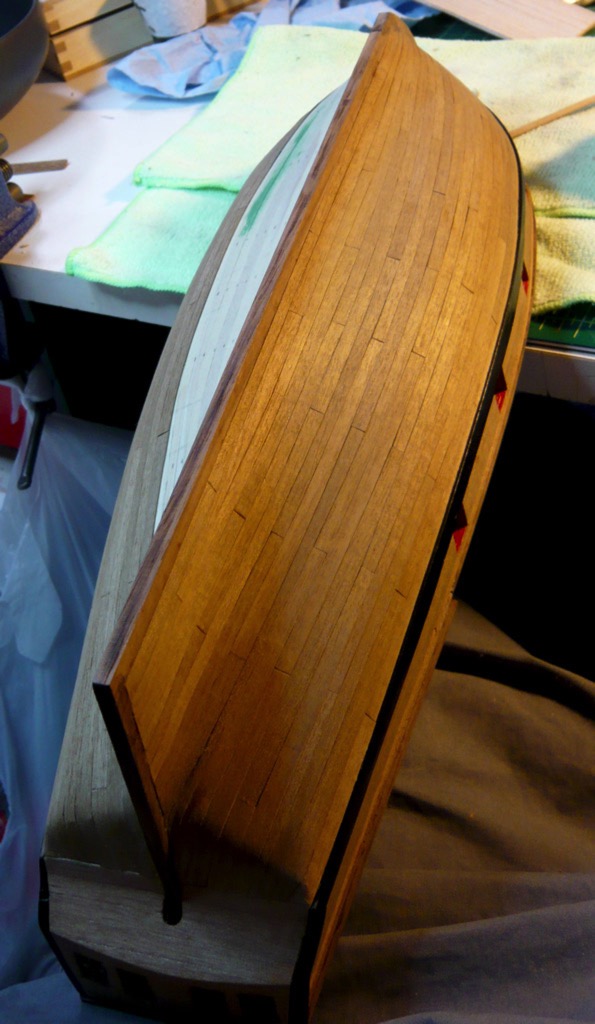
Finally, here is where I stand at the moment. One side of the hull is planked, and the other side is about two thirds of the way complete. Once I finish the other side, I'll sand it all smooth, and then hit it with some sanding sealer, and polyurethane. Once I am happy with the exterior finish, it'll be time to move on to constructing some of the deck structures. I will be quite happy to be able to take a break from planking at that point (I'll still have to plank the main deck later). Overall, I am very happy with how things are progressing, although it seems that, when I ordered this kit in the first place, I grossly underestimated the amount of time required to complete it. At this rate, I'll be lucky if I have completed the kit before a year has elapsed since the kit first came into my possession. But it is a fun project and definitely the challenge I was hoping for!
Here you can see the insides of the railing things painted the appropriate red color. I discovered, once I had the sides built up and the railings installed, that the back deck sides on my model were a bit taller than they are supposed to be. This meant that the sides up there, on my model, were only as thick as the outside basswood planking and looked pretty weird. So I spent a bit of time adding a few layers of wood to give those back walls thickness. It seems to have turned out okay, and I'm hoping it won't cause any issues later on in the build.
Once that was complete, I moved on to installing some of the main thicker planks on the upper outside of the hull and then adding the thin walnut finish planking to the upper areas.
From that point it was just a matter of planking the rest of the lower hull. It took me a little while to get the hang of how things go, but this task isn't too tough. It does get a bit tedious though, since it is really just a great deal of measuring and trimming plank after plank. Below you can see some of the masking tape guidelines that I used in order to help me control the flow of the planks around the hull.
I found that once I masked off a new line (based off of plank width), I could then go back and eyeball rough divisions of the intermediate space. So, for example, if the space between the tape and the finished planks required five full-width planks to cover it at the widest spot, then I would then move along the length of the ship and make marks that divided the space into five sections. If I did this every two inches or so, I found that I could then simply lay down an uncut 4" plank, see where it needed to be width-wise and then trim as needed. Then it was just a simple matter of cutting, gluing and, in some cases, soaking and bending, all of the planks required to fill the space. To the right, you can see the hull, a bit further along, with the markings for the last section in place.
That said, I discovered today that I still managed to goof up the planking on one side of the hull. It's nothing too major, but my planking pattern is off on every third plank, so that instead of a nice even distribution of plank ends, they are a bit offset. Since I was already about two thirds of the way done on that side, I decided I could live with it :)
Finally, here is where I stand at the moment. One side of the hull is planked, and the other side is about two thirds of the way complete. Once I finish the other side, I'll sand it all smooth, and then hit it with some sanding sealer, and polyurethane. Once I am happy with the exterior finish, it'll be time to move on to constructing some of the deck structures. I will be quite happy to be able to take a break from planking at that point (I'll still have to plank the main deck later). Overall, I am very happy with how things are progressing, although it seems that, when I ordered this kit in the first place, I grossly underestimated the amount of time required to complete it. At this rate, I'll be lucky if I have completed the kit before a year has elapsed since the kit first came into my possession. But it is a fun project and definitely the challenge I was hoping for!
blog comments powered by Disqus