
November 2011
Almost done...
14 - November - 2011 - 20:12
I'm finally seeing the light at the end of the tunnel on this project. All the big pieces are starting to go together and at the time of this writing all that is left is some rigging and the shaping of the propeller. I suppose I'll also have to fashion some sort of base for the plane to be attached to, in order to help keep it away from damage. Here's what's happened since the last post:
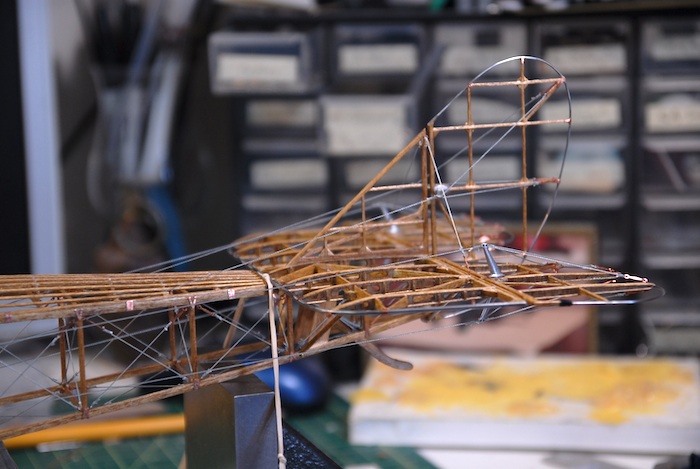
First up, the tail needed to be attached. When I went to fit the tail, I discovered that the turtleback ended a bit too far back on the fuselage, resulting in the tail hanging off the back. This made it so that the rudder wouldn't go on, and clearly, some adjustment would be needed. I brought out the razor saw and trimmed a few millimeters off of the turtle back.
This made some room for the tail to be fitted and the back edge of the vertical stabilizer lined up properly with the back of the fuselage.
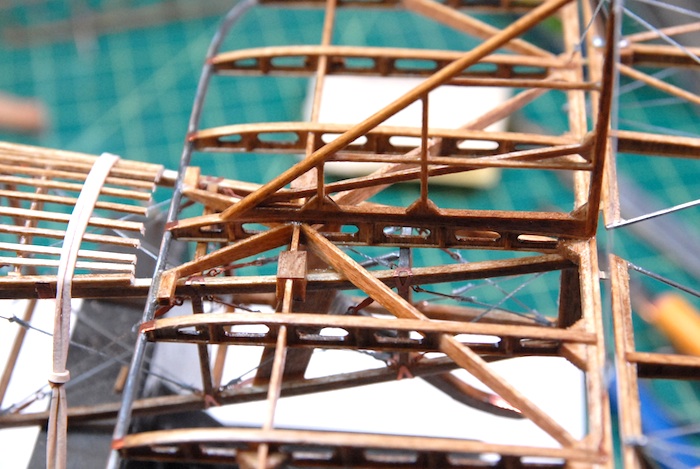
Since I cut off the laser-cut part, I needed to craft a new rear rib for the turtle back. Fortunately I had kept the scrap thin plywood that the turtleback parts had come attached to. I snipped off a little bit of that wood, and fashioned a replacement rib. Here you can see it glued in place.

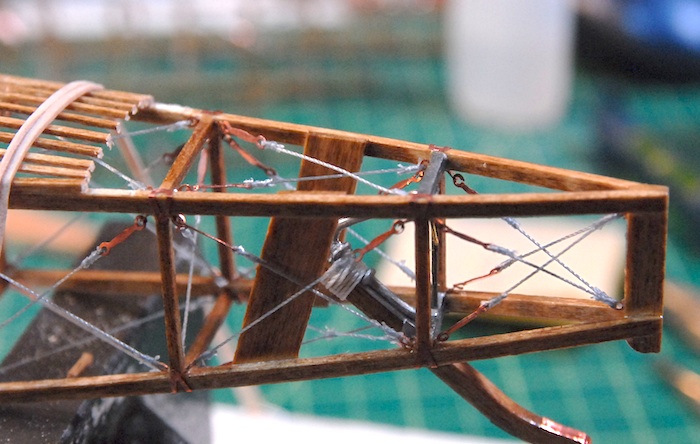
That new piece had to be stained to match the rest of the plane, and then a coat of polyurethane. Next, the tail was glued in place, the rudder attached and the various control lines rigged to connect to the cockpit fittings.
Next up were the lower wings. Below you can see the rough fitting. This mostly just consisted of me drilling out the holes for the connecting pins to go into and then setting the wing in place.
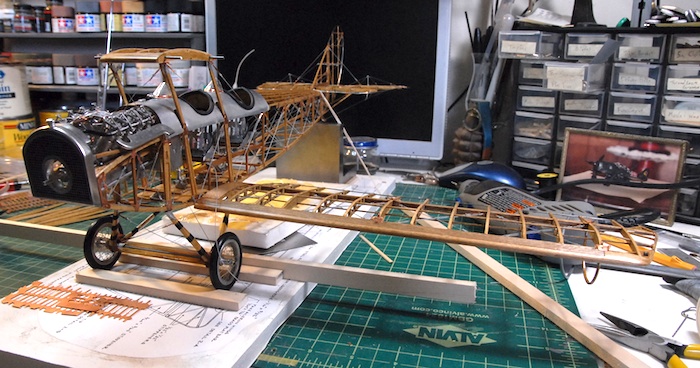
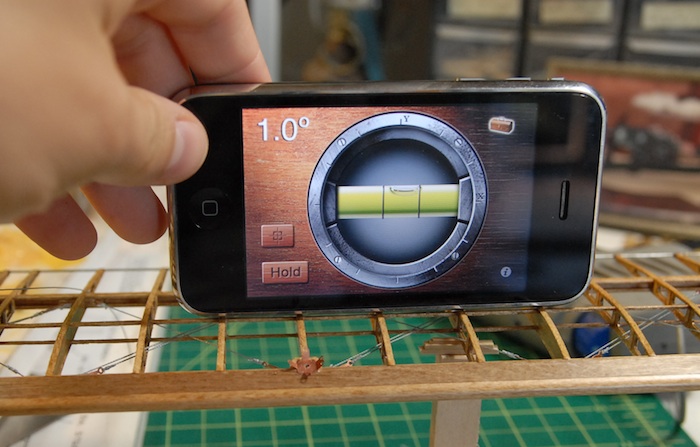
The lower wings are supposed to have one degree of dihedral. In order to get just such a thing, I had to build a little support rig which I could add little shims to until the wing was at just the right angle. Below you can see my high-tech angle measuring method along with my low-tech support and shim method.
Once the angle of the wings were set, a bit of epoxy held them in place permanently. Next, a similar fitting for the upper wings, although those just sit on top of the inter-plane struts, so were a bit easier to fit. They really just required a boring out of the connection holes, so that the wings could lay at the proper angles.
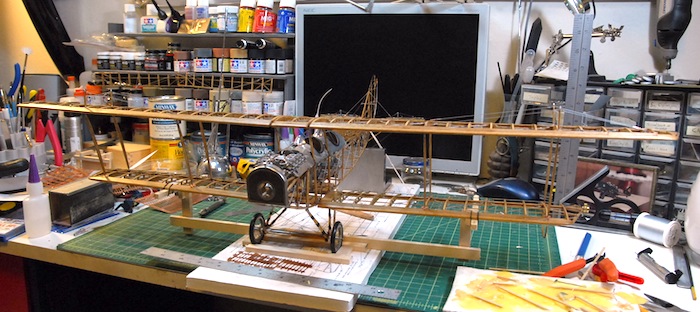
Finally, below you can see the state of the model this evening. The top wings are epoxied in place and the inter-plane struts are glued in place.
Next up: rigging and shaping of the propeller.
First up, the tail needed to be attached. When I went to fit the tail, I discovered that the turtleback ended a bit too far back on the fuselage, resulting in the tail hanging off the back. This made it so that the rudder wouldn't go on, and clearly, some adjustment would be needed. I brought out the razor saw and trimmed a few millimeters off of the turtle back.
This made some room for the tail to be fitted and the back edge of the vertical stabilizer lined up properly with the back of the fuselage.
Since I cut off the laser-cut part, I needed to craft a new rear rib for the turtle back. Fortunately I had kept the scrap thin plywood that the turtleback parts had come attached to. I snipped off a little bit of that wood, and fashioned a replacement rib. Here you can see it glued in place.
That new piece had to be stained to match the rest of the plane, and then a coat of polyurethane. Next, the tail was glued in place, the rudder attached and the various control lines rigged to connect to the cockpit fittings.
Next up were the lower wings. Below you can see the rough fitting. This mostly just consisted of me drilling out the holes for the connecting pins to go into and then setting the wing in place.
The lower wings are supposed to have one degree of dihedral. In order to get just such a thing, I had to build a little support rig which I could add little shims to until the wing was at just the right angle. Below you can see my high-tech angle measuring method along with my low-tech support and shim method.
Once the angle of the wings were set, a bit of epoxy held them in place permanently. Next, a similar fitting for the upper wings, although those just sit on top of the inter-plane struts, so were a bit easier to fit. They really just required a boring out of the connection holes, so that the wings could lay at the proper angles.
Finally, below you can see the state of the model this evening. The top wings are epoxied in place and the inter-plane struts are glued in place.
Next up: rigging and shaping of the propeller.