
December 2009
Next Project! Dragon Panzer III Ausf.N Tank
13 - December - 2009 - 20:21
And now for something completely different...
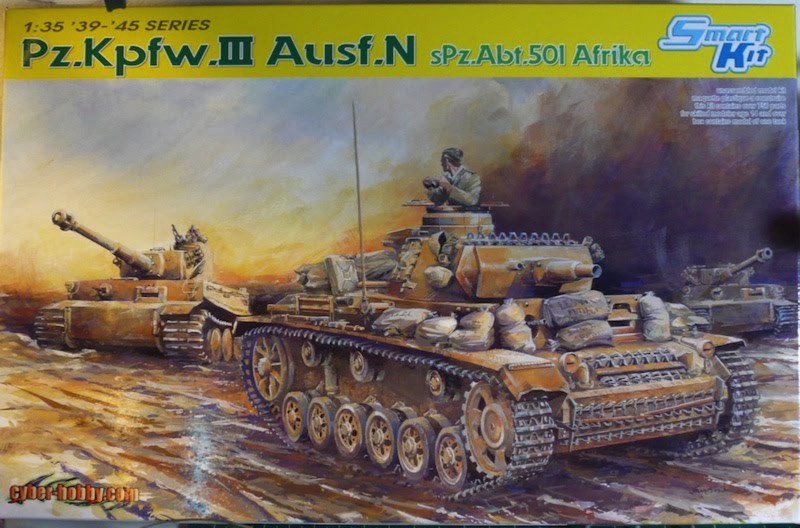
So, I've begun my next project. I picked a few plastic armor kits up last February, when I stumbled upon a new hobby shop (which has since become my main hobby shop), and found that they were having a sale. I had done a little bit of reading and looked for kits that came with individual-link tracks, and some photo-etched metal parts, in hopes of finding the kits challenging. The one that I am starting with is a German Panzer tank, of a fairly late revision, with markings from their African campaign. This kit is made by Dragon, and they look to have gone above and beyond when it comes to the quality of the plastic molding and overall level of detail.
I've also decided to try quite a few new things on this project. Since I haven't really done any sort of armor model since I was a little kid, I figured I could try lots of new things, based on recent reading and get much of the learning going all at once. First off, I am trying some new paints, primers, and glues. I've picked up some Mr Surfacer products for priming and filling, some Pro Weld plastic welder to replace the Testors cement I've always used, some Milliput epoxy putty, and various super glues, sanding devices, etc, all that I have not tried before. Later in the project, I also hope to experiment with some new airbrushing techniques, and to try out some weathering techniques using pigments and some artist oils.
Here is the kit that I am working with.
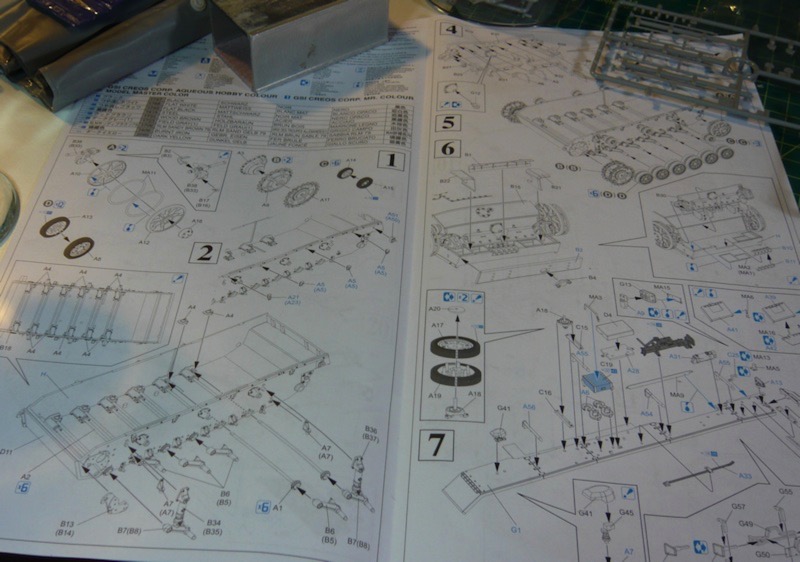
Here's an example of the instructions. They don't seem to be real big on the step-by-step sort of approach and instead seem to go for more of a put-all-this-stuff-together-at-once sorta thing.
I've started putting a few pieces together. Mostly this has just involved a great deal of sanding and a little filling. I've been trying out filling tiny seams with Mr Surfacer 500, which is somewhere in between primer and filler. It seems to be working pretty well so far, although I've only used it to smooth over some seams on the drive wheels.

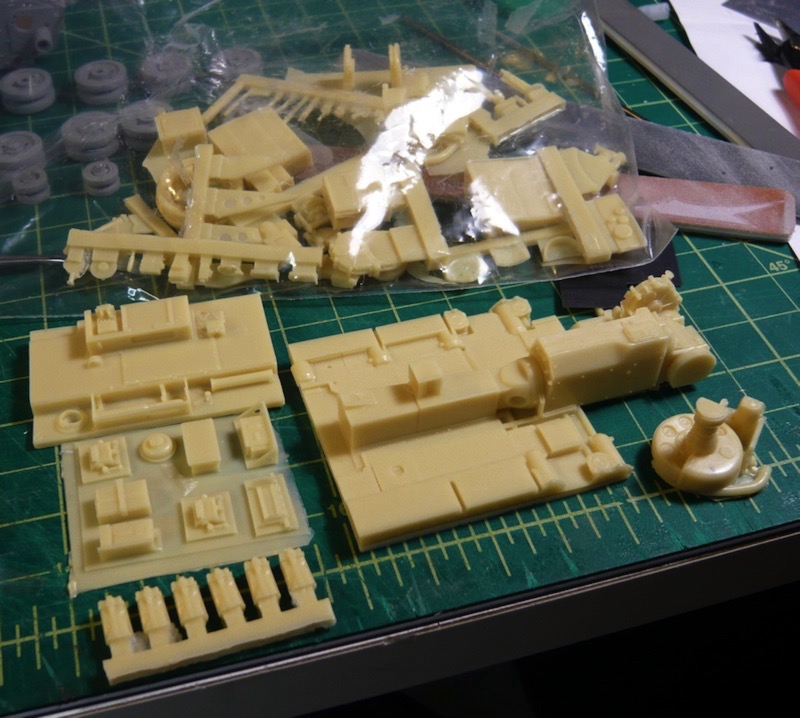
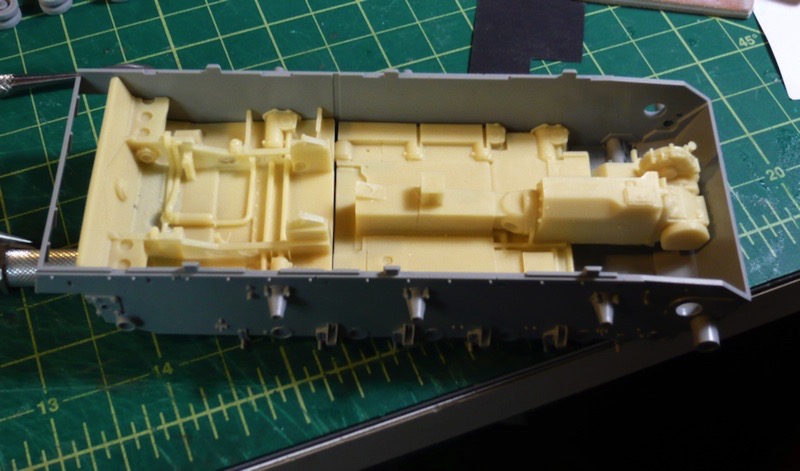
Another in the list of new things I am trying on this kit is the addition of a third-party resin interior kit. The model did not come with any interior parts beyond a few gun parts that go inside the turret. But, the kit DOES allow for all of the hatches and portals to be assembled in an open position. So, with a little scrounging and some sanity checks on the Fine Scale Modeler forums, I decided on an interior kit and an engine bay kit, both from Verlinden. The interior kit adds the various crew-related parts as well as a floor, transmission tunnel and various other transmission parts. The engine bay adds the bits on the other side of the firewall, which is mostly just the engine and some fans and things.
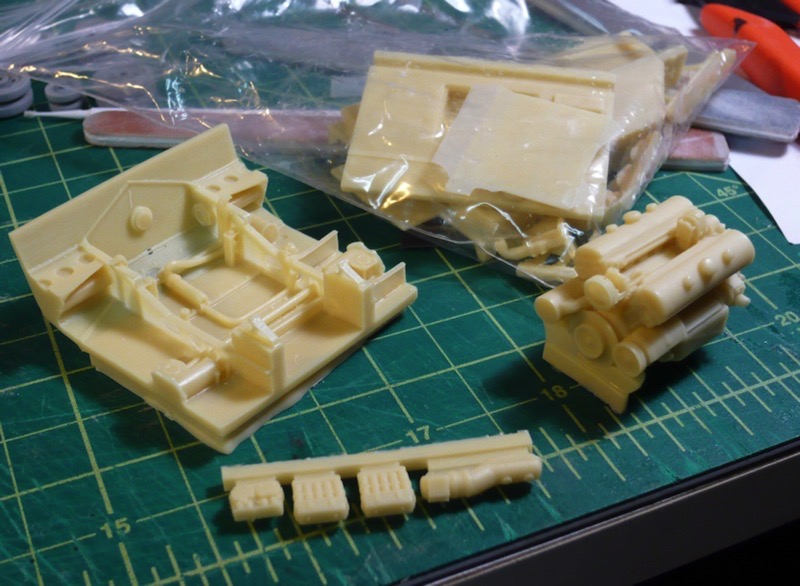
Here is how they roughly fit into the lower hull piece.
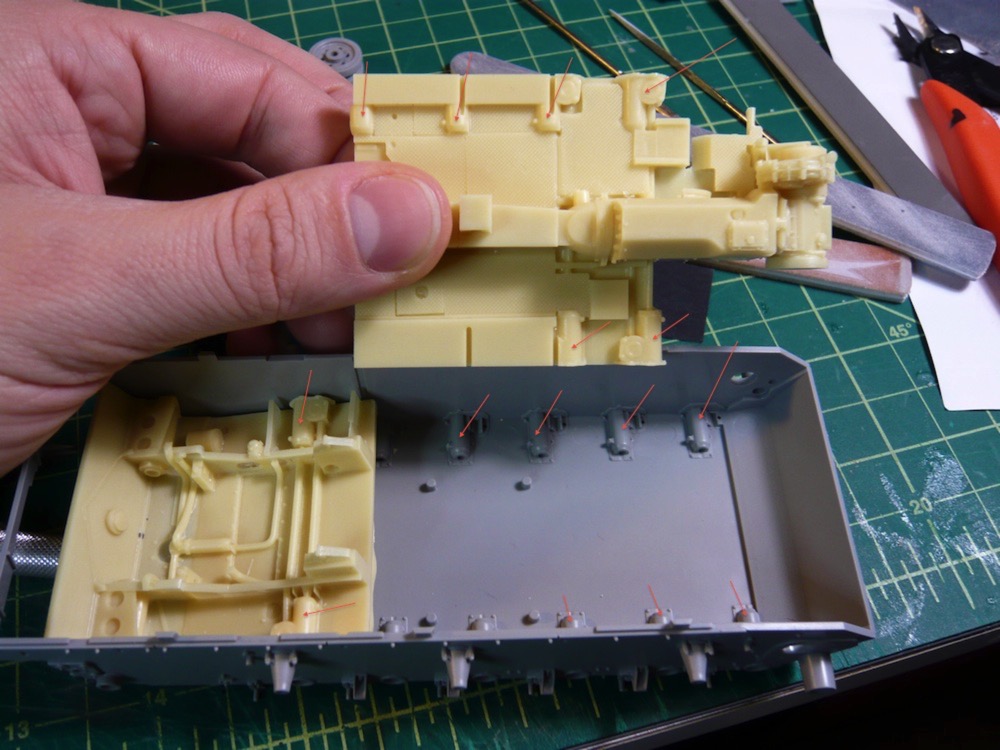
The big catch here, is that these resin bits were not made for this Dragon kit, but rather for a Tamiya kit, which has less internal detail. As a result, there is some duplication in details between the lower hull part of the plastic kit and the detail in the resin kit. This means that this will take a bit of figuring and some quality time with the Dremel in order to get everything to play nicely with one another. Below is an image, with tiny red arrows, illustrating the duplicated details.
All in all, I am pretty excited about this project, as it is really nice to have a bit of a change of pace after all that time with wood and string and superglue. Stay tuned for further updates as this one progresses, hopefully at a slightly faster pace than the last project. If all goes well, I'm hoping to have this one completed in time to enter into the Hobby Expo 2010 on February 20th, in Petaluma.
So, I've begun my next project. I picked a few plastic armor kits up last February, when I stumbled upon a new hobby shop (which has since become my main hobby shop), and found that they were having a sale. I had done a little bit of reading and looked for kits that came with individual-link tracks, and some photo-etched metal parts, in hopes of finding the kits challenging. The one that I am starting with is a German Panzer tank, of a fairly late revision, with markings from their African campaign. This kit is made by Dragon, and they look to have gone above and beyond when it comes to the quality of the plastic molding and overall level of detail.
I've also decided to try quite a few new things on this project. Since I haven't really done any sort of armor model since I was a little kid, I figured I could try lots of new things, based on recent reading and get much of the learning going all at once. First off, I am trying some new paints, primers, and glues. I've picked up some Mr Surfacer products for priming and filling, some Pro Weld plastic welder to replace the Testors cement I've always used, some Milliput epoxy putty, and various super glues, sanding devices, etc, all that I have not tried before. Later in the project, I also hope to experiment with some new airbrushing techniques, and to try out some weathering techniques using pigments and some artist oils.
Here is the kit that I am working with.
Here's an example of the instructions. They don't seem to be real big on the step-by-step sort of approach and instead seem to go for more of a put-all-this-stuff-together-at-once sorta thing.
I've started putting a few pieces together. Mostly this has just involved a great deal of sanding and a little filling. I've been trying out filling tiny seams with Mr Surfacer 500, which is somewhere in between primer and filler. It seems to be working pretty well so far, although I've only used it to smooth over some seams on the drive wheels.
Another in the list of new things I am trying on this kit is the addition of a third-party resin interior kit. The model did not come with any interior parts beyond a few gun parts that go inside the turret. But, the kit DOES allow for all of the hatches and portals to be assembled in an open position. So, with a little scrounging and some sanity checks on the Fine Scale Modeler forums, I decided on an interior kit and an engine bay kit, both from Verlinden. The interior kit adds the various crew-related parts as well as a floor, transmission tunnel and various other transmission parts. The engine bay adds the bits on the other side of the firewall, which is mostly just the engine and some fans and things.
Here is how they roughly fit into the lower hull piece.
The big catch here, is that these resin bits were not made for this Dragon kit, but rather for a Tamiya kit, which has less internal detail. As a result, there is some duplication in details between the lower hull part of the plastic kit and the detail in the resin kit. This means that this will take a bit of figuring and some quality time with the Dremel in order to get everything to play nicely with one another. Below is an image, with tiny red arrows, illustrating the duplicated details.
All in all, I am pretty excited about this project, as it is really nice to have a bit of a change of pace after all that time with wood and string and superglue. Stay tuned for further updates as this one progresses, hopefully at a slightly faster pace than the last project. If all goes well, I'm hoping to have this one completed in time to enter into the Hobby Expo 2010 on February 20th, in Petaluma.
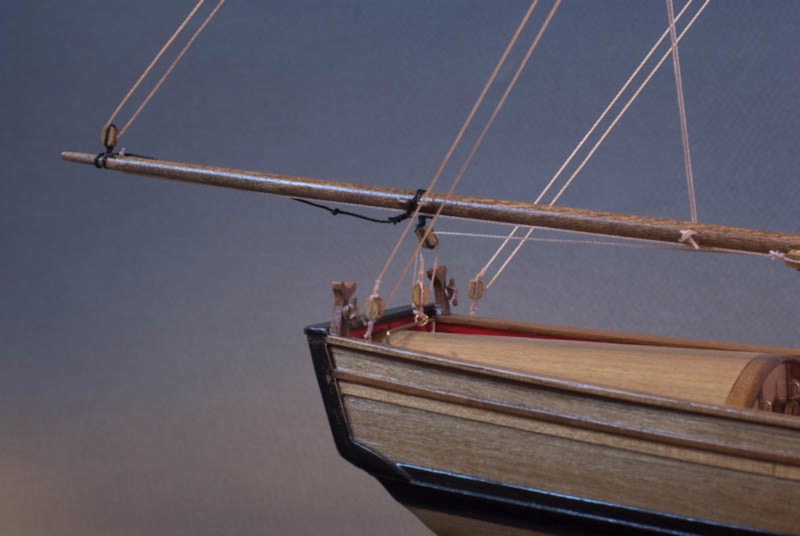
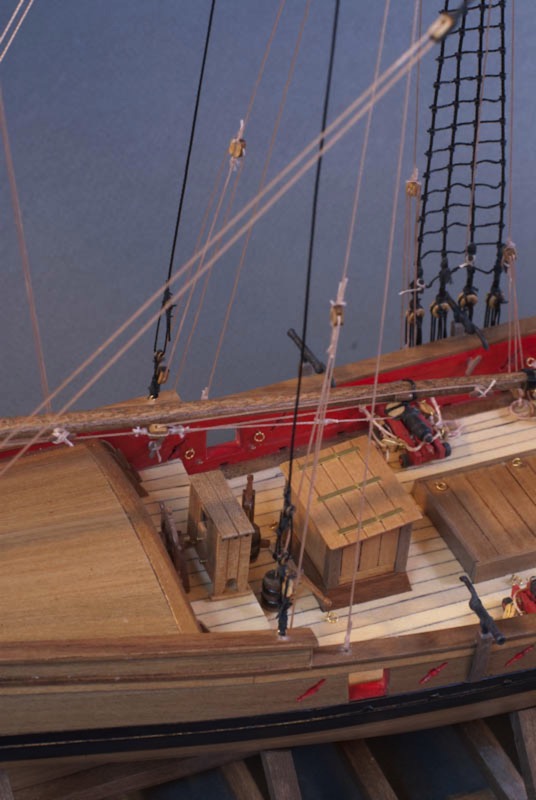
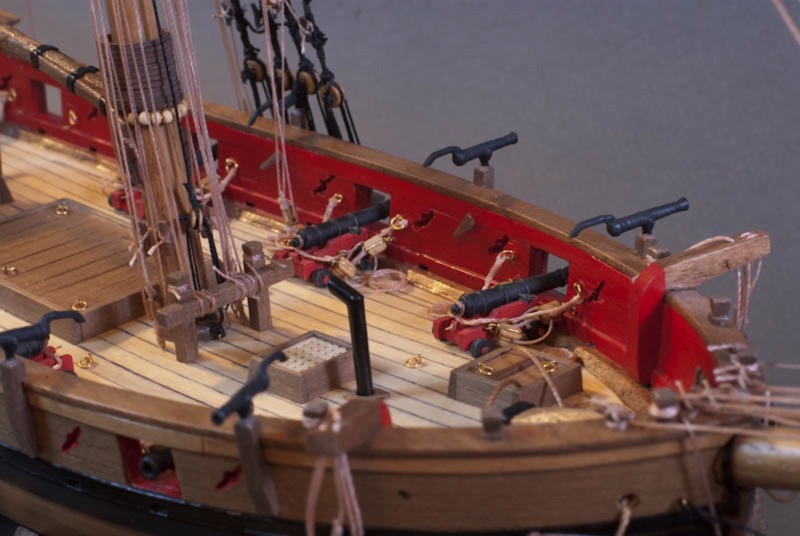
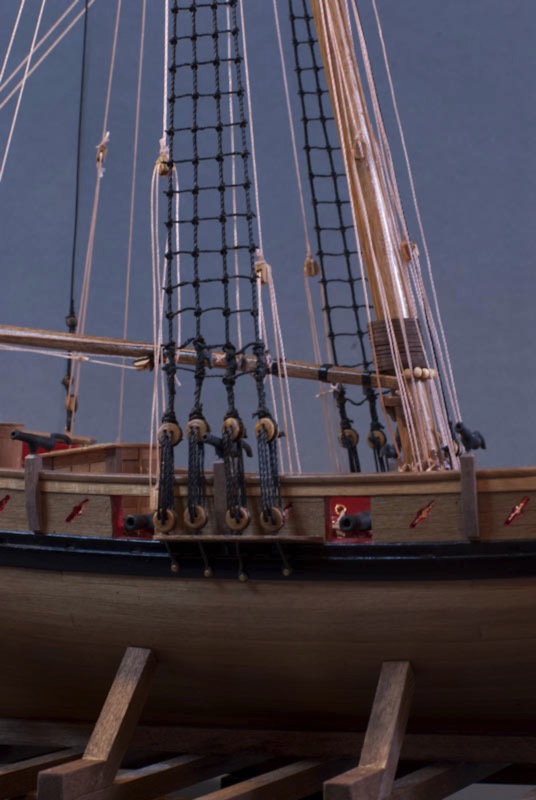
Armed Virginia Sloop - And That's That
06 - December - 2009 - 20:21
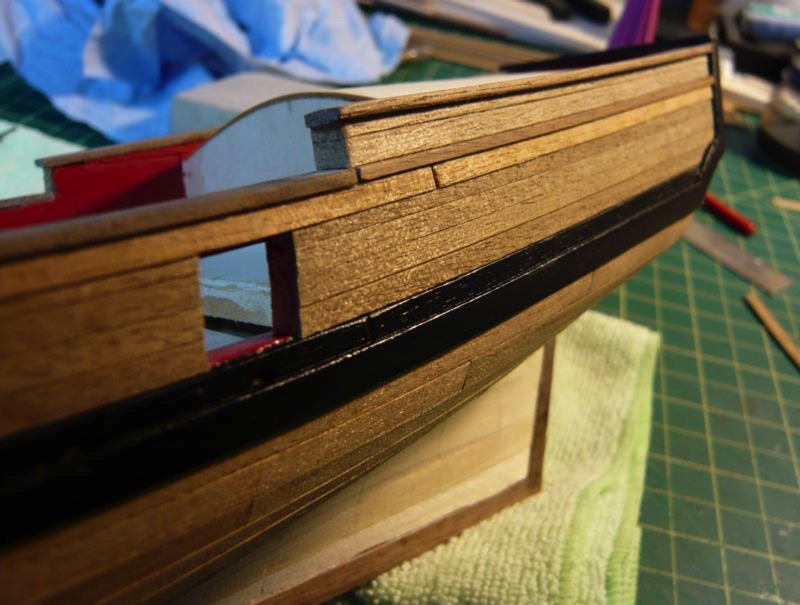
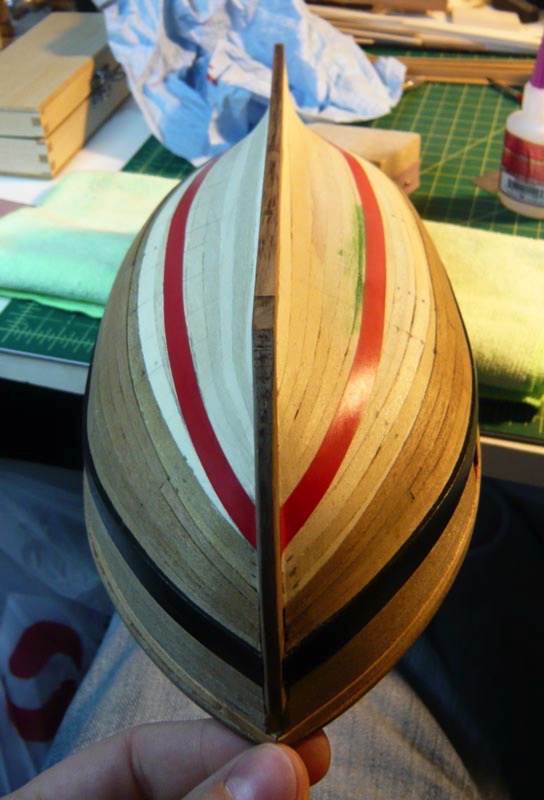
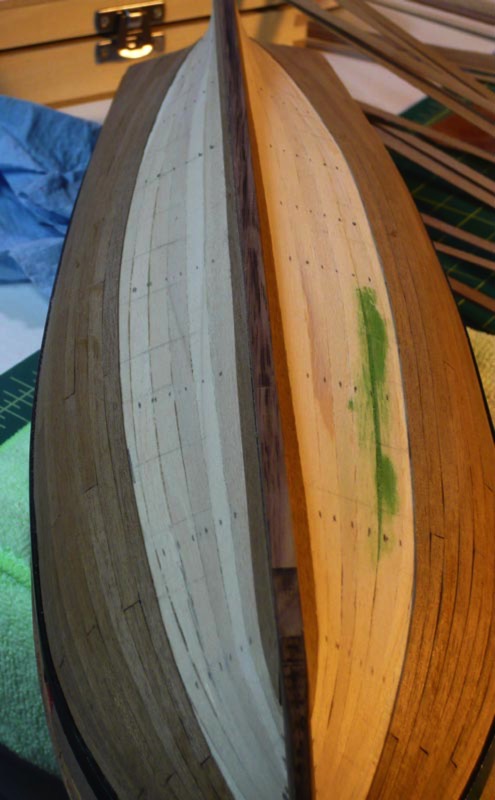
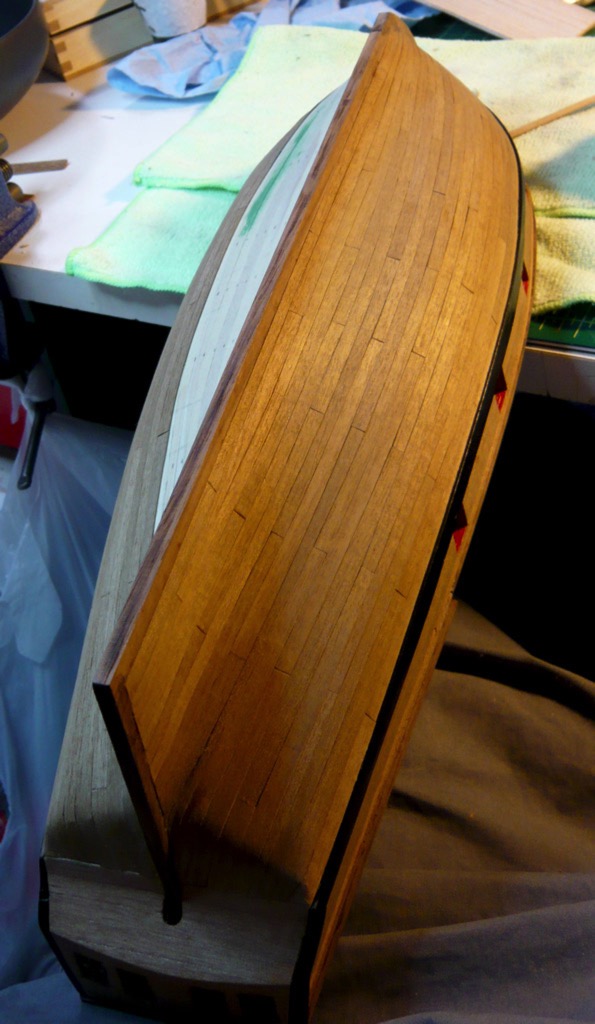
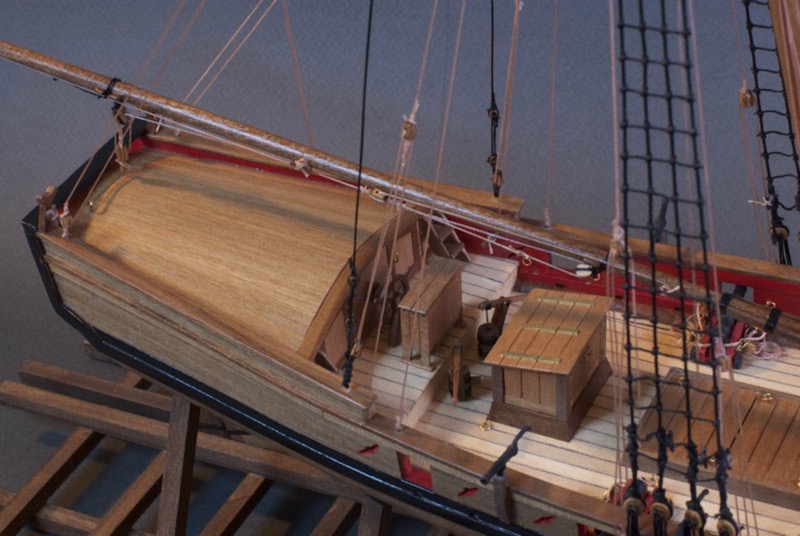
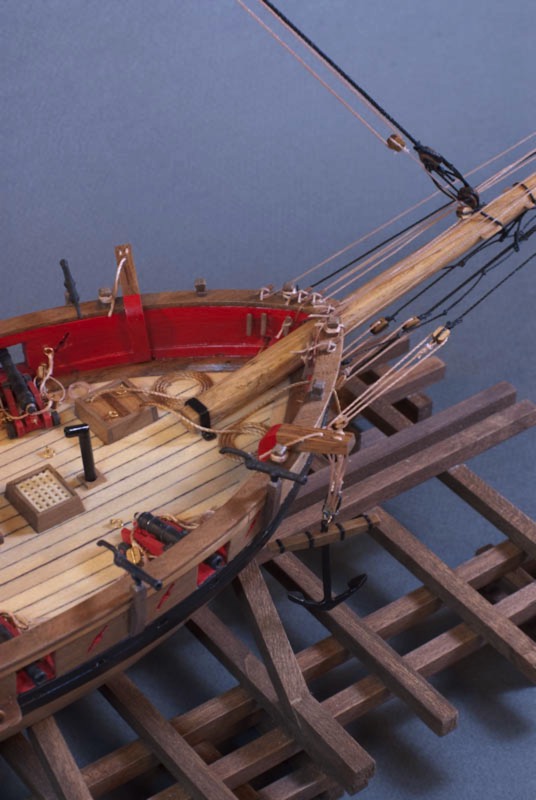
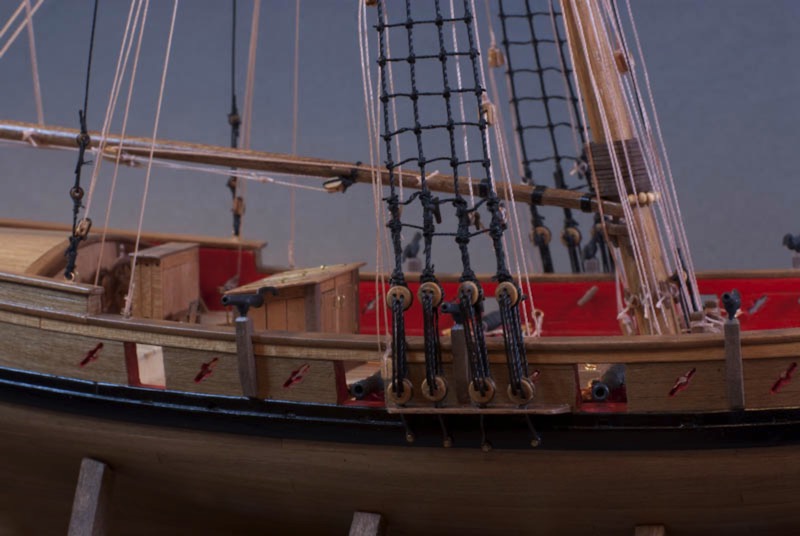
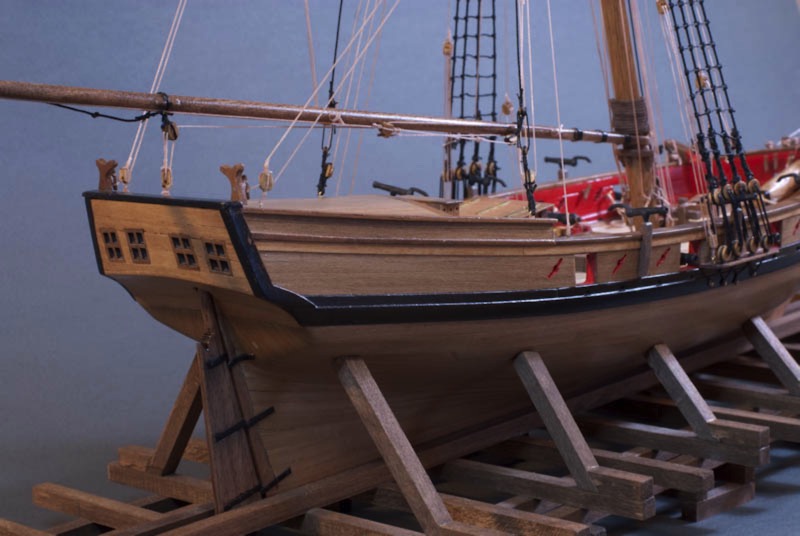
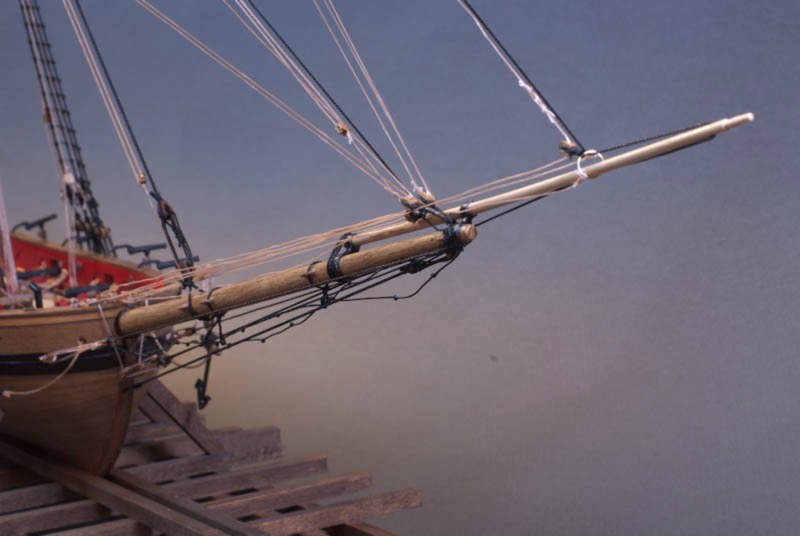
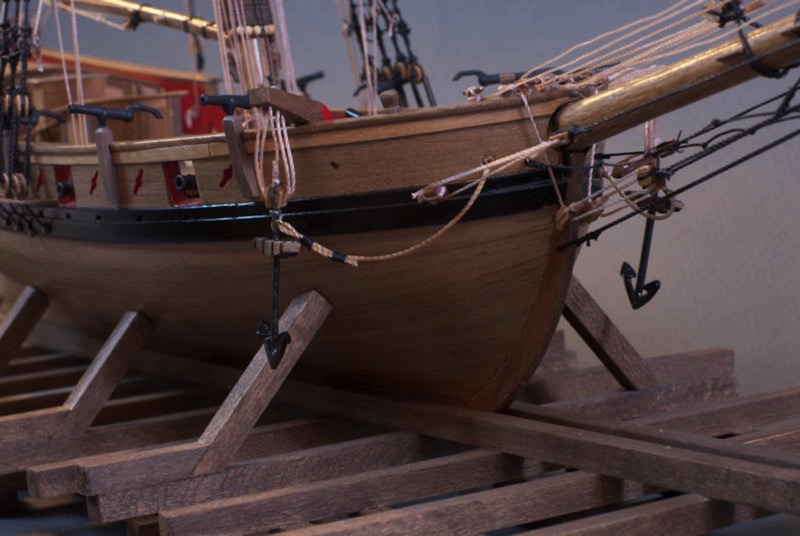
After roughly ten months of work, cutting, sanding, gluing, painting, and tying, I think this one is finally done.
The past few weeks have mostly just been spent finishing the rigging. The final few steps were to add the anchors and clean up many of the tied-off strings. The swivel guns were finally glued in place and the thick anchor rope was formed into a coil on deck.
Overall this has been a very rewarding project, and I've learned an enormous amount about both working with wood on a small scale and about sailing ships themselves. But now I'm definitely ready for some non-wood projects! I've got a bit of a stockpile of plastic kits that I've built up over the past year, so keep an eye out for future updates on those.
Now, for some photos: