
July 2016
Chris-Craft Cobra pt 2
30 - July - 2016 - 12:43
In the last post, I had just wrapped up the under-planking. Next came the mahogany planking. I began on the keel, running a plank up each side of the center line on the bottom. I also soaked some of the planks, so that they would be easier to bend at the front. Below you can see the darker plank (dark because it is wet), bent around the front of the keel.
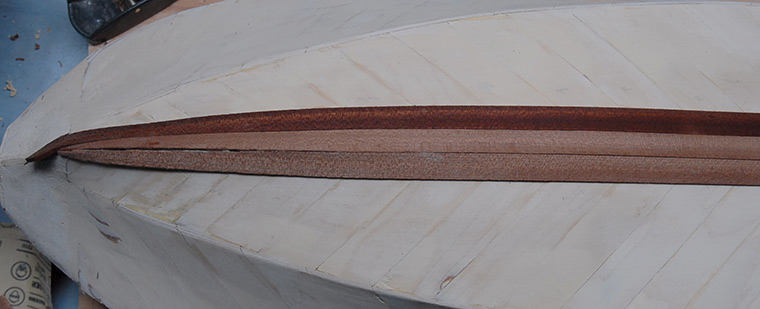
After a few rows of planks from the center, I then added one that runs along the edge that forms the border between the bottom and the sides. Having that plank in place gave me something to fit the bottom planks to, so there isn’t a gap.
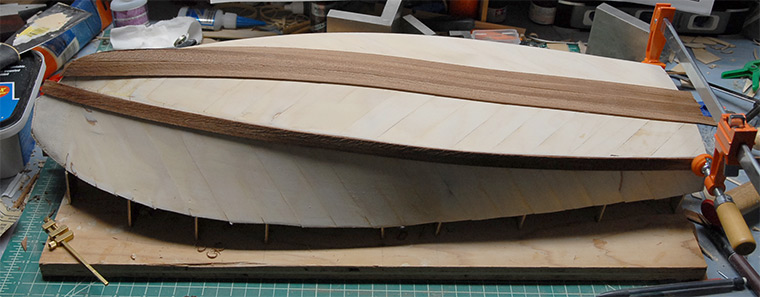
Below you can see the bottom planking done. The planks are just glued on with thick CA glue, so they go on fairly quickly.
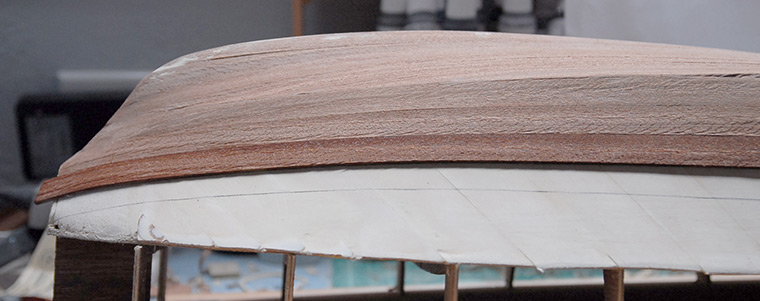
Below you can see a detail shot of the front. I wasn’t too careful about the fitment on these planks, as they will be below the waterline and therefore painted. With a little filler and sanding, this area will be nice and smooth before it gets painted.
The planking continued on the sides of the boat. The planks were long enough to span the length of the boat, so attaching them really just consisted of tracing a line along the edge of each plank on the hull (seen below), and then using that line as a guide for where to apply some glue. With the glue in place, then I can just hold the plank in place until the glue sets.
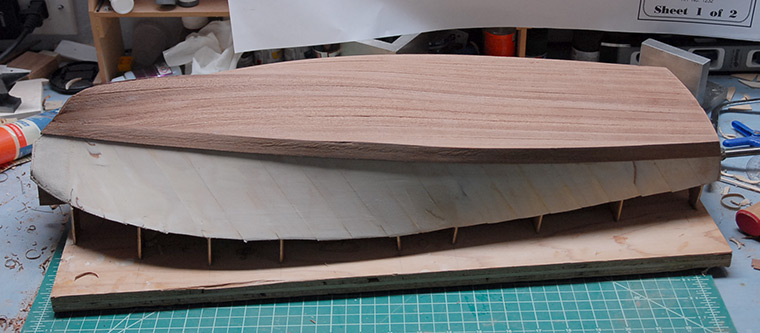
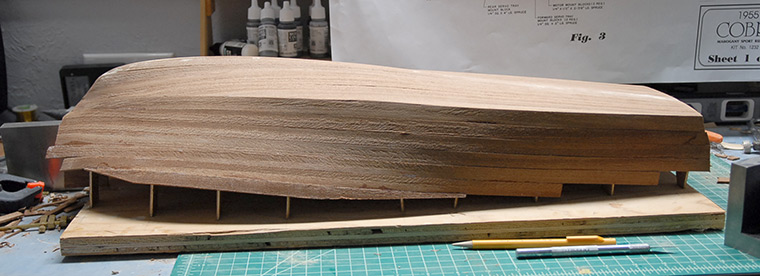
Below you can see all the bottom and side planks in place.
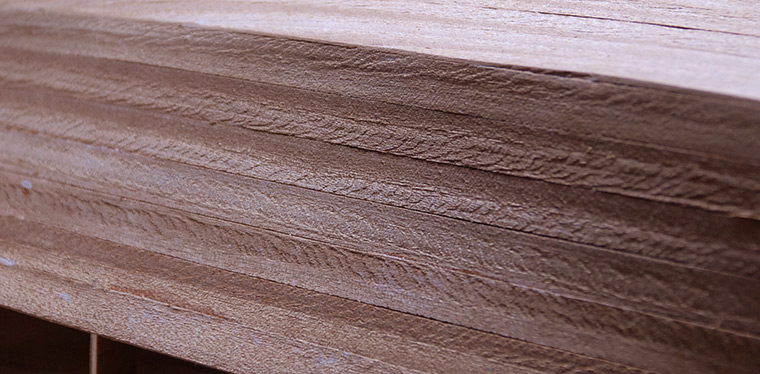
Here is a close-up showing the relatively rough surface of the planks. This will take quite a bit of sanding later to get it smoothed out.
With all the planking in place, I applied a coat of the wood filler to the lower parts of the hull. This is the area that will later be painted, so having a smooth surface is more important than having good looking wood.
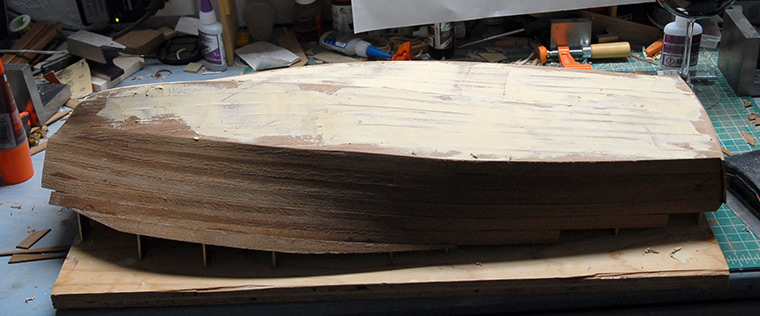
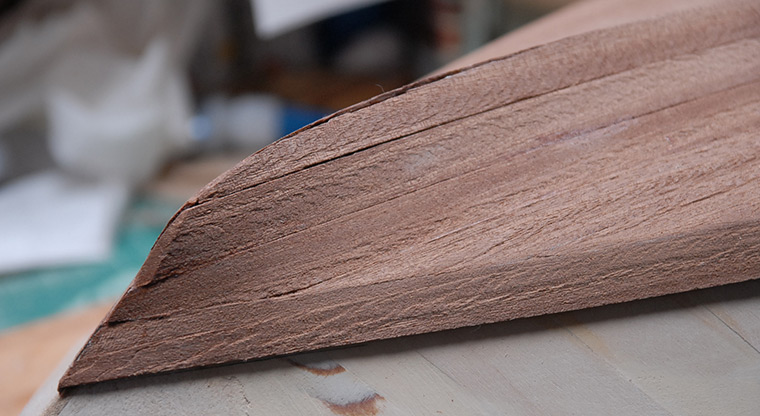
Below you can see the nose of the hull after a bit of sanding and refining of the center line.
It was also at about this point that I realized that maybe soaking the big mahogany planks was not the best thing to do. It seems that while the planks being wet made them easier to bend around a few curves, it also made them swell just a bit. Once the planks had been on the hull for a few days and had dried out, they shrunk back to their original size, leaving a few gaps between the planks. I’m hoping that these will be filled in a bit later on, once I put a bunch of coats of spar varnish on the hull.

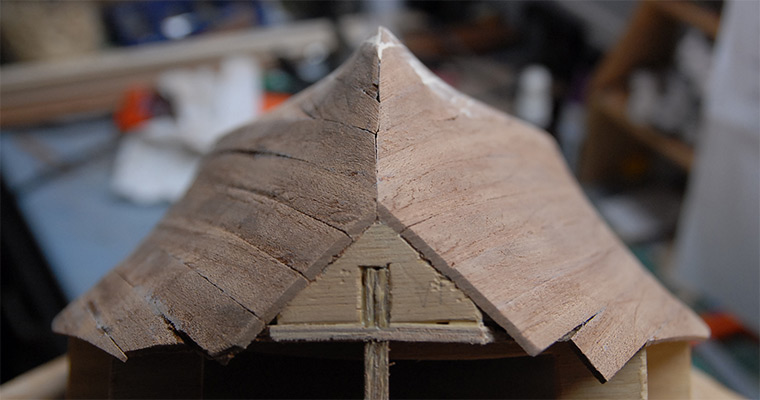
Next up was carving the nose from a block of mahogany. Below you can see the starting point, which was two triangles glued together, a mid point, when I had sawn off big chunks for rough shaping, and the point at which I had finished the rough shaping using a Dremel and sanding drum.

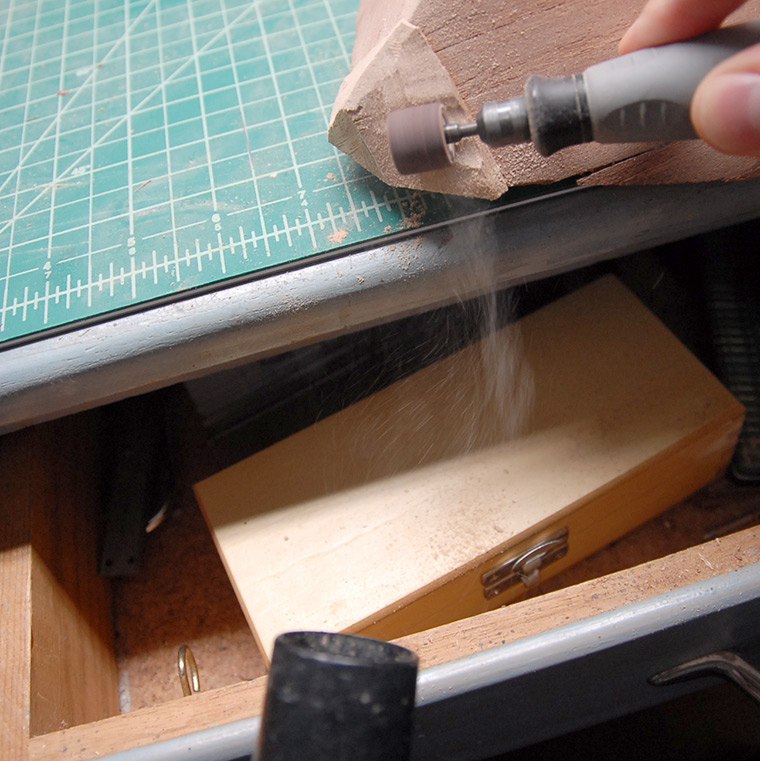
In order to reduce the mess from the sanding, I had some luck making a makeshift dust collection system using out vacuum cleaner hose positioned near the sanding. Below you can see an action shot of the sawdust coming off of the sanding drum and into the hose. It looked cool, so I took a photo :)
That completed the underside of the boat. The next step was to cut it off of the build board, sand the ribs flush with the top surface and then start adding the top deck components. Below you can see the edge parts glued in place. This was, unfortunately, where I made a bit of a mistake, placing the side strips a little bit too far inboard. I didn’t notice the misplacement until later in the build, though.
The side strips consist of three layers, each layer overlapping the others differently. Below you can see the second layer being held in place while the glue dries.
There is a strip that runs along the inside of the mahogany parts that provides support for the decking later. Below you can see it being glued in place.
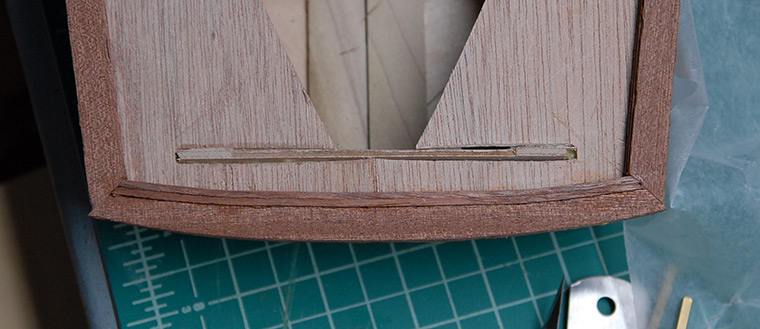
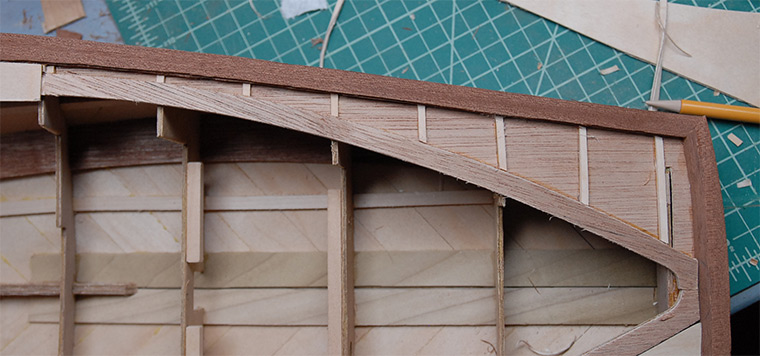
In gluing the above strip in place, I realized my mistake. The rear edge strip was in the correct place, but when I glued the side strips on, I had aligned the outside edges with the outside of the rear strip, when I SHOULD have aligned the inside edges. Once I discovered this, I found that I couldn’t pry off the side strips without doing lot of damage, so I opted instead to make adjustments to the build as I went, in order to compensate for the misalignment. The first thing I had to do was add a few extra strips to the back in order to even out the alignment of the inside edge. Below you can see the two additional strips, before sanding.
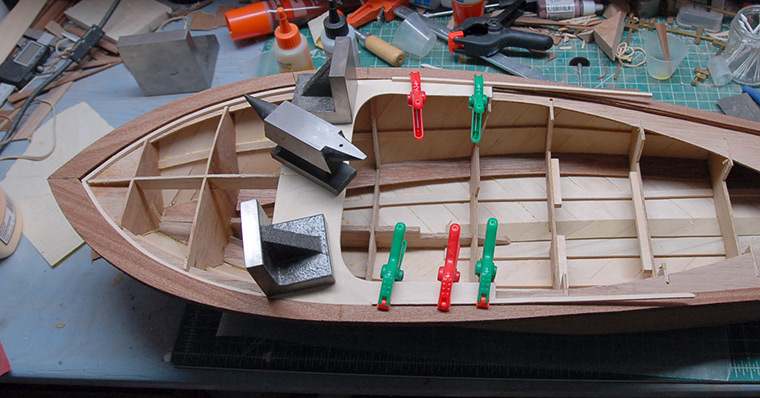
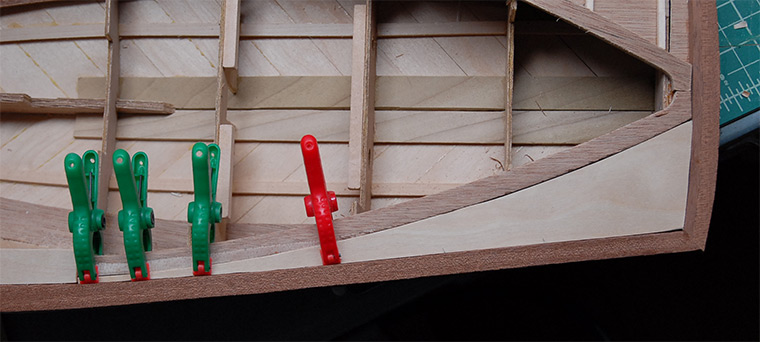
While there will need to be more adjustments later, the next few steps were fairly straightforward. Below you can see some decking glued in place, forming the front of the cockpit surround.
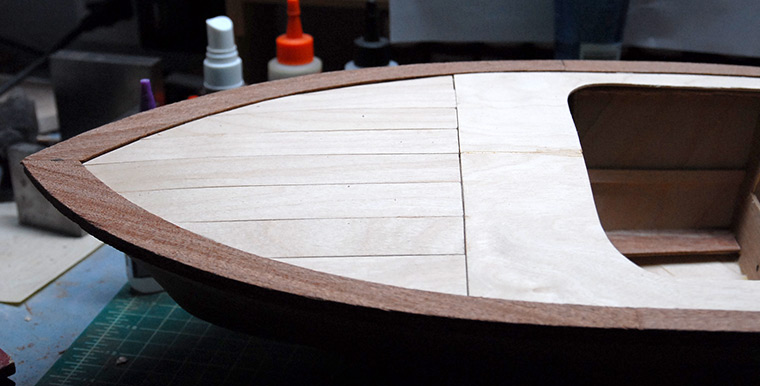
Front sub-planking in place, using the same techniques as the lower hull:
I order to provide support for the rear and side decks, I needed to add some support ribs. Theses were just 1/8” basswood, cut to length and tapered a bit so that there will be a bit of a slope to the decks.
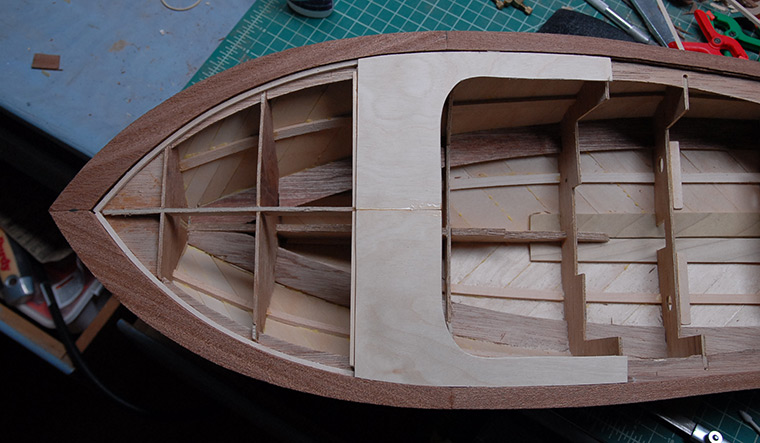
Below you can see the side/rear sub-decking in place. I had to do a good deal of trimming and fitting to this piece in order to fit it into a space that is slightly smaller due to my additional thickness on the rear edge piece.
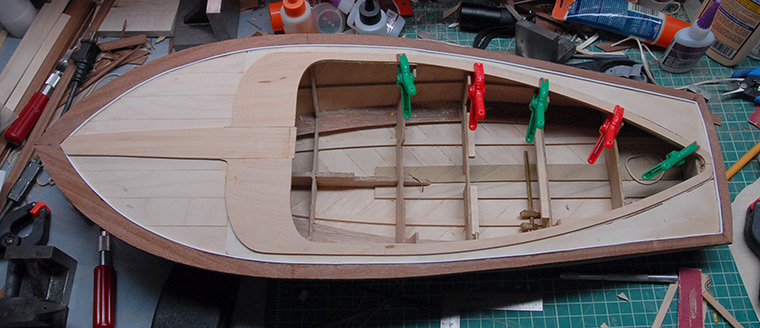
Finally, once the sub-deck was in place, I could start to add the final top decking layer. Below you can see the current state of the boat. Because the side rails should have been pushed just a bit back and out, the center basswood part didn’t reach the full length of the front deck. This meant that I had to add a little piece to extend it, which will be sanded and integrated more later. The thicker rear edge rail also required that the large basswood part be shortened slightly, in order to match up with the edges of the cockpit and still just meet the rear edge. I ended up removing approximately 1/4 inch from the straight section along the edge of the cockpit. I may also need to shorten the plastic molded pieces that form the engine cover and fin, but I was already thinking of cutting those up in order to add opening engine bay covers, so that may not cause any problems.
That is where the project stands now. Next up is applying the striped mahogany and plastic decking, and then a bunch of sanding to even it all out.
Thanks for reading!
After a few rows of planks from the center, I then added one that runs along the edge that forms the border between the bottom and the sides. Having that plank in place gave me something to fit the bottom planks to, so there isn’t a gap.
Below you can see the bottom planking done. The planks are just glued on with thick CA glue, so they go on fairly quickly.
Below you can see a detail shot of the front. I wasn’t too careful about the fitment on these planks, as they will be below the waterline and therefore painted. With a little filler and sanding, this area will be nice and smooth before it gets painted.
The planking continued on the sides of the boat. The planks were long enough to span the length of the boat, so attaching them really just consisted of tracing a line along the edge of each plank on the hull (seen below), and then using that line as a guide for where to apply some glue. With the glue in place, then I can just hold the plank in place until the glue sets.
Below you can see all the bottom and side planks in place.
Here is a close-up showing the relatively rough surface of the planks. This will take quite a bit of sanding later to get it smoothed out.
With all the planking in place, I applied a coat of the wood filler to the lower parts of the hull. This is the area that will later be painted, so having a smooth surface is more important than having good looking wood.
Below you can see the nose of the hull after a bit of sanding and refining of the center line.
It was also at about this point that I realized that maybe soaking the big mahogany planks was not the best thing to do. It seems that while the planks being wet made them easier to bend around a few curves, it also made them swell just a bit. Once the planks had been on the hull for a few days and had dried out, they shrunk back to their original size, leaving a few gaps between the planks. I’m hoping that these will be filled in a bit later on, once I put a bunch of coats of spar varnish on the hull.
Next up was carving the nose from a block of mahogany. Below you can see the starting point, which was two triangles glued together, a mid point, when I had sawn off big chunks for rough shaping, and the point at which I had finished the rough shaping using a Dremel and sanding drum.
In order to reduce the mess from the sanding, I had some luck making a makeshift dust collection system using out vacuum cleaner hose positioned near the sanding. Below you can see an action shot of the sawdust coming off of the sanding drum and into the hose. It looked cool, so I took a photo :)
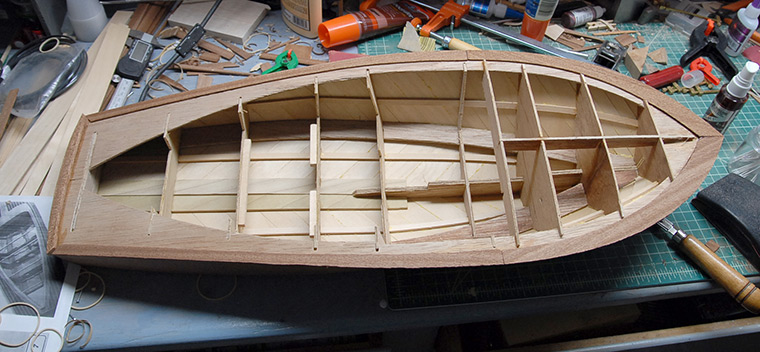
That completed the underside of the boat. The next step was to cut it off of the build board, sand the ribs flush with the top surface and then start adding the top deck components. Below you can see the edge parts glued in place. This was, unfortunately, where I made a bit of a mistake, placing the side strips a little bit too far inboard. I didn’t notice the misplacement until later in the build, though.
The side strips consist of three layers, each layer overlapping the others differently. Below you can see the second layer being held in place while the glue dries.
There is a strip that runs along the inside of the mahogany parts that provides support for the decking later. Below you can see it being glued in place.
In gluing the above strip in place, I realized my mistake. The rear edge strip was in the correct place, but when I glued the side strips on, I had aligned the outside edges with the outside of the rear strip, when I SHOULD have aligned the inside edges. Once I discovered this, I found that I couldn’t pry off the side strips without doing lot of damage, so I opted instead to make adjustments to the build as I went, in order to compensate for the misalignment. The first thing I had to do was add a few extra strips to the back in order to even out the alignment of the inside edge. Below you can see the two additional strips, before sanding.
While there will need to be more adjustments later, the next few steps were fairly straightforward. Below you can see some decking glued in place, forming the front of the cockpit surround.
Front sub-planking in place, using the same techniques as the lower hull:
I order to provide support for the rear and side decks, I needed to add some support ribs. Theses were just 1/8” basswood, cut to length and tapered a bit so that there will be a bit of a slope to the decks.
Below you can see the side/rear sub-decking in place. I had to do a good deal of trimming and fitting to this piece in order to fit it into a space that is slightly smaller due to my additional thickness on the rear edge piece.
Finally, once the sub-deck was in place, I could start to add the final top decking layer. Below you can see the current state of the boat. Because the side rails should have been pushed just a bit back and out, the center basswood part didn’t reach the full length of the front deck. This meant that I had to add a little piece to extend it, which will be sanded and integrated more later. The thicker rear edge rail also required that the large basswood part be shortened slightly, in order to match up with the edges of the cockpit and still just meet the rear edge. I ended up removing approximately 1/4 inch from the straight section along the edge of the cockpit. I may also need to shorten the plastic molded pieces that form the engine cover and fin, but I was already thinking of cutting those up in order to add opening engine bay covers, so that may not cause any problems.
That is where the project stands now. Next up is applying the striped mahogany and plastic decking, and then a bunch of sanding to even it all out.
Thanks for reading!